

How to Easily Install Microsoft SQL Server 2019
Preface
Microsoft SQL Server 2019 is a new personification of the familiar relational database management system. The latest version of the Transact-SQL system gives a mission-critical performance and lowest vulnerabilities among other RDBMS servers. Microsoft SQL Server is a leading product in the database engine and management arena and used in the various level of need from SOHO environment to high transaction database server such as enterprise requirements. SQL Server 2019 Installation will be covered in this article with SQL server management studio installation access.
There are different editions of the SQL server from free express edition to Enterprise edition. The following list shows the different editions of SQL server 2019.
Express editions
Developer
Web
Standard
Enterprise
Express edition is a free and entry-level usage edition, and Enterprise is most robust in performance and data handling for high-level database transactions.
In this article, we are going to demonstrate the SQL server 2019 evaluation that gives 180 days trial to test and plan for your database needs. The installation of Microsoft SQL Server 2019 is straight forward and can be installed by any junior-level system administrators. We are also going to download and install SQL Server Management tools (SSMS) after the installation Microsoft SQL server database engine.
SQL Server 2019 Installation
You can download Microsoft SQL server 2019 from the link here https://www.microsoft.com/en-us/sql-server/sql-server-downloads#. Before starting the SQL server 2019 installation, make sure the Windows update is up to date, and the windows server is fully patched.
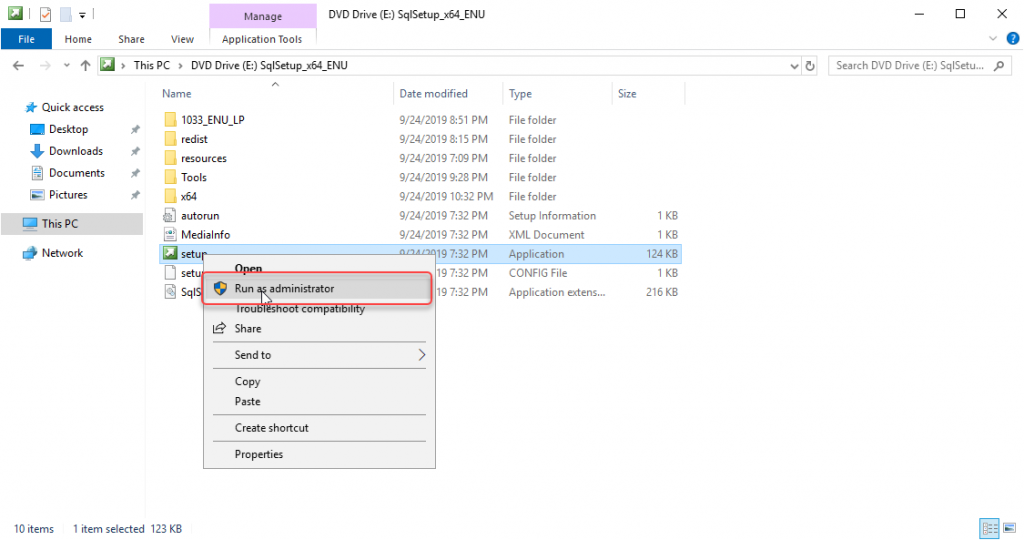
Once download the ISO, mount it as a DVD drive on the server that you are planning to install SQL server 2019. Double click the ISO file on the Windows server will mount the ISO file as a drive. Once the ISO file mounted, you can expand the directory on the windows explorer and right-click the setup executable file and run as administrator to start the installation.
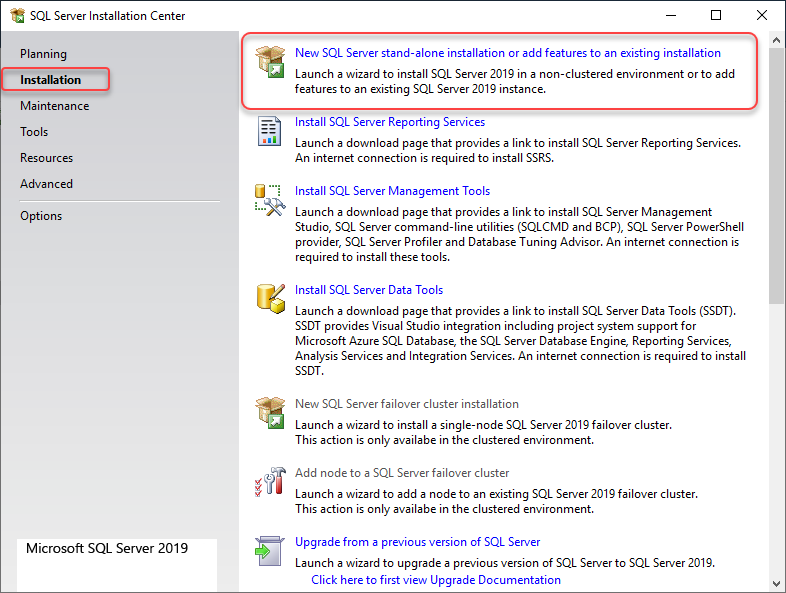
The setup executable will open the SQL Server Installation center, as shown below. On the SQL server installation center, select an installation from the left side navigation and click on the link with the description “New SQL server standalone Installation or add features to an existing installation.” Clicking on the link will start the installation.
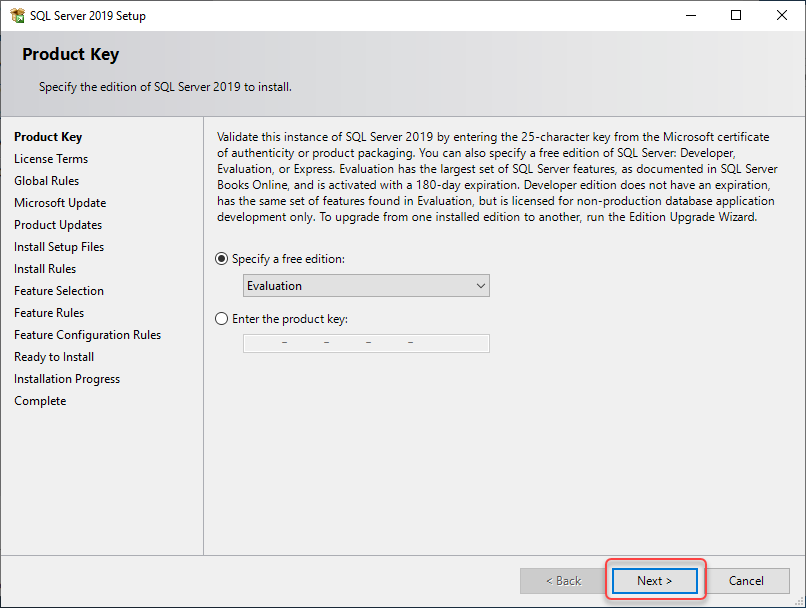
If you have already purchased one of the SQL Server editions, you can enter the product key and continue the installation, or you want to try the SQL server before buying the software, you can select Evaluation and continue with the installation. This is just a demonstration, so I choose Evaluation from the dropdown. Click Next to continue once the proper installation edition is selected.
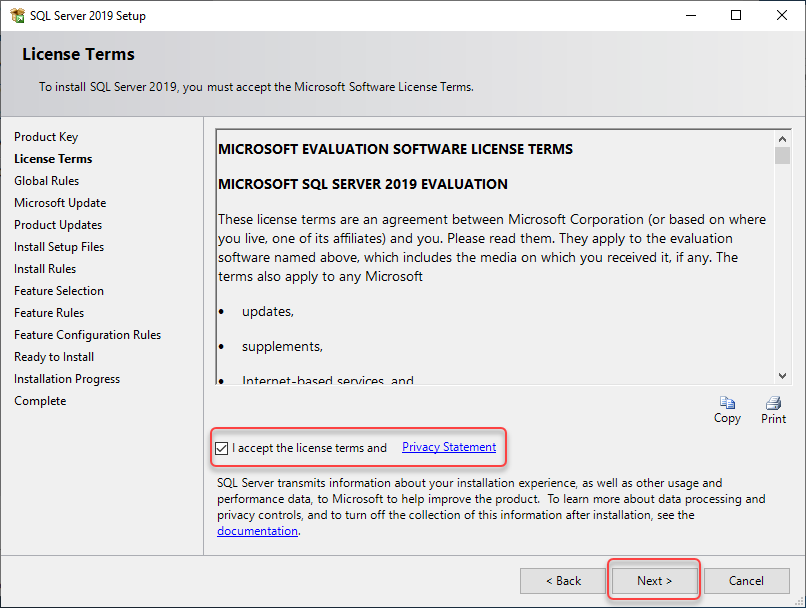
The next page is agreeing to license terms, and you need to go through the license terms before continuing the installation. Once you have gone through and agree to the license terms, select the “I accept license terms and privacy statement” checkbox and click Next.
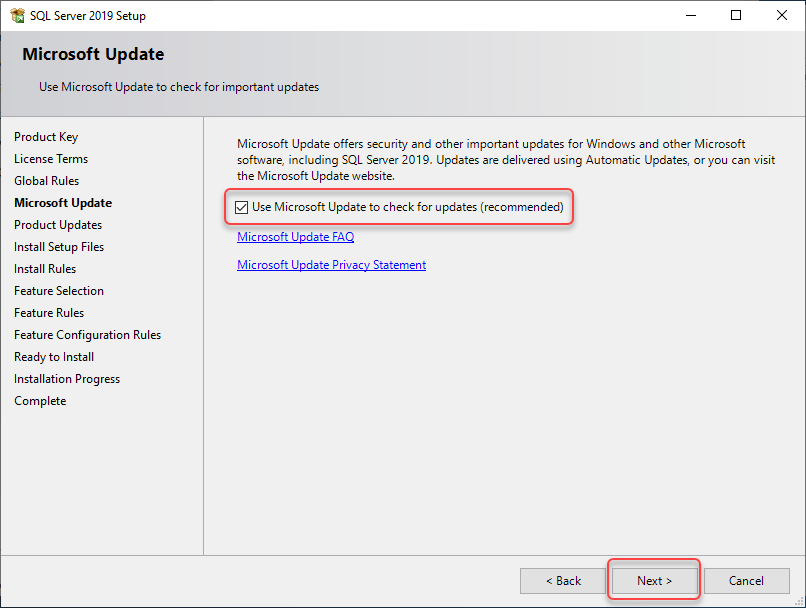
It is recommended to check for Microsoft updates before starting the installation, check the box neat to “Use Microsoft Update to check for updates” and click Next.
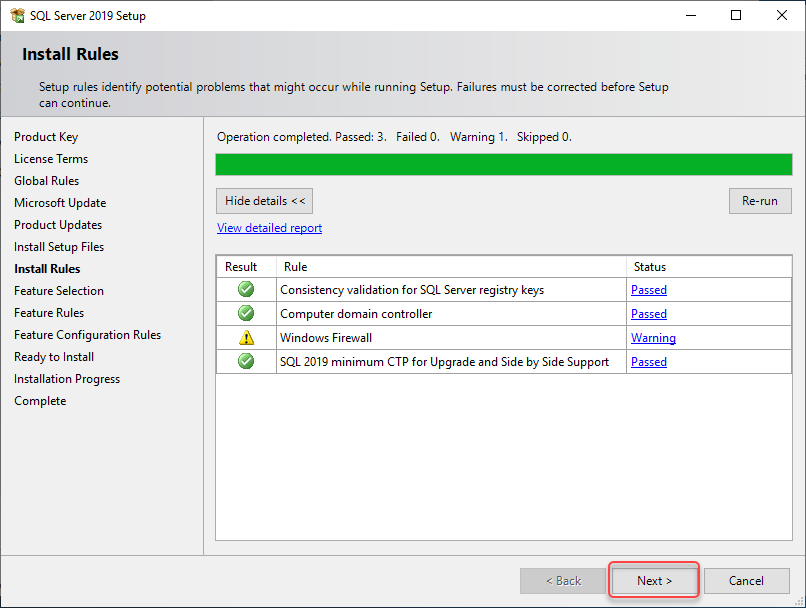
On the next screen, Install Rules would check various problems. In this demonstration, Install rules warned about the 1433 inbound rule on the Windows firewall to open for SQL server accessed from other servers or client computers. Click Next to continue the installation.
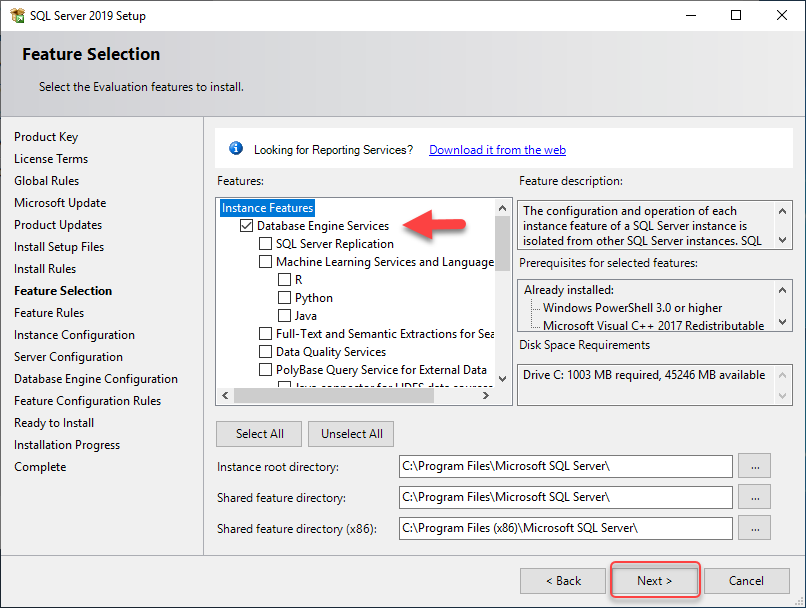
On the Features selection of setup wizard select the database engine feature and the installation path, you can also select the other features as you need. For this demonstration, we are only focused on the installation of a database engine, select the database engine feature, and click Next.
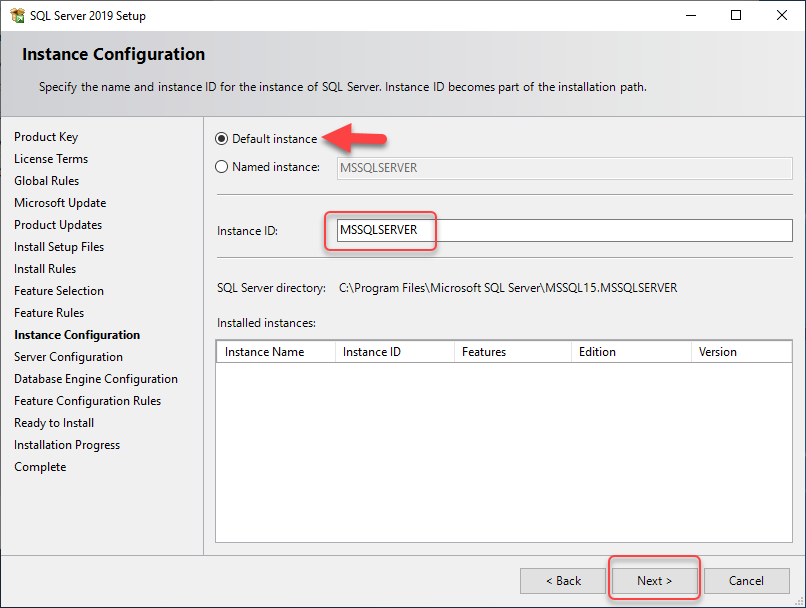
On the Instance configuration, we either go with default instance, or you can name the instance as you want. The default instance name is MSSQLSERVER, to make administration simple, we are going to select the default instance and click Next to continue.
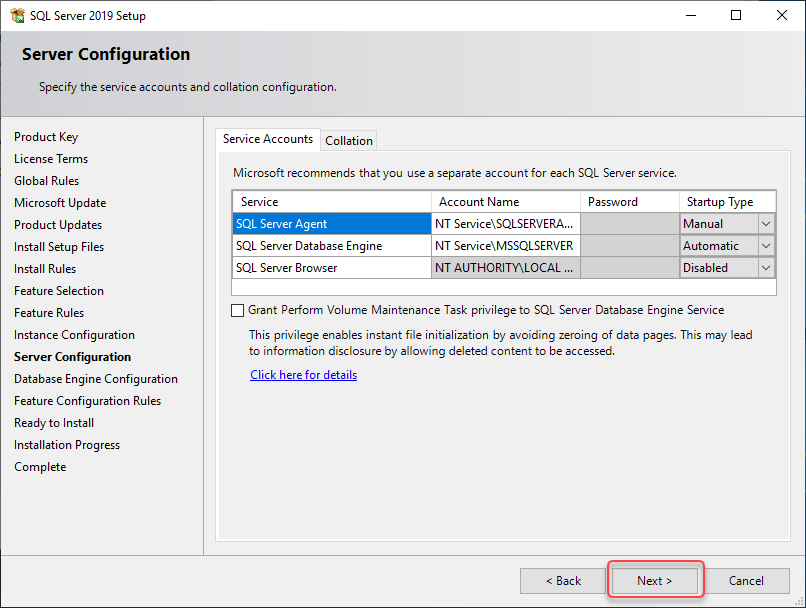
Service accounts are utilized to make the SQL server database engine services more secure. You must create service access on Active Directory if you are in a domain environment and provide that service account here with the credentials. We leave the service account no utilized and click Next to continue.
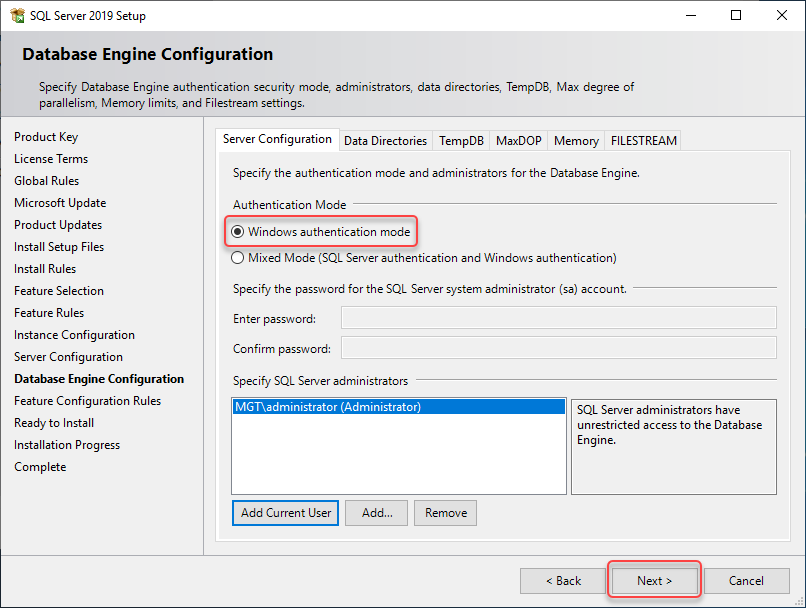
On the database engine configuration, you can select an access-mode which is suitable for your need. There are two authentication modes on the SQL server. The Windows authentication mode is allowed authentication happens only with the Windows credentials, for example, Active Directory environment. In contrast, Mixed Mode will give you the ability to authenticate using Windows authentication as well as the SQL server authentication. You can change the authentication mode on the SQL server properties after the SQL server installation. Add current logged in user as a SQL server administrator and select relevant mode and click Next to continue, in this demonstration we stick with Windows Authentication.
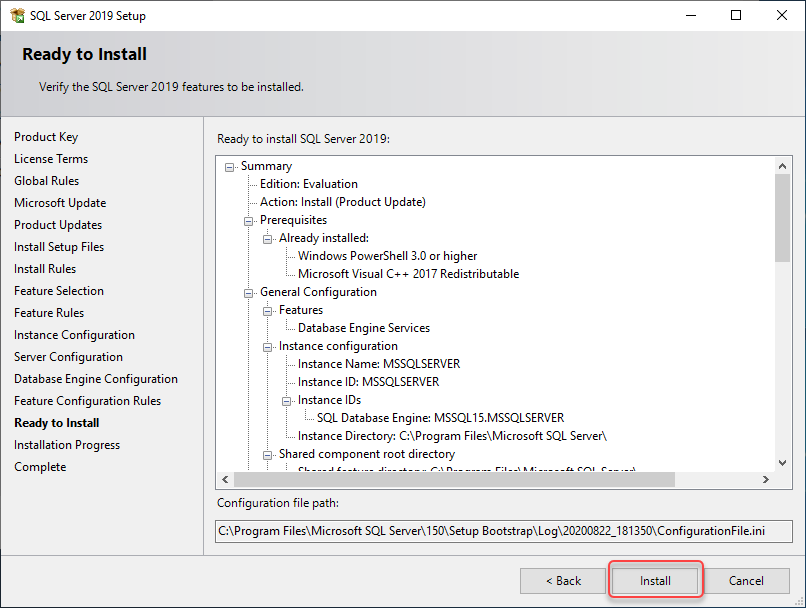
Verify the features selected for installation, if you are not happy with the features you may always go back and change the selected by adding or removing features and come back here and click install to start the installation.
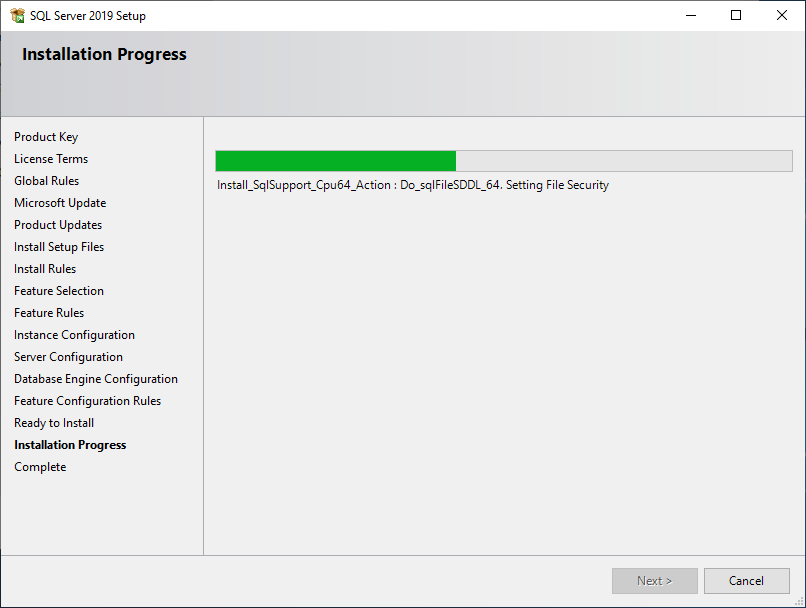
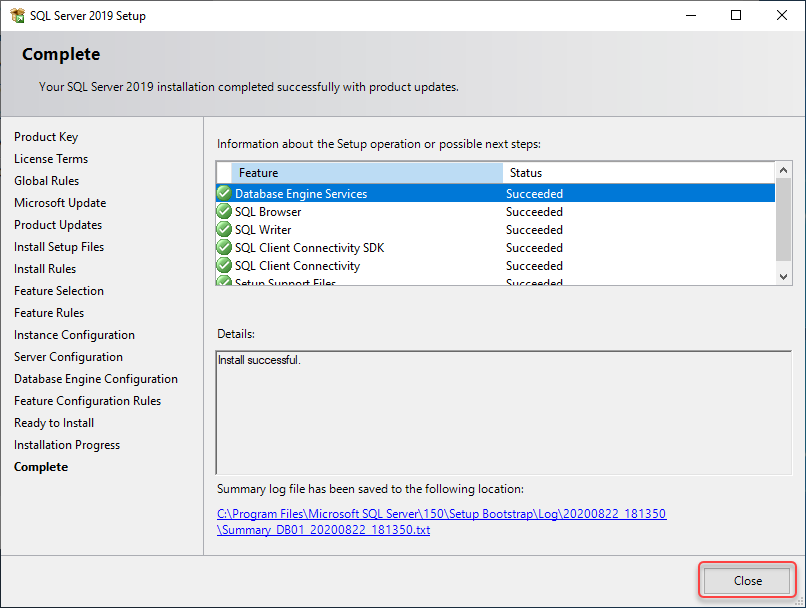
The installation progress screen helps you check the progress of the installation, and you should wait until the installation shows 100% completed.
Once the status of features installation complete, you can close out the installation wizard.
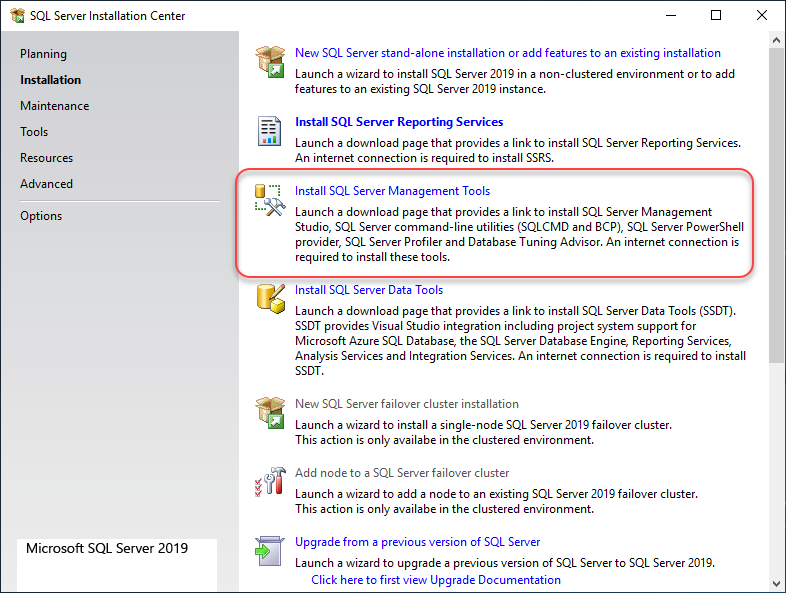
Install SQL Server Management Tools
The next step in setting up the SQL server is to install SQL Server Management Tools. Go back to the installation center and remain on the installation tab on the left side navigation and select SQL Server Management tools. You will get to the download page of SQL Server Management tools.
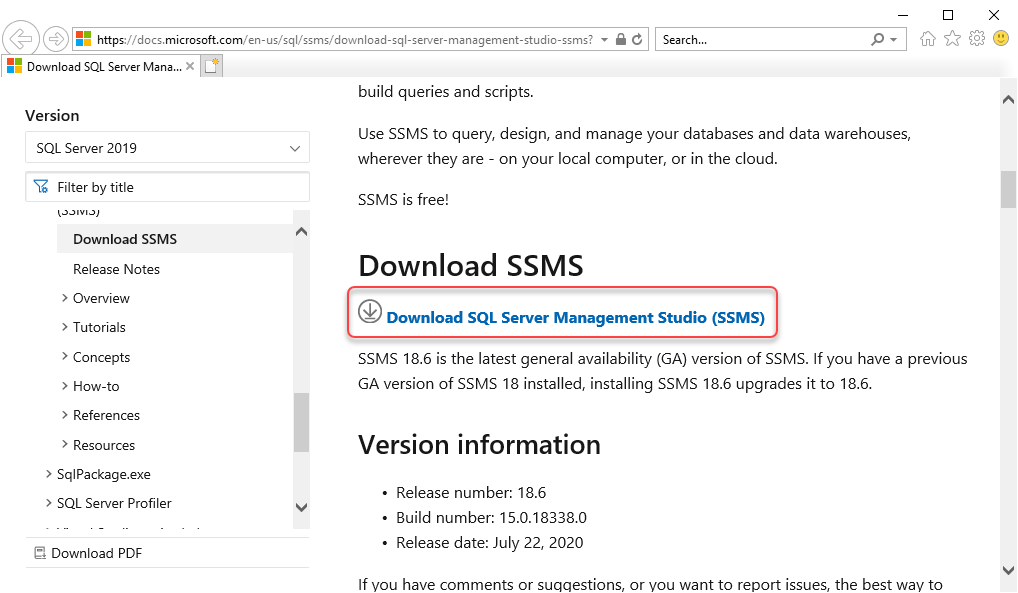
On the download page will open on the web browser of Microsoft site. Click on download SQL Server management studio, which will download the latest version of SQL Server management tools binaries.
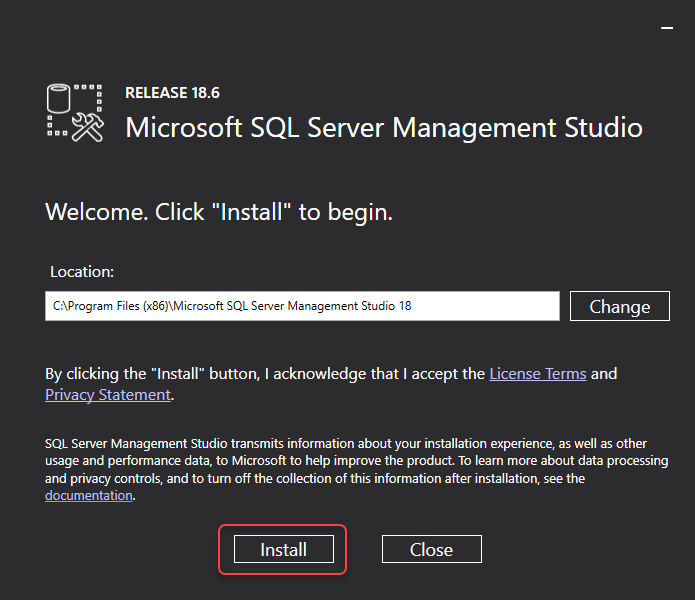
On the Install page of SQL server management studio, either leave the default installation path, or if you want to install other installation, you need to specify here. Once the installation path has been pointed, click Install to start the installation.
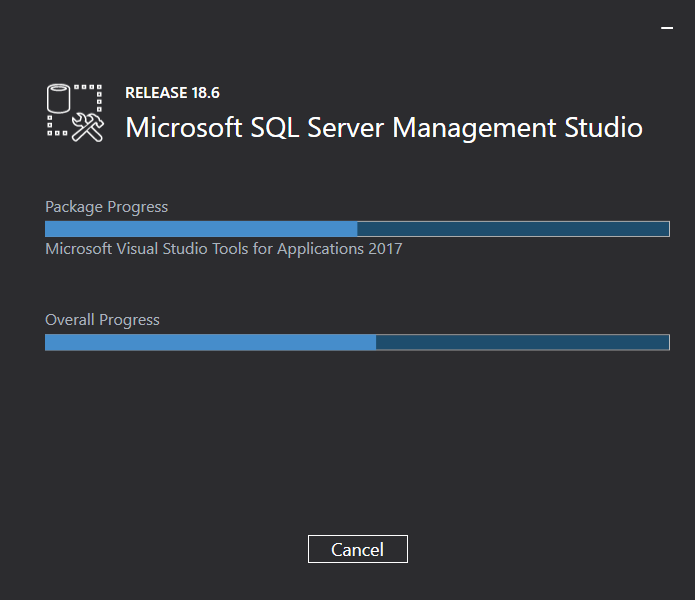
The Microsoft SQL Management Studio installation progress will give you the status of installation and the progress of the installation.
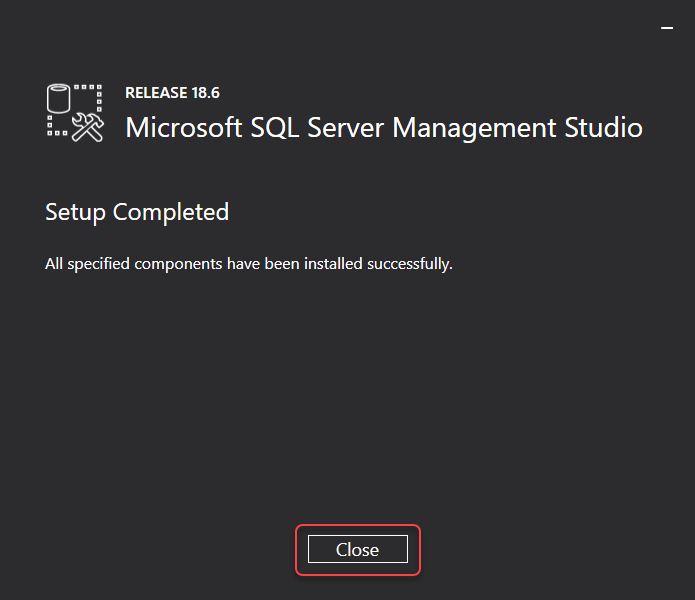
Once the installation is completed, you will get a message saying setup completed. Click close to closeout the installation wizard.
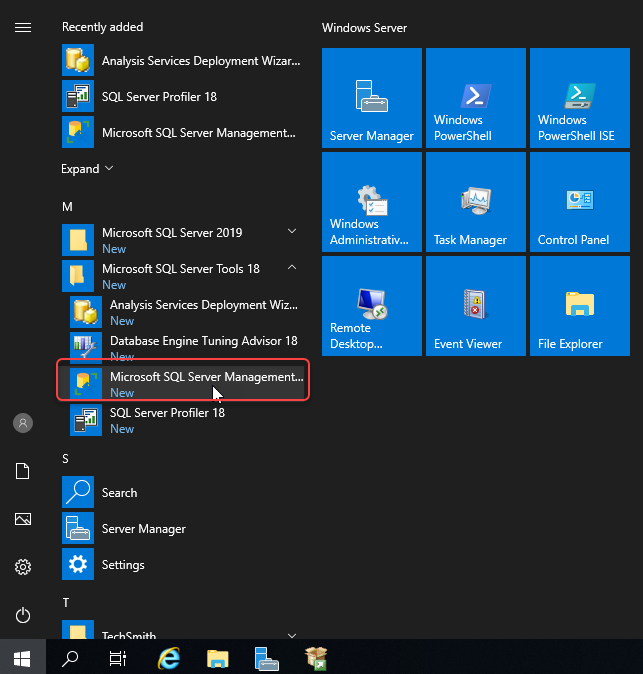
The SQL server management studio can be accessed from the Start menu of the Windows server. The management tools can also be installed on a desktop computer installed with Windows client operating system such as Windows 10.
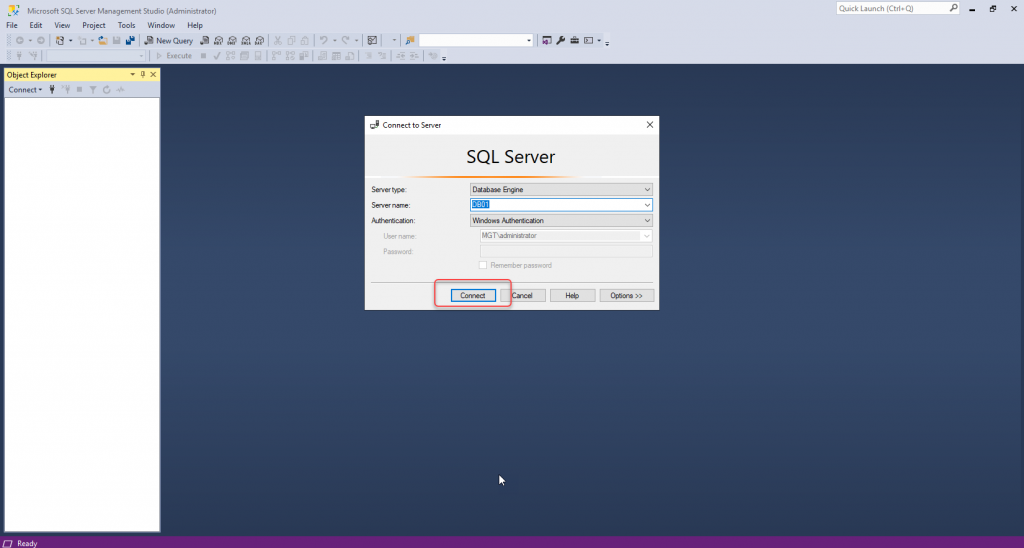
The SQL Server Management Studio will prompt for administrator login as in the screen below. It will use the currently logged in user to access the database engine on the windows server. Click connect to open SQL server database engine.
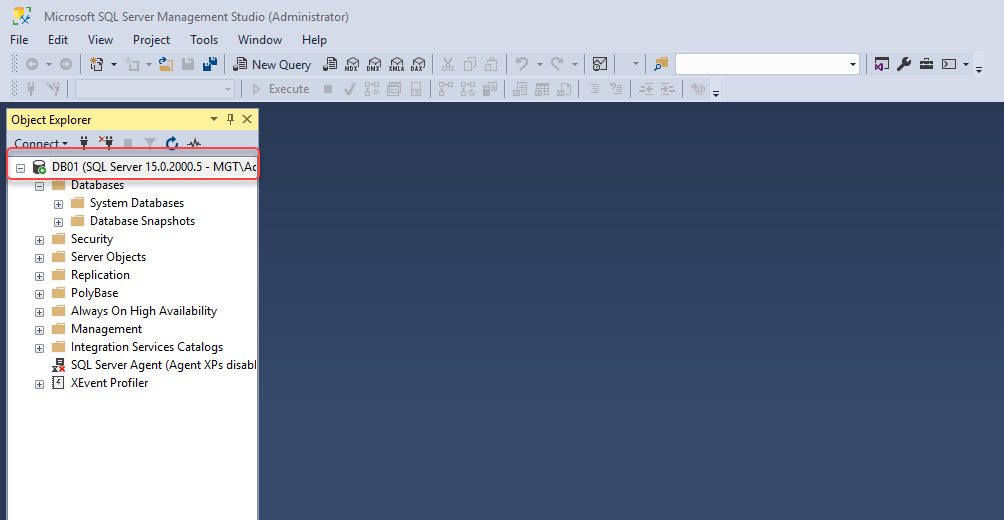
Once the object explorer of the SQL server opened on the SQL Server Management Studio, you can access the various SQL server management features to control and configure them.
Conclusion
In this article, we have demonstrated the installation of SQL Server and SQL server management tools. We have gone through the installation elements one by one, and the primary selection is SQL server edition and features.
We have posted a lot of other Windows server roles and server products on the Blog site here. You may have some questions or feedback to share with me, please click the comments below and share your thoughts. I am so happy to answer your questions.