
Setup a Secure VPN (SSTP) on Windows Server 2019
Preface
The Virtual Private Network installation in Windows Server 2019 is like a breeze after the Secure Socket Tunneling Protocol (SSTP) becomes more popular over recent years. The SSTP protocol makes the VPN configuration much easier as the configuration of the firewall needs to open only SSL over Http port 443. The port 443 is used mostly for web servers, and it is common on the networking world organizations to open this port for accessing the https services.
Today I’m going to demonstrate the enablement of this service by installing and configuring the new and robust server from Microsoft, which is no other than Windows Server 2019. When we talk about security, we cannot disregard the concept certificate from certification authority which can be either an internal CA server or third party one. We need to install a Certification Authority certificate on the Internet Information Services (IIS), and the web site installed when we implement Remote Access Services.
There are two parts we need to take into consideration, which setup a Secure VPN (SSTP) on Windows Server 2019 and the VPN client configuration on client operating systems such as Windows 10. On the outset, while we talk about Windows servers and Clients, we can also use this step by step guide to install VPN services on Windows Server 2016 and the Windows 8 and 8.1 client to connect to the Server. There are some minor changes we need to take care of while we do this configuration on earlier operating systems like Windows Server 2016 and Windows 8 and 8.1.
The following steps are involved in Setup a Secure VPN (SSTP) on Windows Server 2019. We see one by one and complete Routing and remote Access implementation for Virtual Private Network Service using Secure Socket Tunneling Protocol (SSTP). We are going to dive deeper into this ‘How to Setup a Secure VPN (SSTP) on Windows Server 2019’, so be with me until we complete the setup.
- Add Remote Access Server Role
- Configure Remote Access with VPN Access
- Limit number of VPN Ports
- Configure Remote Access Settings for VPN
- Configure Dian-in connection on the user object
- Create a VPN network Connection
- Connect to the VPN Server over internet
Add Remote Access Server Role
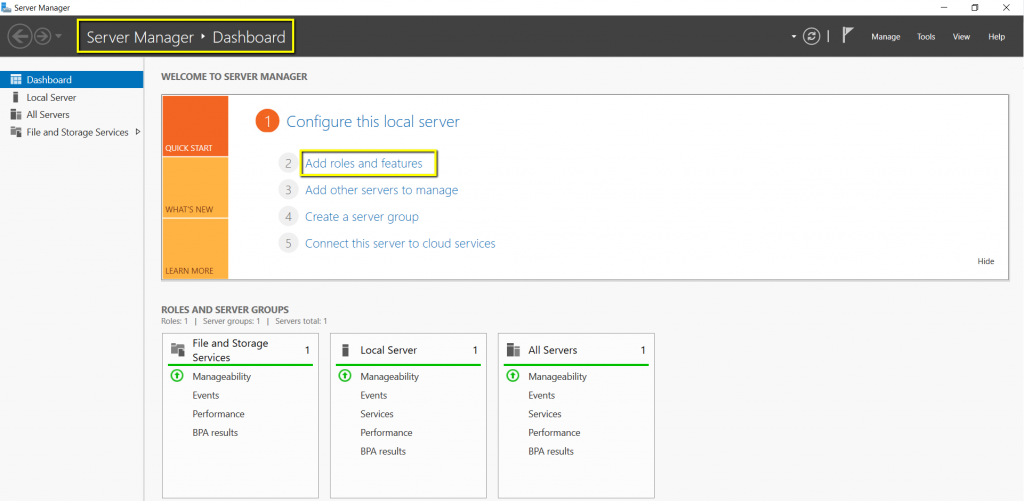
The first step in Setup a Secure VPN (SSTP) is Adding the Remote Access Server Role on the server. The remote access server role to be installed by going to the Server Manager Dashboard. Once the Server Manager windows would open, click on the Add Roles and Features, and the ‘Add Roles and Features’ wizard would start, and we can go through this wizard to complete the Remote Access role installation.
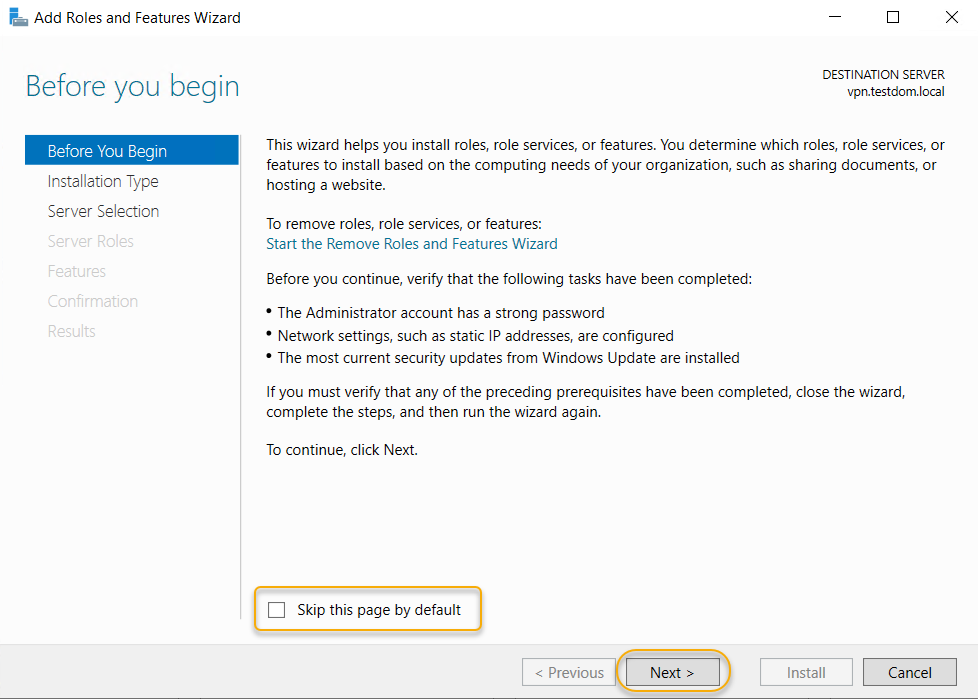
The wizard will start with instructions on using this tool to add the roles and features. If you don’t want to see this page, you can click the checkbox next to ‘Skip this page by default,’ and you won’t be prompted with this page anymore.
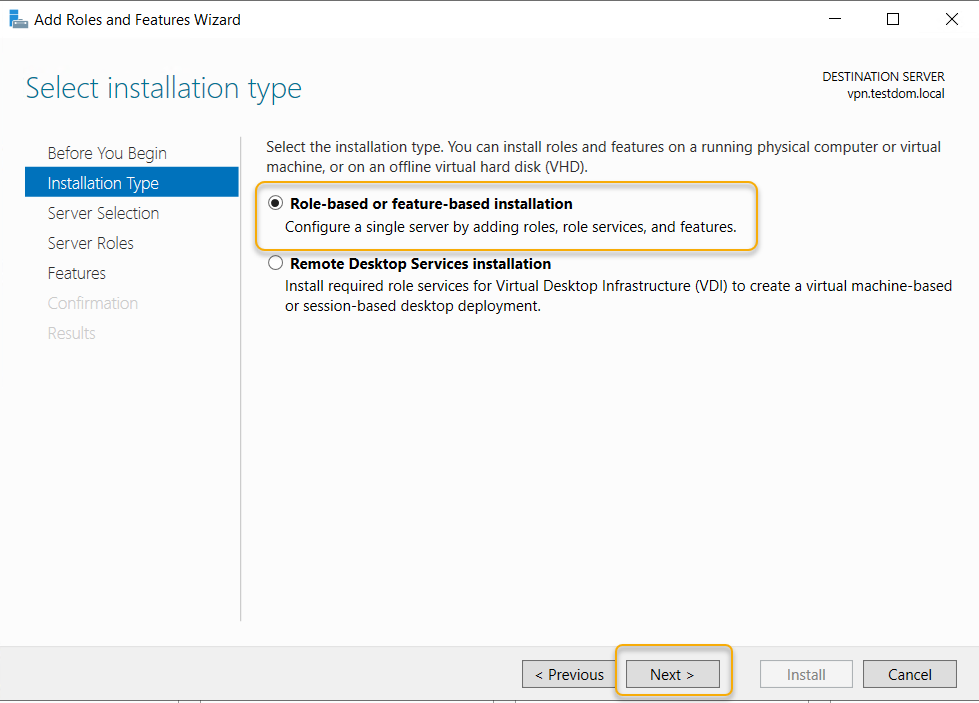
In this wizard, we are going to use the role-based installation to add this role, so select Role-based or Feature-based Installation to begin with and click Next to continue.
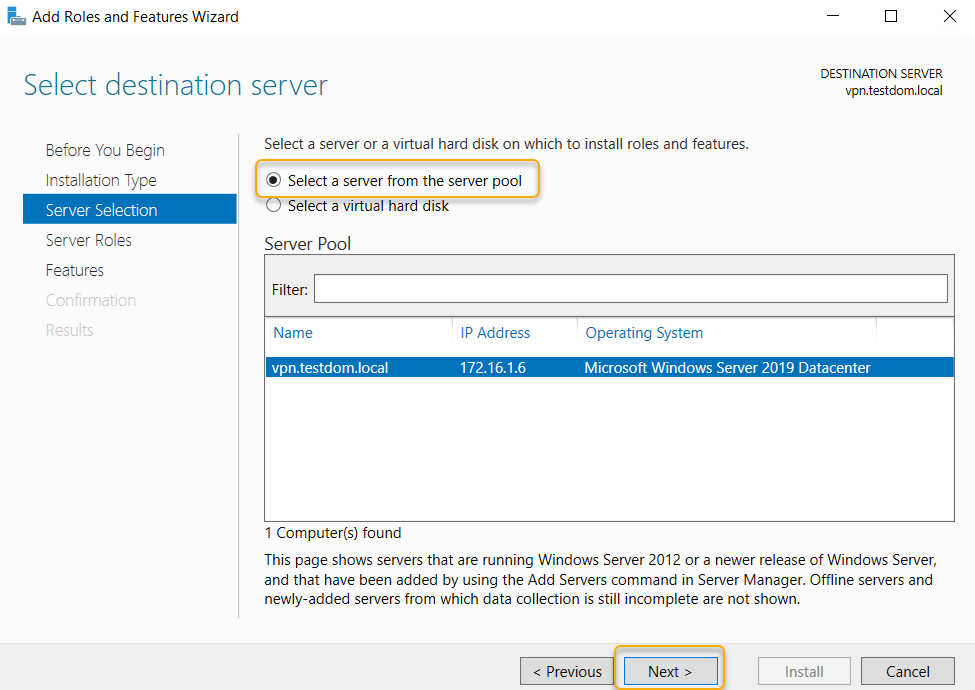
Make sure the local server in the server pool and select it and click Next.
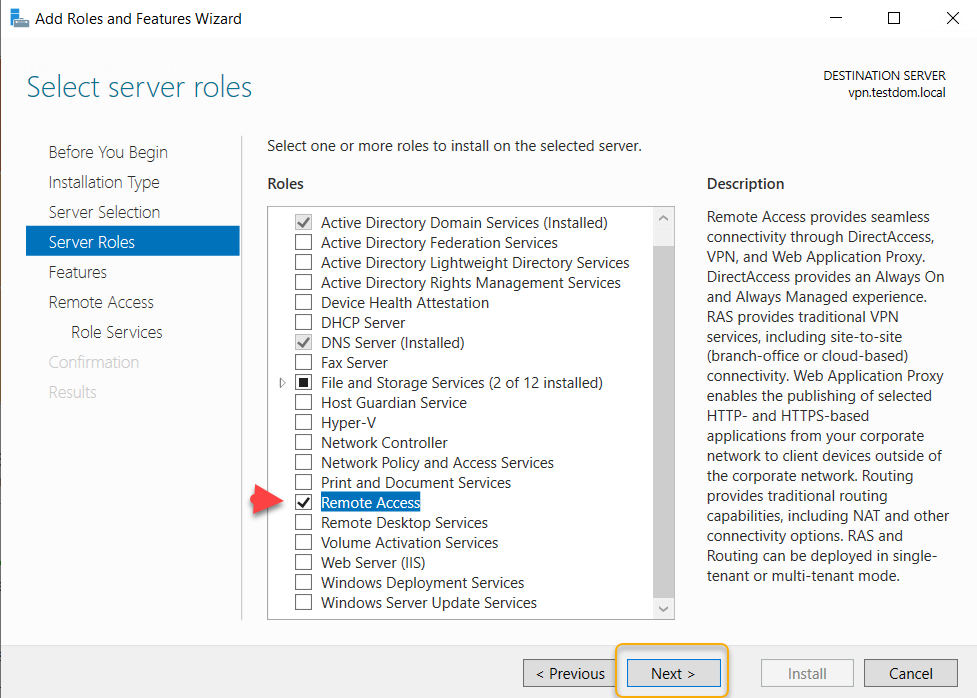
In the Select Server Role page, select Remote Access checkbox, and click Next.
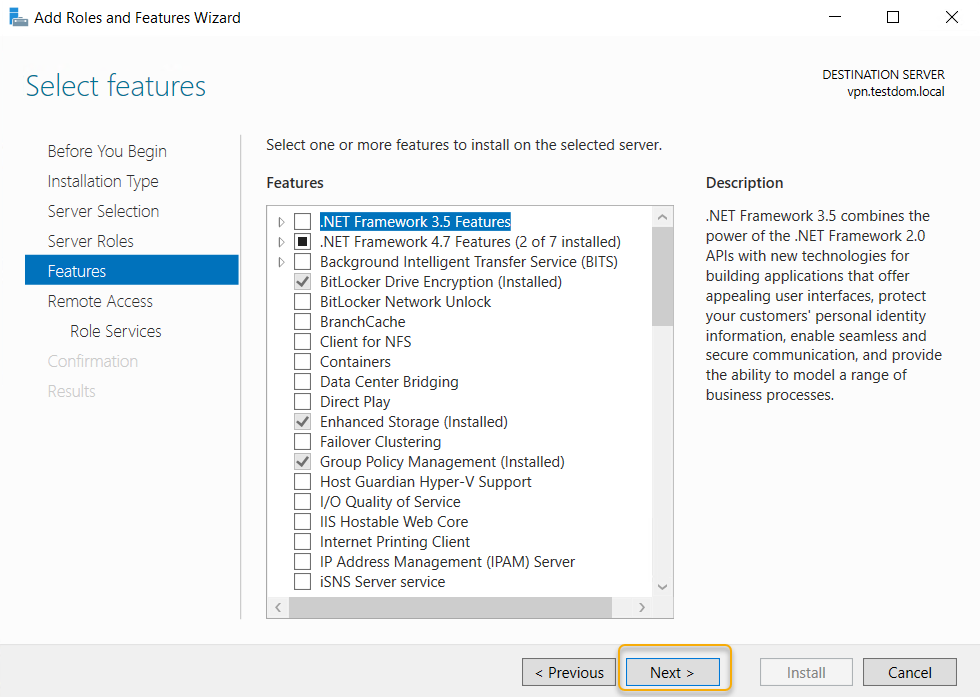
On the next page, leave the Features as it is and click Next.
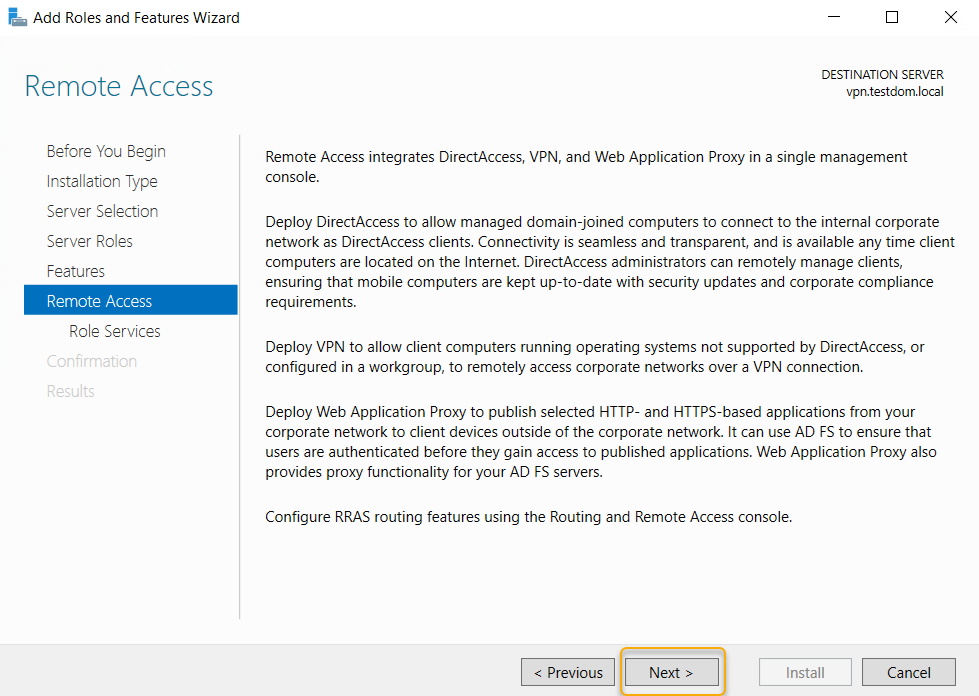
If you need more details, you may go through the details about remote access on this page, and once you are ready to move, click Next.
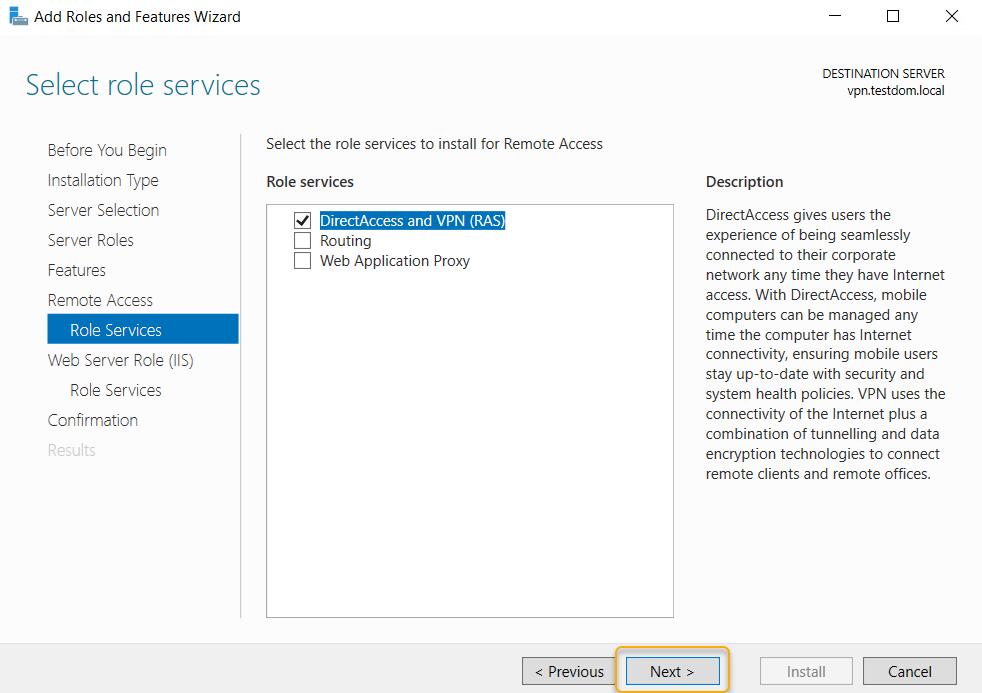
This step is very important, select the Direct Access and VPN (RAS) alone, and you would be prompted with related features on the pop-up and click Add Features, which will return to select the role services page.

We have selected the roles services and its feature, and we are good to move to continue, click Next.
The next page is an information page and it describes that adding this role service also install the Web Server (IIS) role, Click Next to continue.
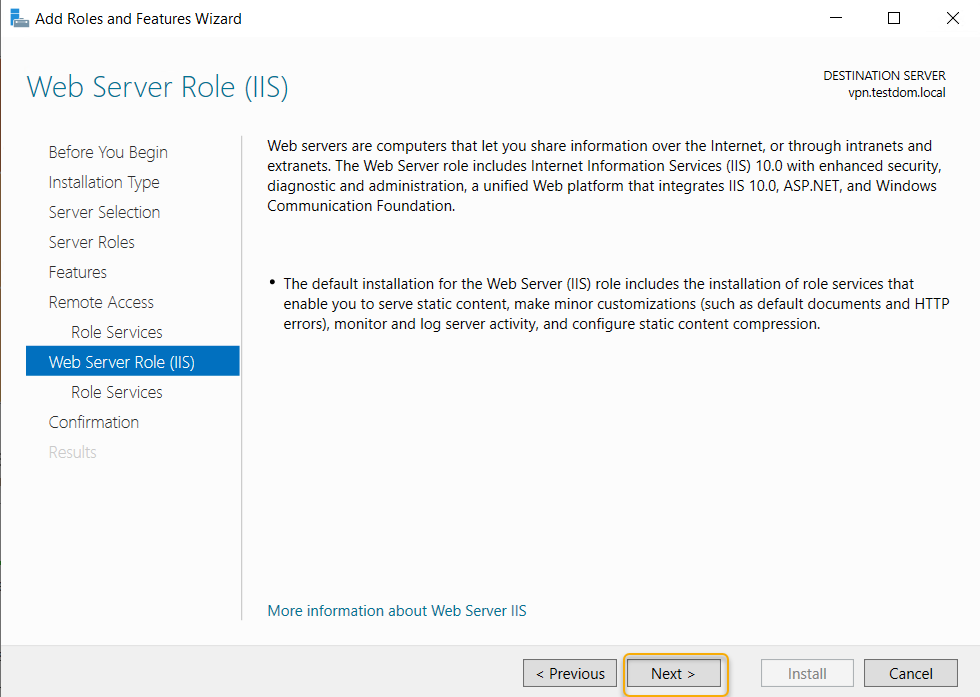
The Web Server(IIS) role will install this role services, leave the default selection, and click Next.

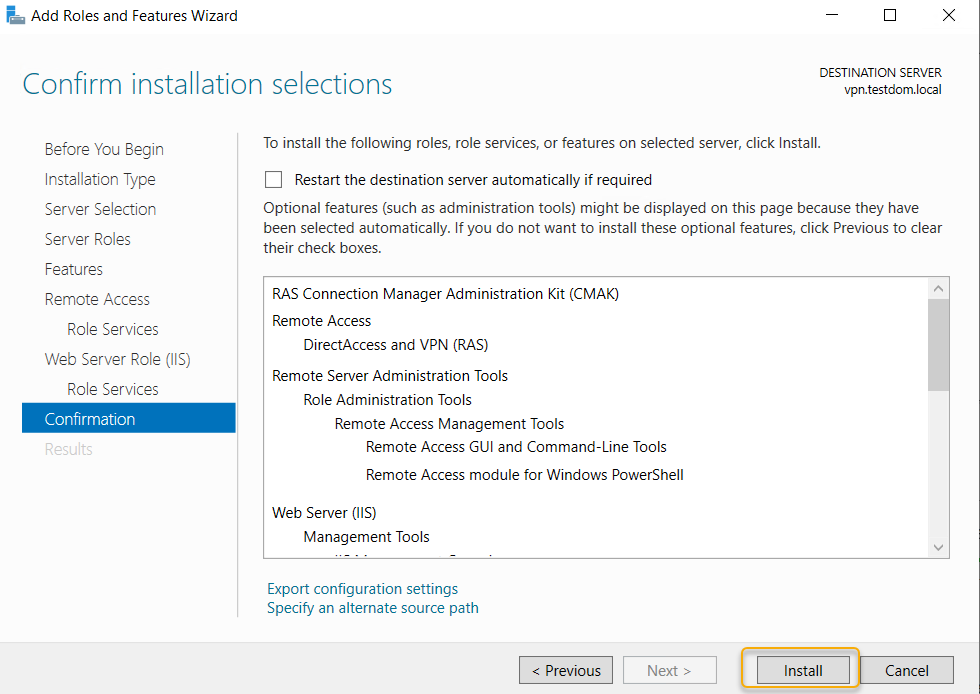
On the confirmation page, verify that the Roles mentioned above and Role Services are correct and click Install to start the Remote Access role installation. Sit back and relax for a few minutes to get the installation to complete.
You would notice the installation succeeded message and also there is a link to open the getting started wizard to start the configuration of the Remote Access Role, click the link.
Configure Remote Access with VPN Access on Setup Secure VPN (SSTP)
Clicking the link will start Configure Remote Access Wizard, on the wizard click Deploy VPN only tab as in the screen below.

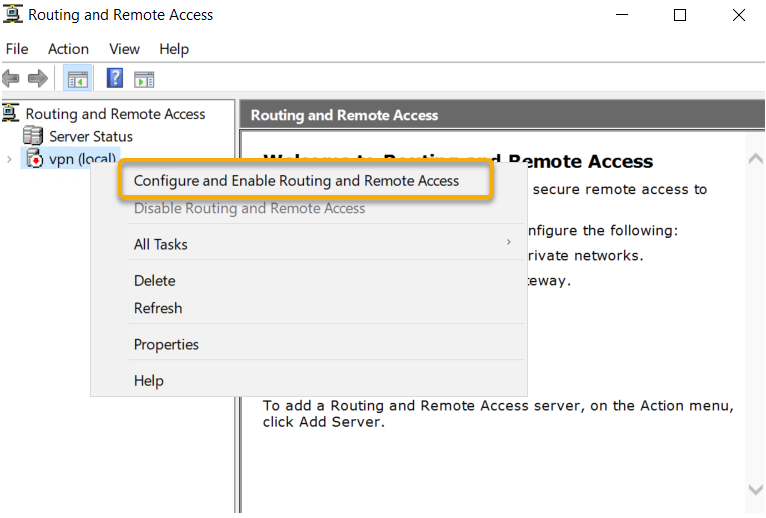
The Routing and Remote Access management console will be opened and right-click on the server node and click ‘Configure and Enable Routing and Remote Access.’
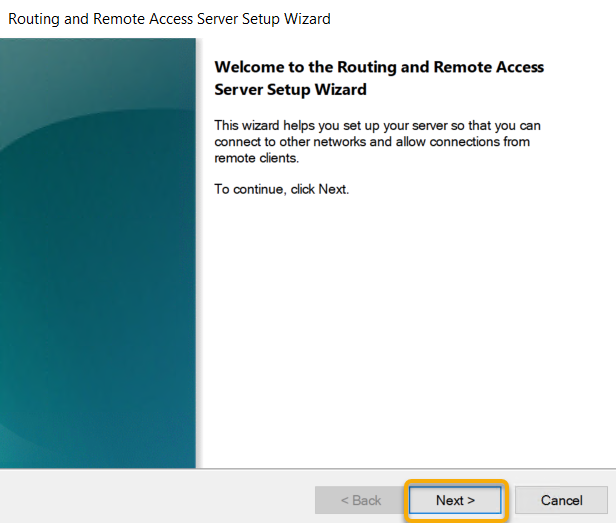
The Routing and Remote Access Server Setup Wizard will start with a Welcome Screen, Click Next to begin the Wizard.
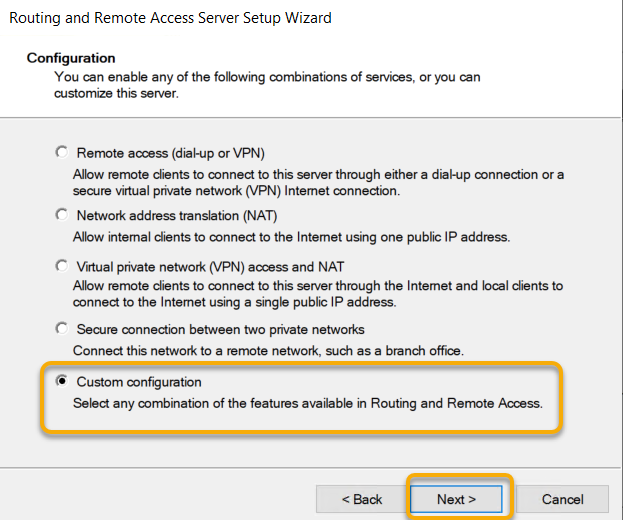
Select the Radio button next to Custom Configuration and click Next.
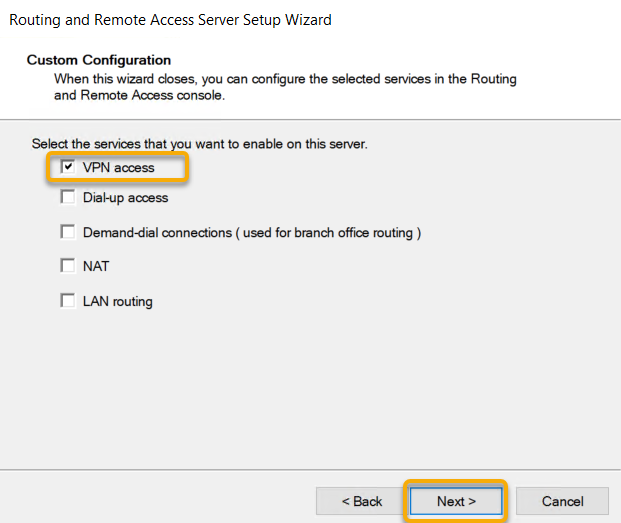
On the Custom Configuration page, select the checkbox next to VPN Access and click Next.
The VPN Access configuration selected on the wizard, and that is the end of the wizard and click Finish.
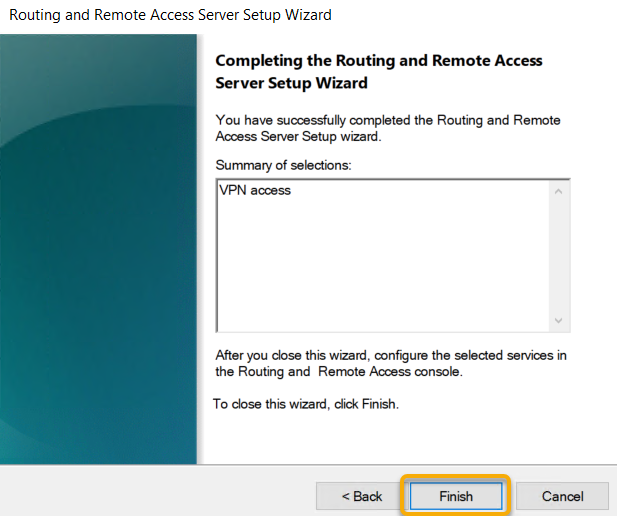
As we have configured Routing and Remote Access services with VPN Access and the wizard will end by prompting to start service.
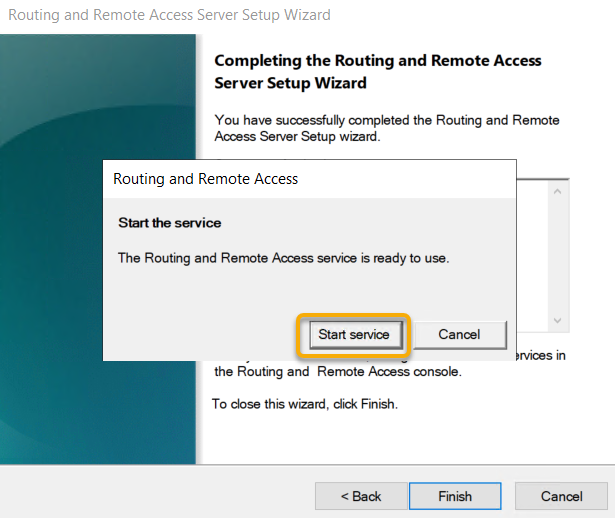
Once the Routing and Remote Access Service Started, you will see a green arrow on the server node implying that the service started and running.
Limit number of VPN Ports
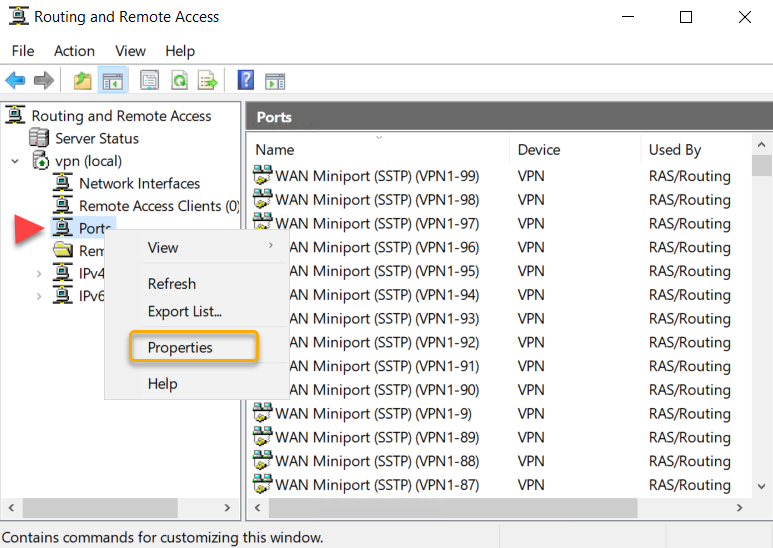
Based on our requirement, we are going to limit the number of connections on the remote access service. To limit the number of ports, right-click on Ports and select Properties.
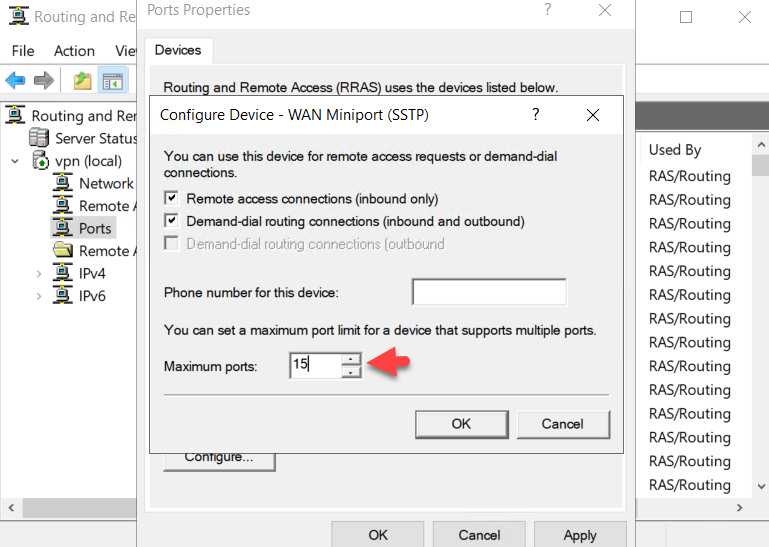
We are going to limit the ports to 15 in this example.
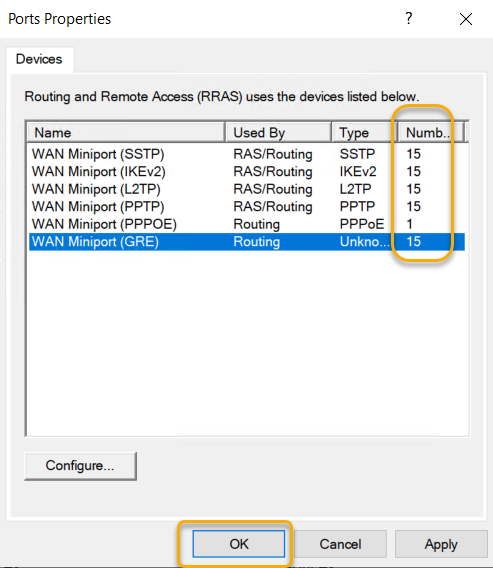
Select Yes to the warning that shows that we are reducing the number of ports.

Once we set all ports to 15 and confirm the numbers and click OK.
Configure Remote Access Settings for VPN To Secure VPN (SSTP)
There are certain settings we need to update to set the VPN to function securely and get the IP4 IPs to the client system.
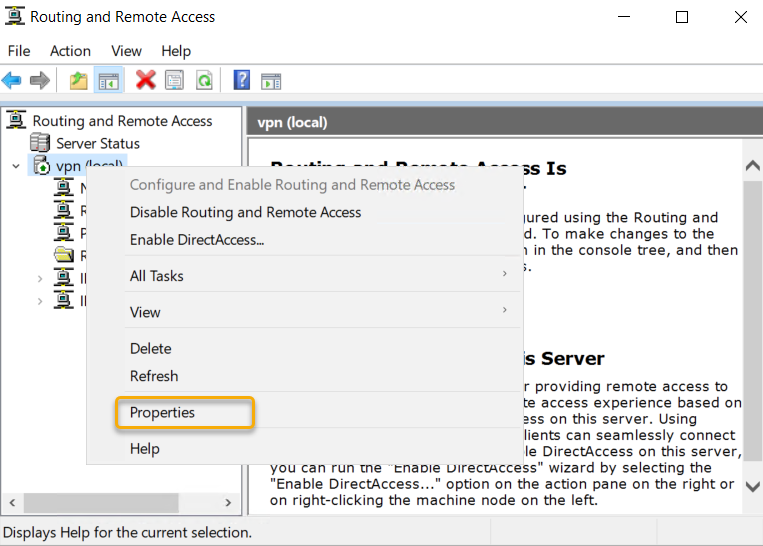
Right-click the server node and click properties as in the screen below.
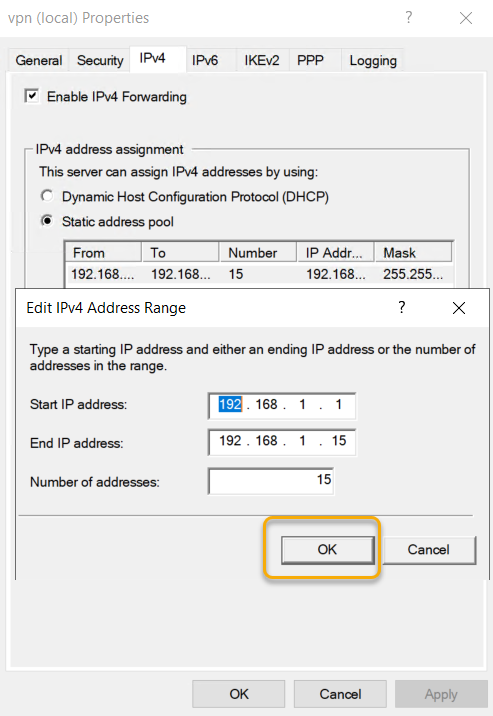
On the Remote Access, Server Properties go to the IPV4 tab and Select the Static Address pool radio button under IPv4 Assignment and click add to add IP address pool. Choose an IP address Pool and type start and end IP address of the pool. The IPV4 address pool is a static one, and if you are running the DHCP server on the server, you can leave the IP address to assign from the DHCP server. As we are not running a DHCP service, we are creating a static address pool in this example.
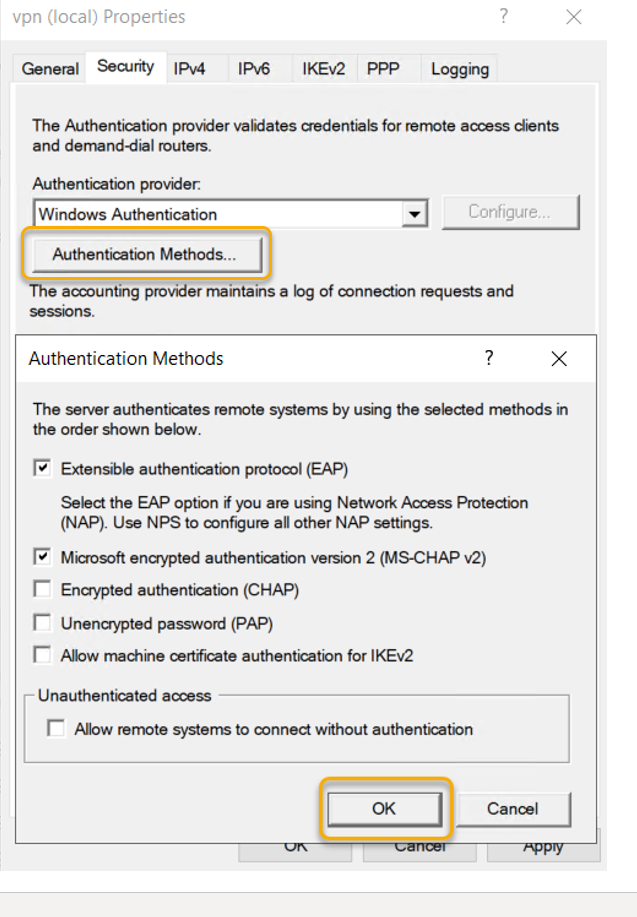
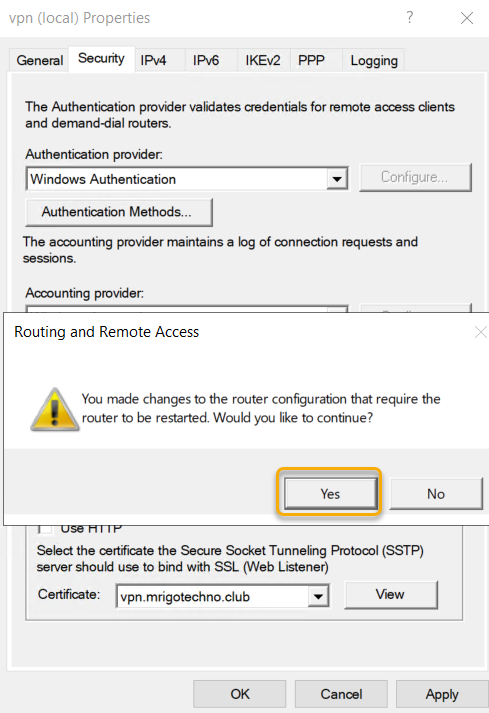
On the Remote Access, Server Properties select ‘Authentication Methods’ check ‘EAP’ and ‘MS-CHAP v2’ selected and click OK.
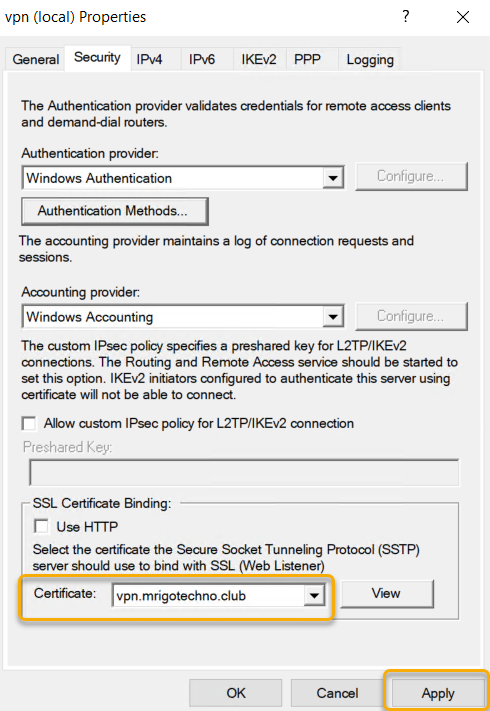
Before starting this installation, I have configured Public DNS of the domain with a hostname record and assigned the server public IP address to it. Also, I have generated a certificate from third-party CA. At the bottom of the page, you can select the certificate that you have installed for the hostname that you have selected.
Applying configuration changes will require a restart of the Remote access service for the configuration to take effect.
We have completed the Routing and Remote Access configuration. To connect to the VPN Server from the VPN client, we need to allow the users who are all needed access. Go to Active Directory Users and Computers and select the User objects that you want to Allow Dial-in to VPN and go to Dian-in on the properties of the user object and select the radio button next to ‘Allow Access.’
Configure Dian-in connection on user object

Create VPN Network Connection to Secure VPN (SSTP)
So, we have completed all server configurations, now is the time to create a VPN connection on the Windows 10 client computer on Setup a secure VPN (SSTP).
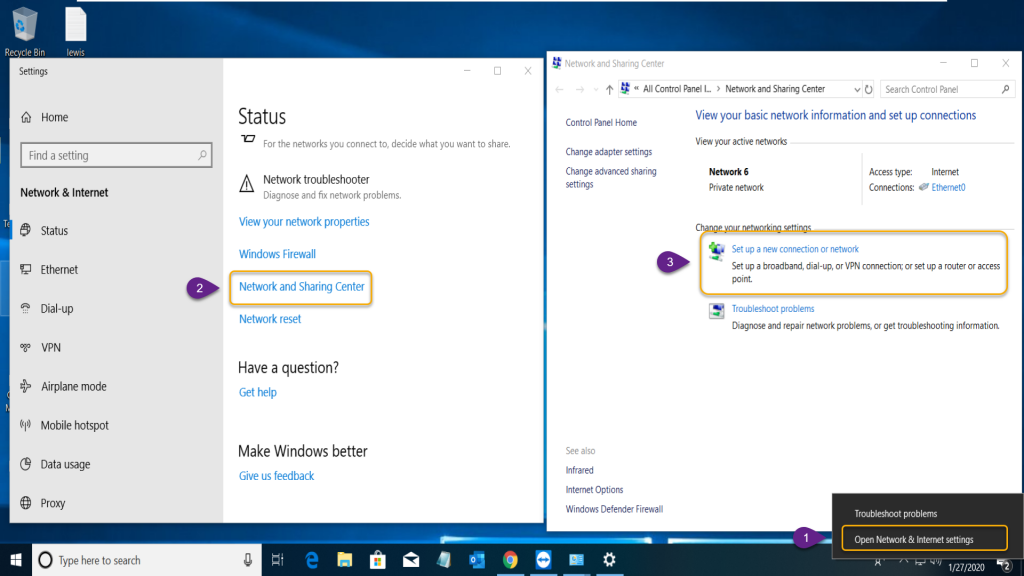
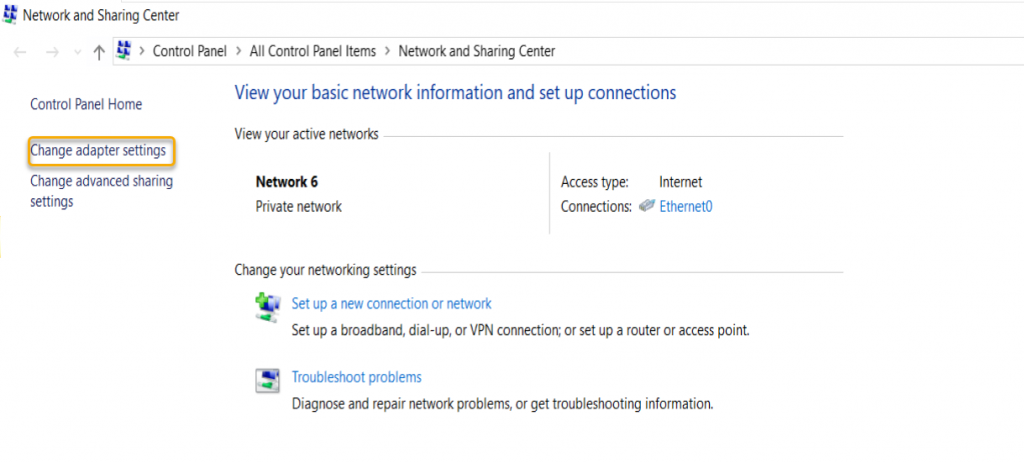
Right-click network Icon on the taskbar and select ‘Open Network & Connection Sharing.’ On settings, windows click ‘Network and Sharing Center’ that will open the ‘Network and Sharing Center’ where we need to select ‘Set up a New Connection or Network’ as in the steps provided on the screenshot below.
Select the steps as in the steps below.
- Open Network & Internet Sharing
- Network Sharing Center
- Set up a New Connection or network
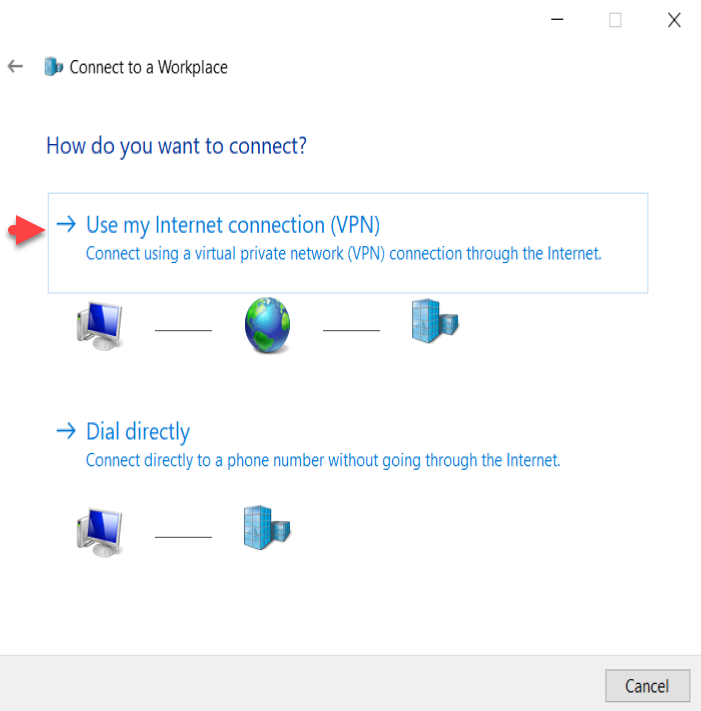
There is a Wizard start, and in the connection options, select ‘Connect to a workplace’ and click Next.

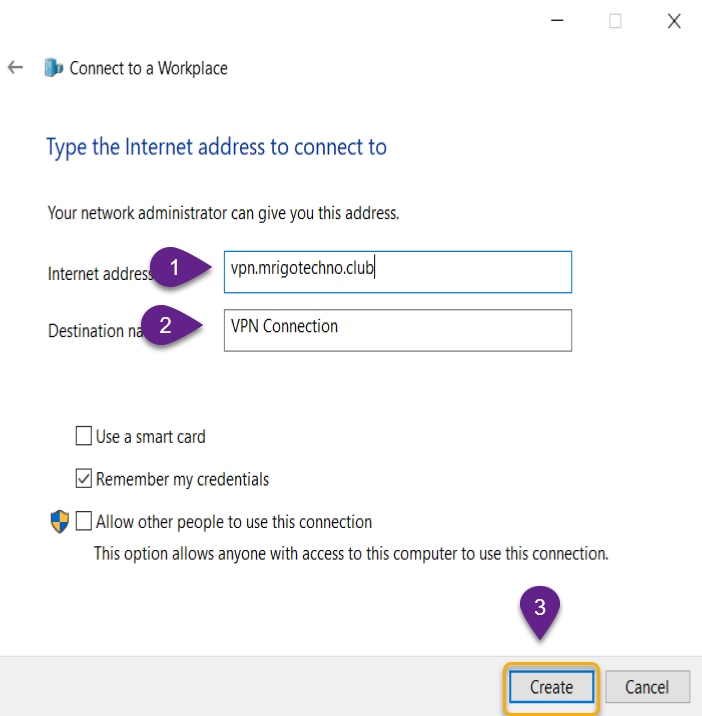
On the How do you want to connect options, select ‘Use my Internet connection (VPN). Type internet address as I told you earlier I have created a hostname called ‘vpn.mrigotechno.club’ on my domain for this VPN configuration.
In the destination name type, a name implies the connection purpose. I left the default name in this example.
Leave the selection of ‘Remember my credentials’ and click create.
- Type the VPN server’s internet hostname or IP address.
- Give a name to the VPN Connection.
- Click Create to create a workplace connect.
Connect to the VPN Server over internet
The VPN connection network adapter has been created and now click change adapter settings to change the VPN network adapter settings to connect to the VPN server.
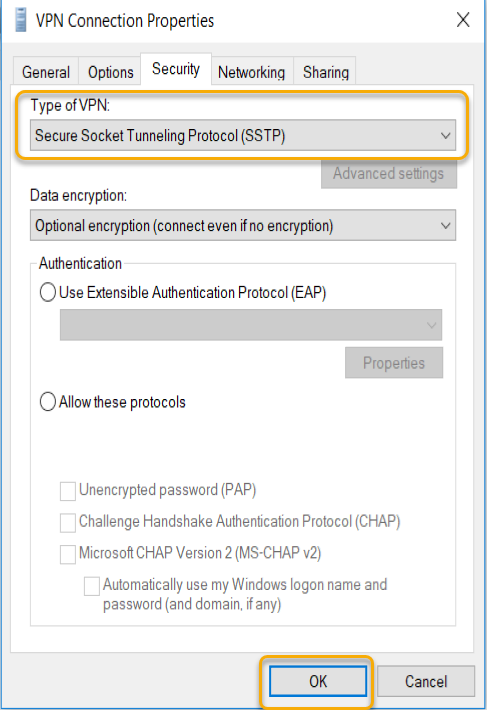
Right-click newly created adapter for VPN Connection and select properties.
On the Security tab, select Secure Socket Tunneling Protocol (SSTP) and click OK.
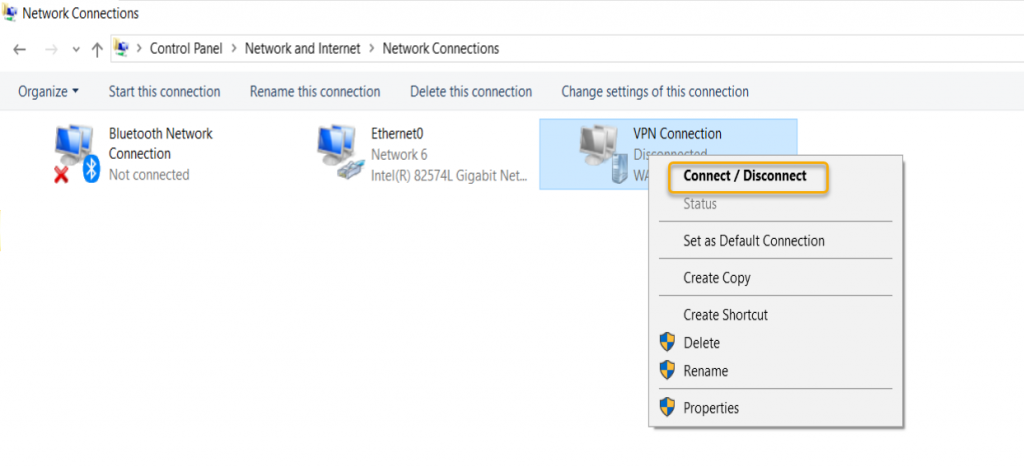
Right-click the adapter one more time and click Connect / Disconnect
The VPN Connection will popup on the taskbar; now click on the VPN Connection.
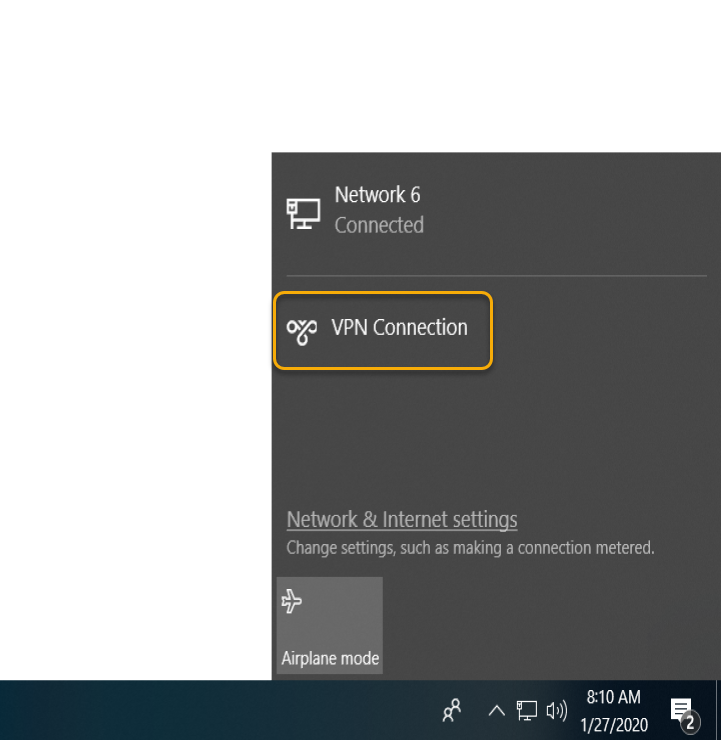
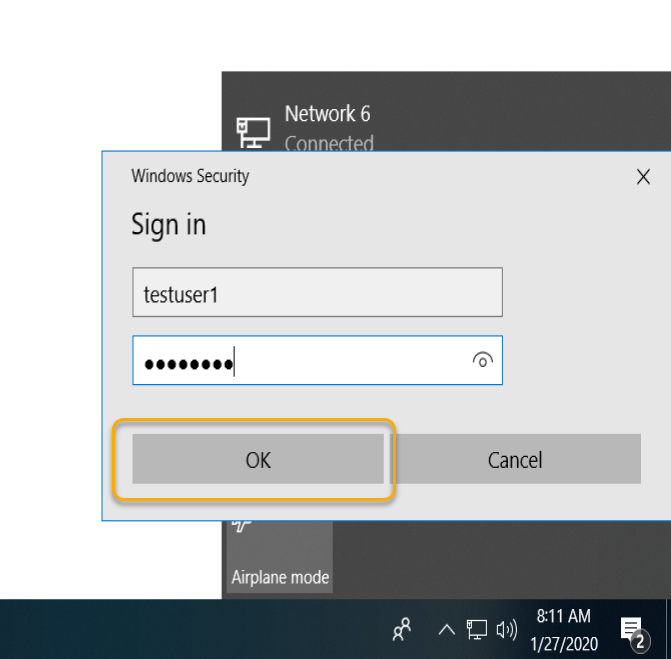
Type the domain credentials and click OK.
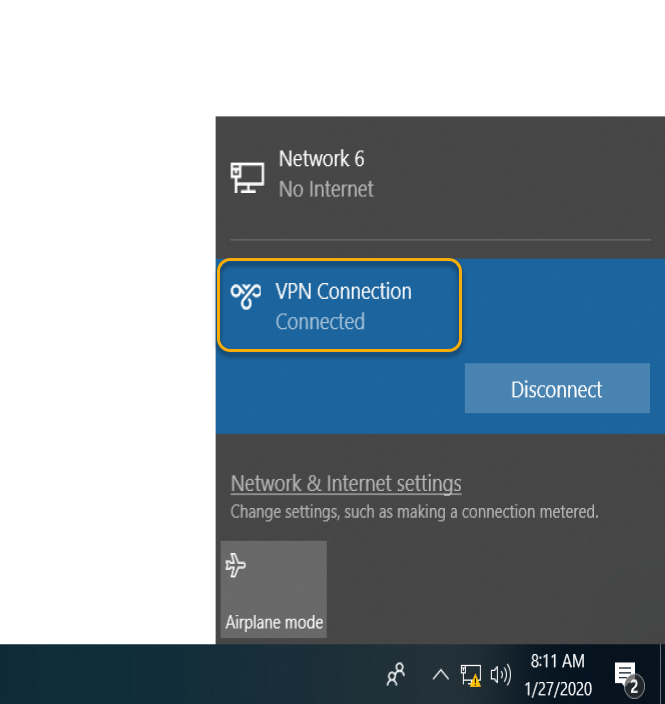
The VPN Connection completed, and you would see the Connected prompt on the VPN Connection.
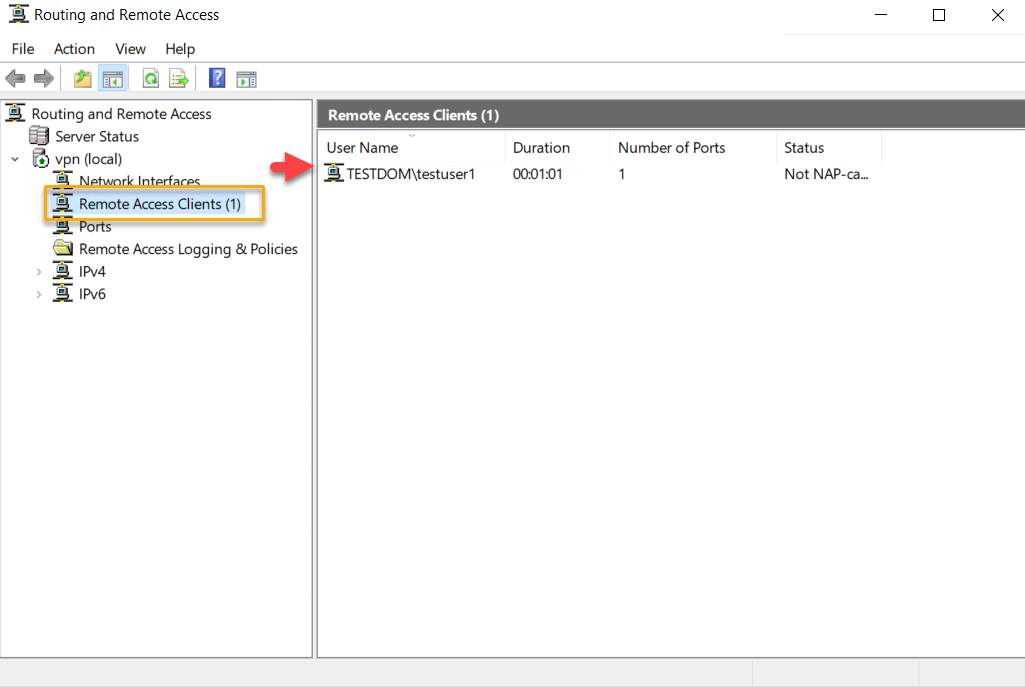
The connection made can be verified on the Routing and Remote Access management console, as in the screen below.
Conclusion
In this article, we have gone through how to set up a secure VPN (SSTP) on Windows Server 2019. We have covered Installation of Remote Access Role, after the installation, we have configured Remote Access with VPN access, and we limit the number of SSTP ports so only maximum allowed connections possible to connect. We configured Dial-In property of the Active Directory domain users and we also covered the Windows 10 client computer to connect the VPN server with the VPN connection adaptor.
I hope this article gives all the details to set up an environment to implement Virtual Private Network using Secure Socket Tunneling Protocol (SSTP). You may have some questions or feedback to share with me, please click the comments below and share your thoughts. I’m so happy to answer your questions.
5 Comments on "Setup a Secure VPN (SSTP) on Windows Server 2019"
You should elaborate on the certificate that is required to use this kind of vpn connection and how to install it. Otherwise people get stuck and are frustrated with this article.
SSL Certificate Binding field doesn’t let me choose a certificate. Only option is ‘Default’
Great article . Next questuin – How can I enable 2 factor autentication?
networking is not my specialty, so my question is probably rather naive, but i will throw it out there anyway. I have a dedicated remote server for which i installed vpn l2tp with psk (to keep it simple). the goal was to restrict access to the server strictly through vpn, meaning that no one could access it via rdp or any public means.
i can still access it via rdp. is it possible – i assume yes – to limit all access except through vpn? if so, how? my assumption is that i would disable rdp on the server, but once logged in through vpn i could use rdp to access other vms hosted by the vpn server. will vpn preclude any other kind of access? i am trying to keep a low profile on the internet with this server.
the ultimate goal is to run the server as a hyper-v server and expose one of vms publicly as a web server. i have 2 nics. but the first goal is to secure the physical server hosting the hyper-v vms. all of my servers are windows 2019. maybe vpn is not the right or complete solution. thanks
The one thing everyone seems to skip on, as you do in this article, is what are the proper configurations of your network interfaces. What is the IP gateway of each NIC as well as the DSN. I assume one NIC is the LAN side and the other NIC is the WAN side.