How to Easily Redirect Folders in Windows Server 2019
Preface
Folder redirection is a group policy setting which used to store user data on the profile, usually Documents, Desktop, and so on stored on a server share. By using these policy settings, the domain users assigned to the folder redirection will get the same data when they log in from a different computer. So, the users can move from one computer to another computer and retain the data stored on the profile. Folder redirection is also helpful to back up the user’s data at the server level, so the user’s data will not be scattered and lost when the user computer is down or disk problem. Let’s get to how to Redirect Folders in Windows Server 2019
In this article, I have demonstrated the folder redirection setup with redirect folder shared on the domain controller and applied group policy to a domain-joined client computer.
The following key points demonstrated and explained to setup folder direction on your environment.
- Create a security group and add test user as a member
- Create a folder to store the redirected file
- Configure security settings and share the folder
- Create group policy and link it to company users OU
- Redirect documents folder with offline access
- Test folder redirection policy with Windows 10 client computer
Create a security group and add test user as a member for Folder Redirection
We are going to create a security group in Active Directory and add a test user as a member to it assign permission for redirect folder shared on the server and filter the group to permit group policy settings to apply. To create a security group, we need to launch Active Directory Users and Computers from the tools menu of the Server Manager.
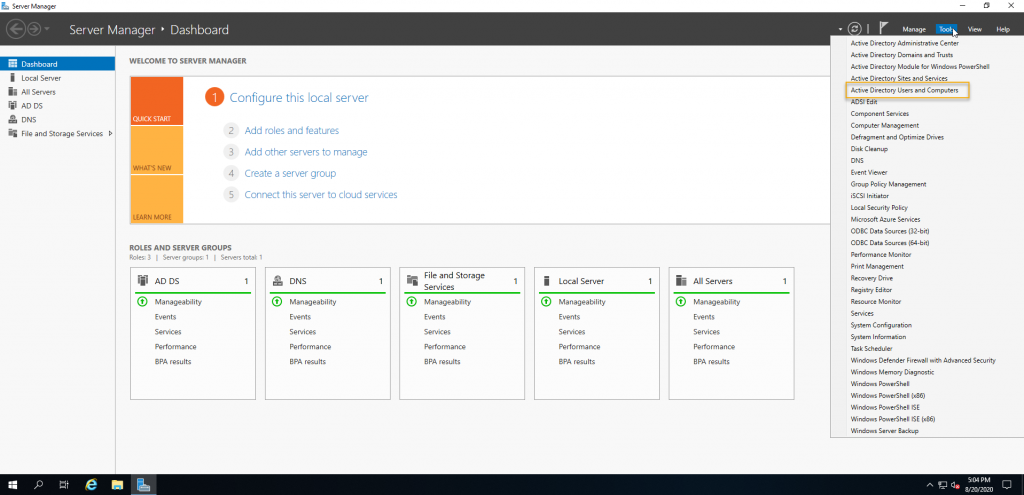
The security group can be created on the OU that is relevant to your environment. In this demonstration, there is an OU called Users under Company OU. Right-click on Users OU and point to New and click group.

Type a descriptive group name, her I named Folder-redirect-Users, and leave the group scope to Global and group type to security and click OK.

Right-click on the group just created, and go to properties to add members to the security group.

Go to Members tab and click add to add members to the group.

I have added a test user for this demonstration, once users are added click OK and close out the Active Directory Users and Computer management snap-in.

Create a folder to store the redirected file
The folder redirection needs a shared folder on the server. Share it with the security group so that the user’s data will be stored in that folder. On windows explorer, go to the home tab and click New folder to create a folder. You can right-click on the windows explorer pane and create a new folder as well.
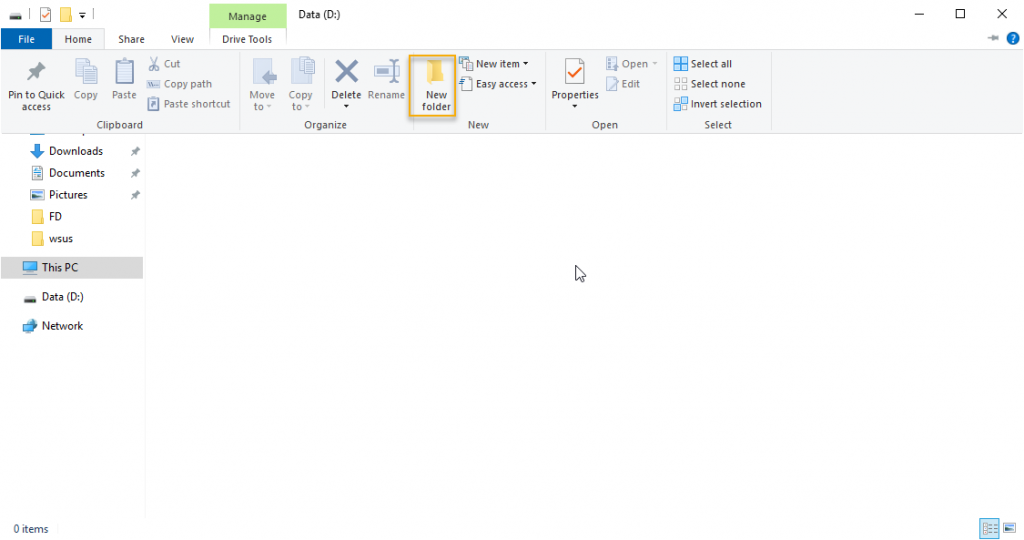
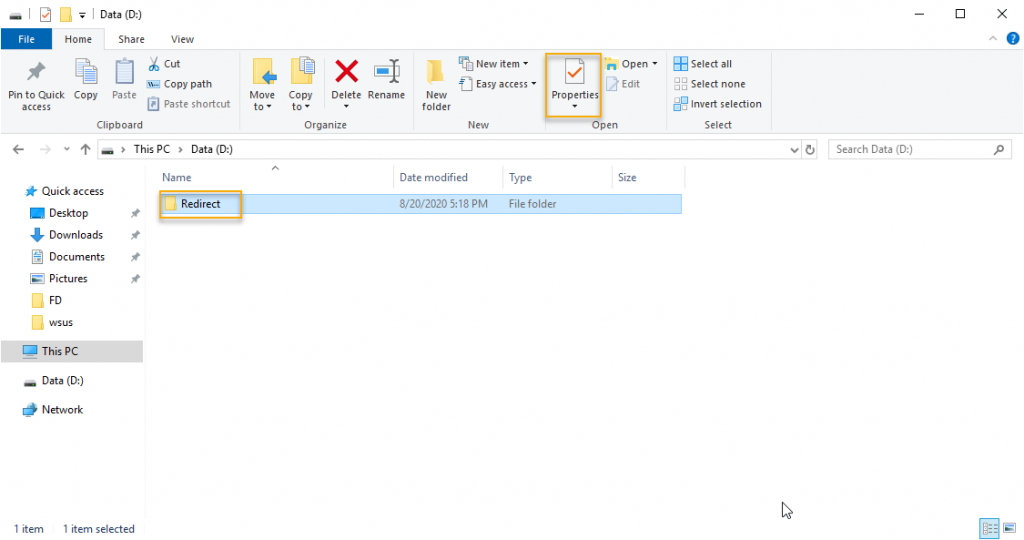
A new folder with the name Redirect is created on the data drive, as in the picture below.
Configure security settings and share the folder
We are going to set permission for the folder to store the user’s data with the highest level of security. Right-click the Redirect folder and click properties and go to the security tab and select advanced.
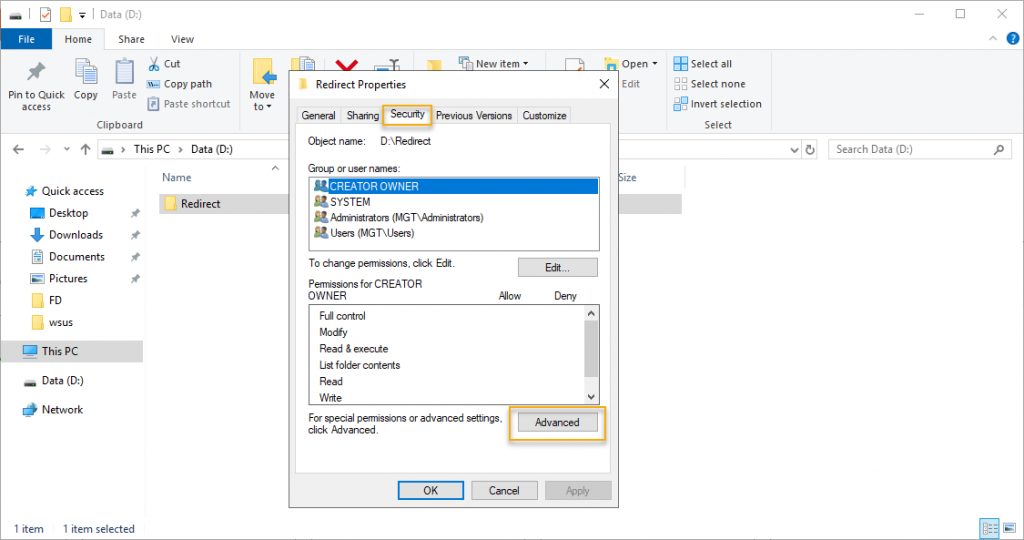
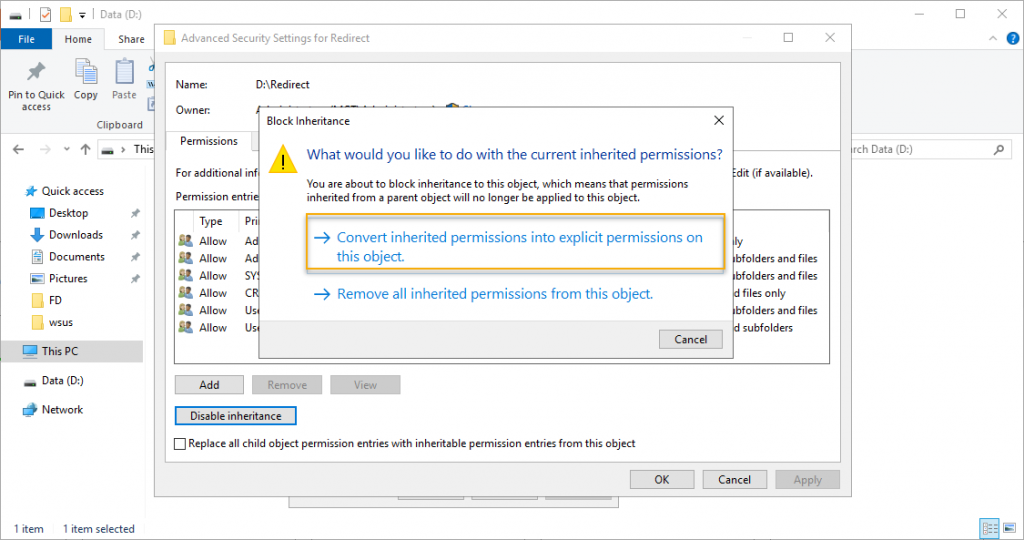
On the advanced properties disable inheritance, you will get a popup window to select a type of permission option you want to have for ease of further permission assignment.

To retain some of the permissions to tweak, select “Convert inherited permissions into explicit permissions on the object.” And click Add to go to permission entry for the redirect folder.
On the Permission entry, select the principal to add the security group that we had created before. In this case, Folder-Redirect-Users is the group name and click OK.

The permission type is Allow and applies to the folder that we are in and its subfolder and files. On the basic permission, leave full control and select all other checkboxes and click OK.

As we have added the security group and disabled inheritance, click OK and go to the Sharing tab on the same property settings.

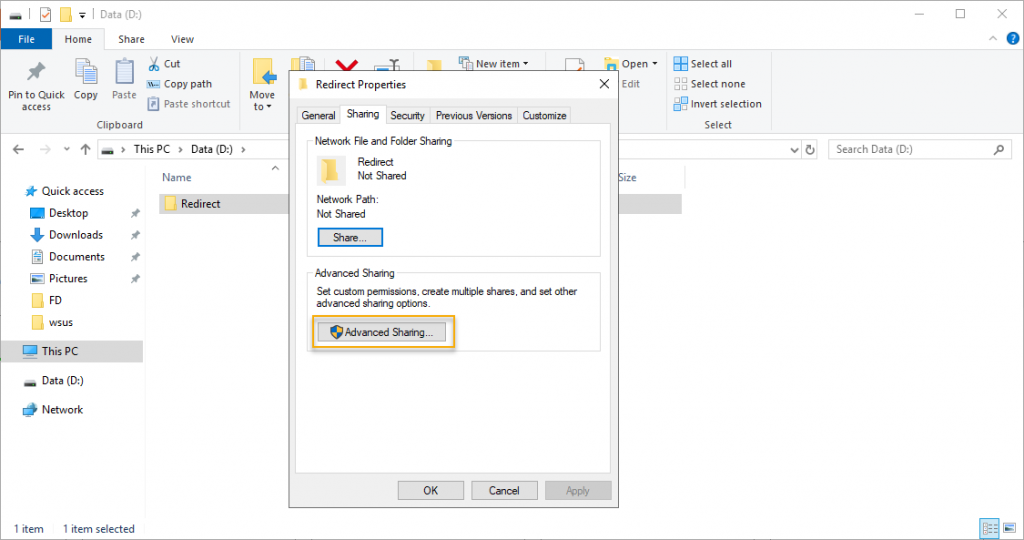
On the Sharing tab of properties, click advanced sharing to share this folder and give share permissions to the security group.
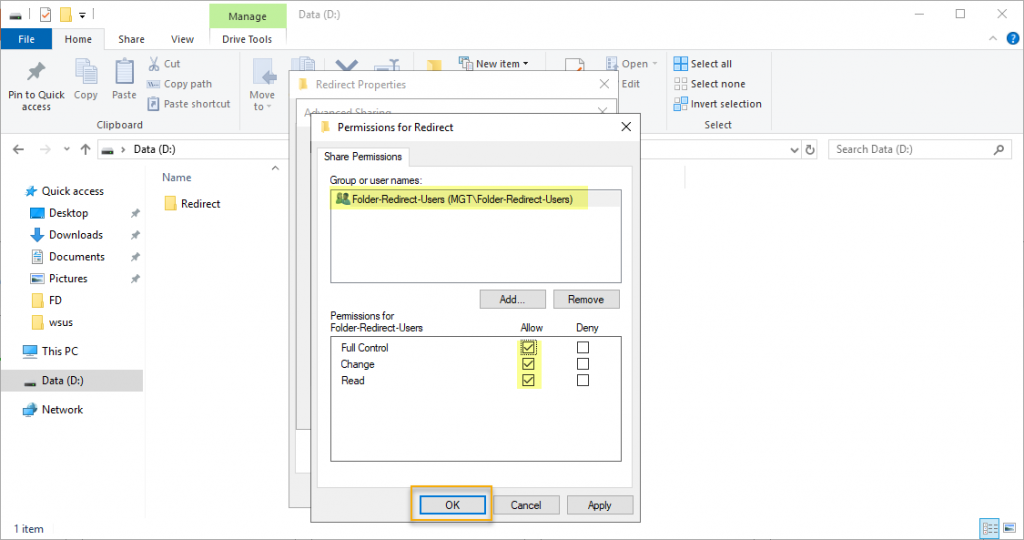
Remove Everyone share permission and add the security group and check Full Control that will add remaining sharing permission.
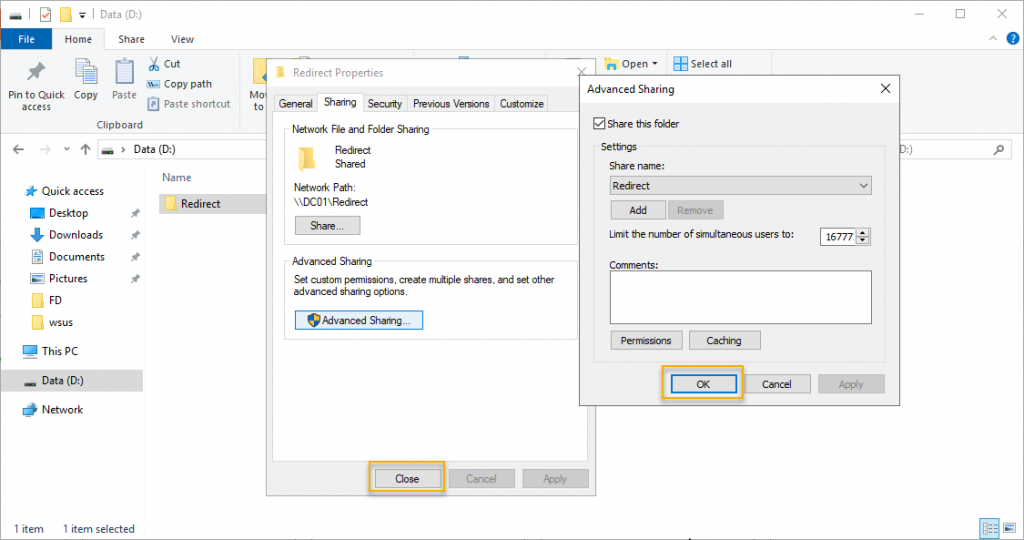
Click on the Advanced sharing tab and closeout folder properties. We have set security permission and share permission.
Create group policy and link it to company users OU
The next step in the folder redirection setup is to create a GPO and link it to the OU where the active directory user object resides. To launch the Group policy management console, go to the server manager, click the Tools menu, and select Group Policy management as in the picture below.
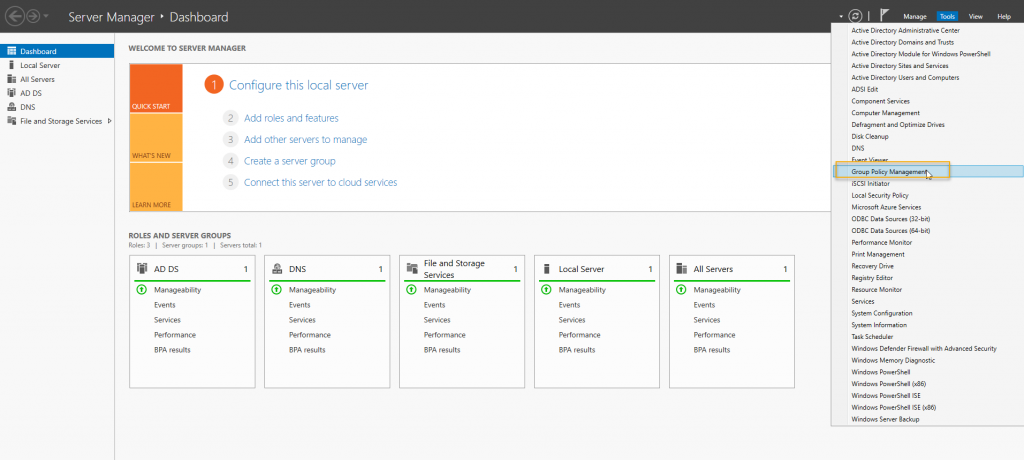
Expand the group policy management until the Users OU and click Create a GPO in the domain, and link it here… to create a new Group Policy Object and link it to the Users OU.

Give New GPO a descriptive name and click OK. In this demo, I have given Folder Redirect Policy.

Redirect documents folder with offline access
Once GPO created, right-click and edit the policy to modify the settings of the folder redirection policy settings.

Before going into group policy settings go back to the folder that we had created for folder redirection properties and on the sharing tab take down the Network path to use it on the folder redirection policy settings.
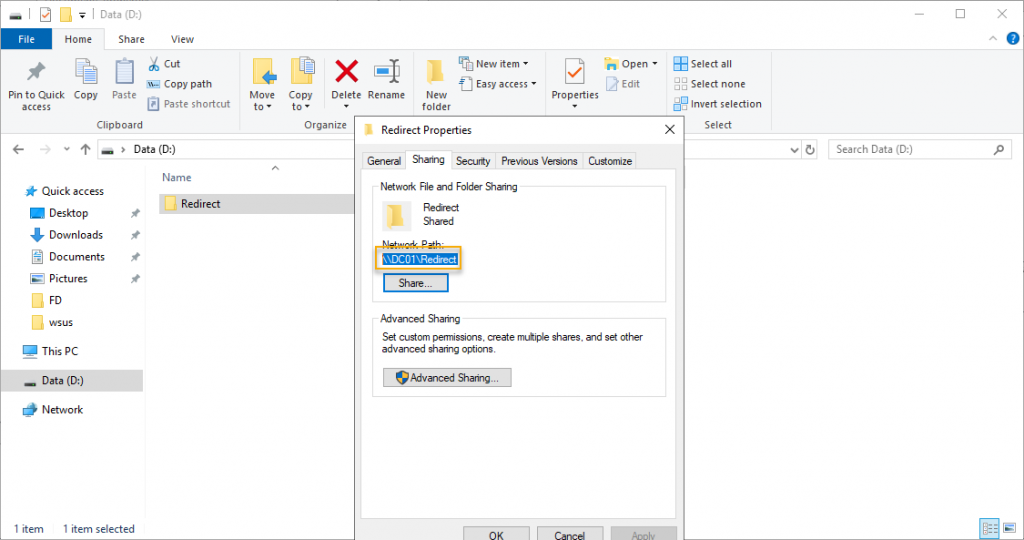
Return to the Folder-redirect-policy GPO and expand the GPO until Folder Redirection policy settings.
The path is User Configuration -> Policies -> Windows Settings -> Folder Redirection
In this demonstration, we are going to see the Folder redirection for the Documents folder. To make it simple and understandable, we are going to set up only one folder here. These settings apply to all other folders and have to go through the same settings to set them up.
Right-click Documents folder and go to properties, and on the target tab, choose a setting basic or advanced, in this demo basic is selected under settings property, that is “Redirect everyone’s folder to the same location.” On the Target folder location, the option “Created a folder for each user under the root path” selected and Root path is the one we have taken down in the previous step, which is the shared folder created earlier. Click Apply and move on to settings.

On the settings tab following option is selected and explained below. The option
Grant the user exclusive rights to Documents – This checkbox is for the user data on the shared folder only exclusively available for the particular user to access, for the administrator to access, the owner’s permission has to be set.
Move the contents of Documents to the new location. This checkbox is for if the folder on the local path has some documents or files in it that will be moved to the respective shared folder.
Redirect the folder back to the local user profile location when the policy is removed. This option is for offline access to the files, and also, when the policy is removed, the user will have the documents on the local profile.
Click OK to accept the settings modified so far.

There will be a warning message popped out as we have not selected the support for the older client operating system. Select yes and closeout the group policy management console, go to Windows 10 client computer to test the folder redirection.

We have returned to Group Policy management editor, so we can either set up other folders as we want or if we have completed, we can close the management edit and management console and test the Windows 10 client.

Test Folder Redirection policy
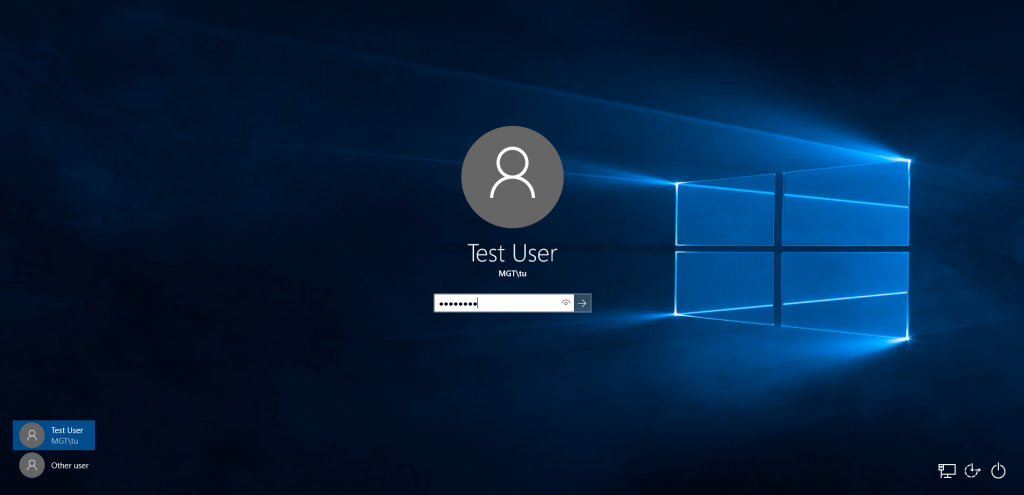
We are on the Windows 10 client computer and try to login as a test user with credentials.
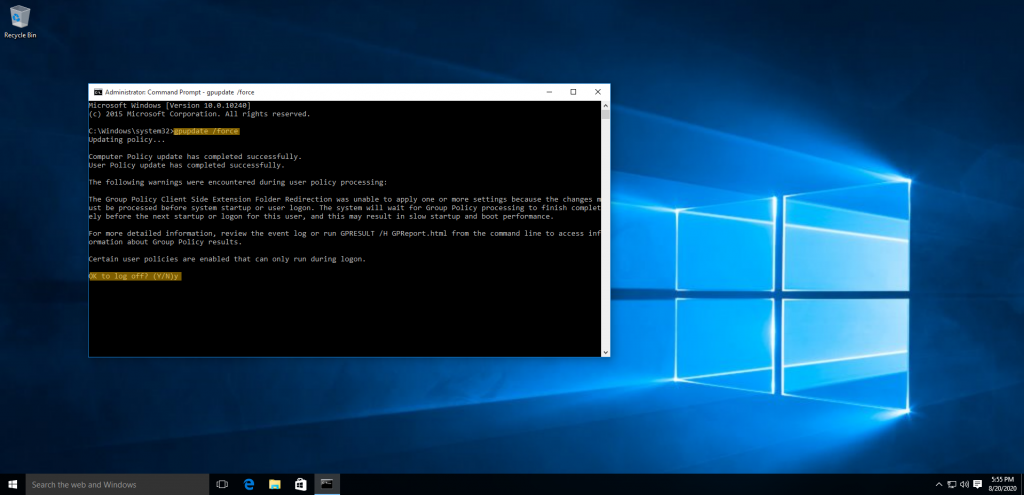
Once logged on to the Windows 10 client computer, open command prompt window, and type below command.
Gpupdate /force
The command will prompt to logoff and login as the user to apply the policy. Click ‘y’ on the prompt and let the client system logoff.
Now, to confirm folder direction work, right-click documents folder, and click properties.
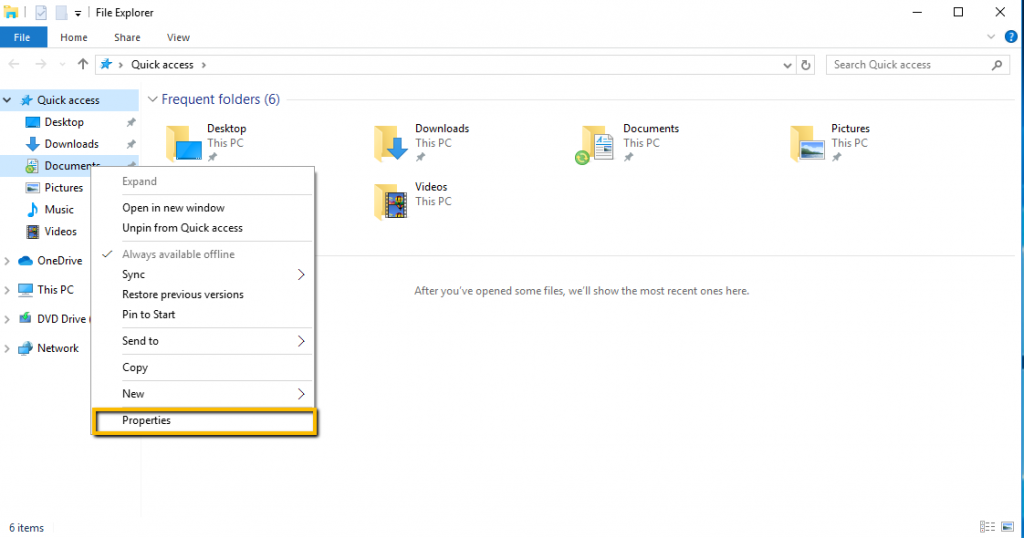
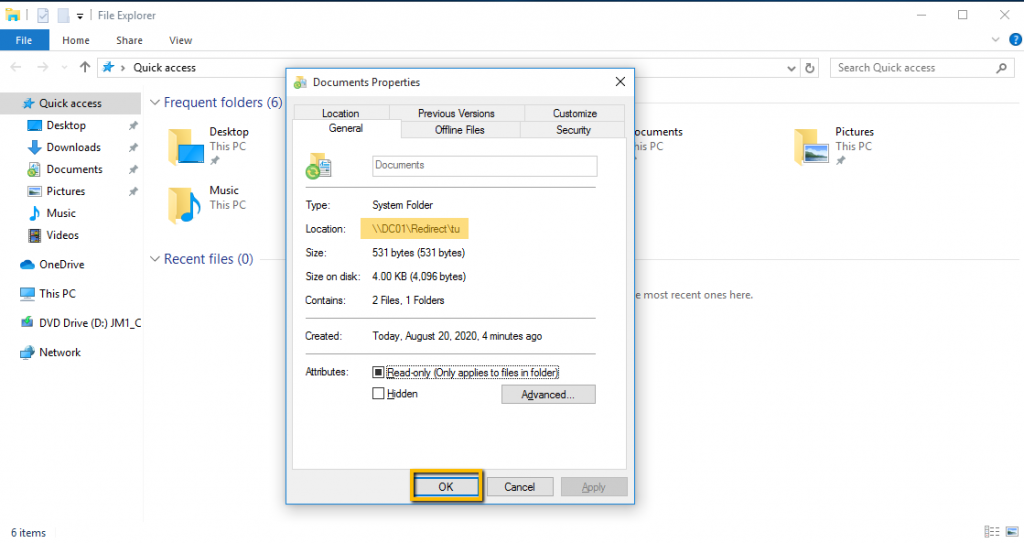
If you look closely, the location of the documents folder is on the shared drive.
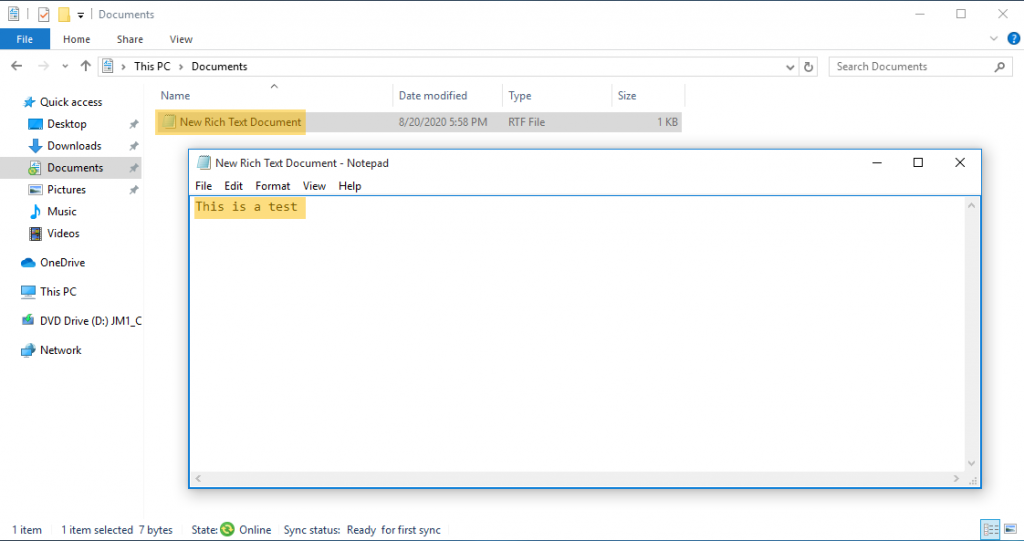
We are going to do one more test whether we can create a file and save them, we have created a test file and save it to the documents folder.
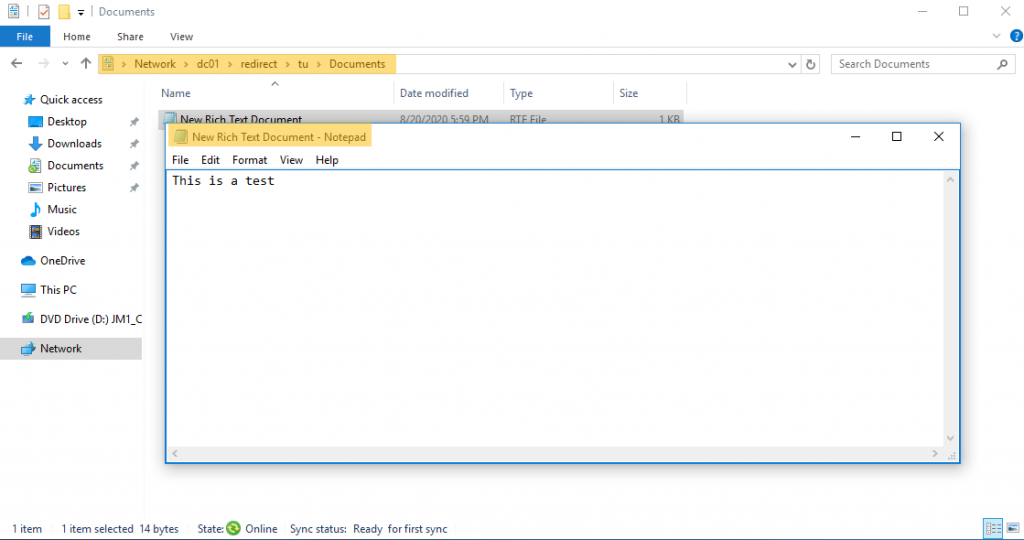
If you goto the network share and the user Redirect folder, you can see the file created in the folder under network share.
Conclusion
In this article, we have gone through the settings of redirect folders in Windows Server 2019 using a group policy object. On demonstrating the concept, we created a folder and shared it with a security group. A new GPO has been created and set up the folder redirection for the documents for the user’s profile data. We also have demonstrated the folder redirection test with Windows 10 client.
If you want to go through my other articles about Windows Server 2019, you can visit the link Get an Admin
You can use this article to setup folder redirection in your environment. You may have some questions or feedback to share with me, please click the comments below and share your thoughts. I am so happy to answer your questions.


1 Comment on "How to Easily Redirect Folders in Windows Server 2019"
Hi Kannan, I believe you have an error in the permissions for the Folder-Redirect-Users security group. I believe the security should be set that it applies to “This Folder Only” and the security set to “List folder/read data;Create folders/append data;Read attributes;Read extended attributes;Read;Traverse folder/execute file”. If not, I believe your instructions would give permission for all users created under that folder access to all other user folders. The intention for Folder-Redirect-Users security group security is to allow the user logging on to be able to create a Folder on the share (the GPO Folder Redirection) and then they would be the only person with access. The Creater-Owner permission takes care of that part. For reference, https://docs.microsoft.com/en-us/windows-server/storage/folder-redirection/deploy-folder-redirection.