
How to Deploy High Availability Remote Desktop Services
High Availability and Load Balancing Remote Desktop Services:
The Remote Desktop Services also called the Terminal Server predecessor is a value-added service of Windows Servers that is a cost-effective solution for the hardware and software licenses and ease of access to the apps. The RDS servers are very critical services as other Windows Services and high availability and Load Balancing is the most needed configuration in the Microsoft Windows Network. The High Availability and Load Balancing are not changed much from Windows Server 2012 R2 to the most recent release of Windows Server 2022.
In this article, we are going to look at important configurations required to set up High Availability and Load Balancing. The High availability part is relevant to RDS Connection Brokers and Load balancing will be of RDS Session Hosts. In order to configure RDS Connection Broker with High Availability, we need to have Microsoft SQL servers in place. Even though we have High availability for Connection Broker it is not complete if you have not configured failover for the Microsoft SQL server which holds the database of Connection Broker services. I have demonstrated RDS high availability with a single SQL server, but in your setup make sure you have configured high availability for the MSSQL server as well.
The following configurations are outlined for High Availability and Load Balancing in RDS:
- MS SQL Installation and configuration (pointed out some important parts)
- Deploy RDS roles with standard deployment.
- Create an Active Directory security group and add connection broker servers to it.
- Add Security group to MSSQL login and give dbcreator server role.
- Open port 1433 on the MSSQL server windows firewall.
- Create DNS A record for the RDS Farm hostname.
- Install MSSQL Client Tools connectivity and add ODBC x64 connection on Connection broker servers.
- Configure High Availability for Connection broker RDS server role.
- Configure User mapping to the Connection Broker DB as DB owner for the security group created in Step 3.
- Add a second Connection Broker server to the CB role.
- Add RD Licensing role to a server in the pool.
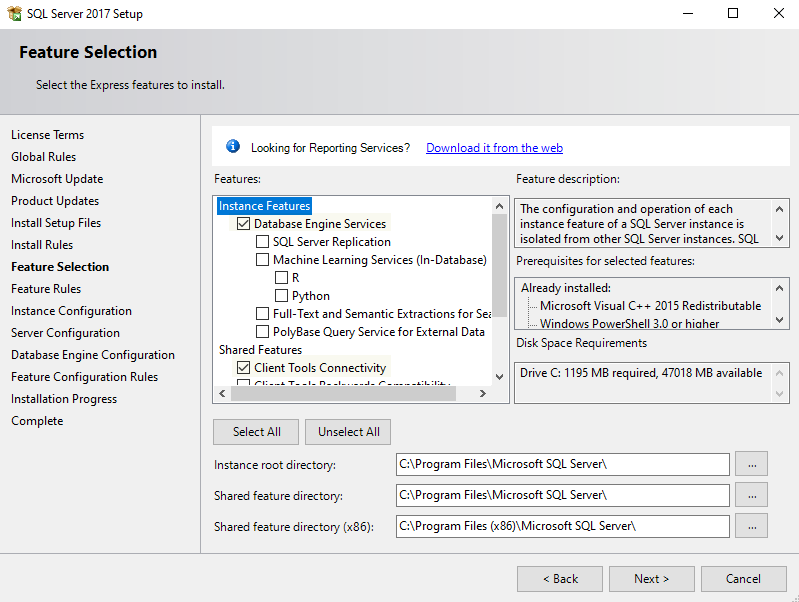
MS SQL Installation and configuration (pointed out some important parts)
Install the MSQL server with the Client Tools connectivity feature. This will allow client connectivity from the connection broker servers.
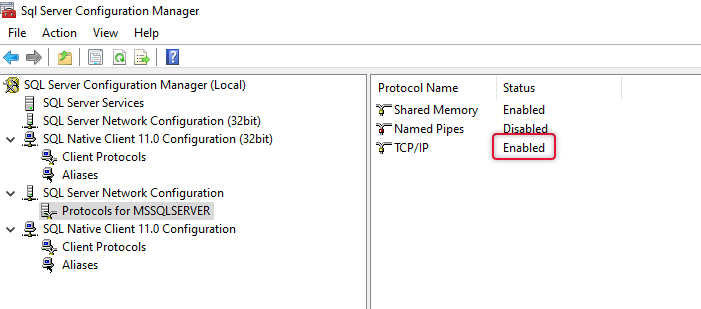
Once MSSQL server installation is complete, the TCP/IP protocol on the server needs to be enabled, and check dynamics port on the properties of the TCP/IP protocol Is set to port number 1433.
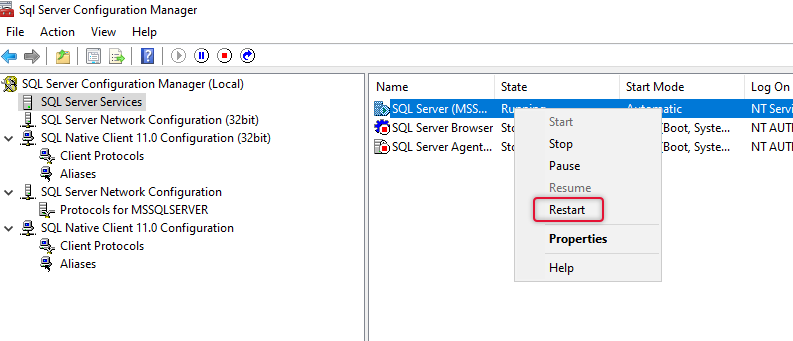
After enabling the TCP/IP port, restart the SQL server service from the services window.
Now, that the SQL server has been set up and configured, if you already have the SQL server in place just make sure the TCP/IP protocol is enabled and the port is set correctly.
- Deploy RDS roles with standard deployment.
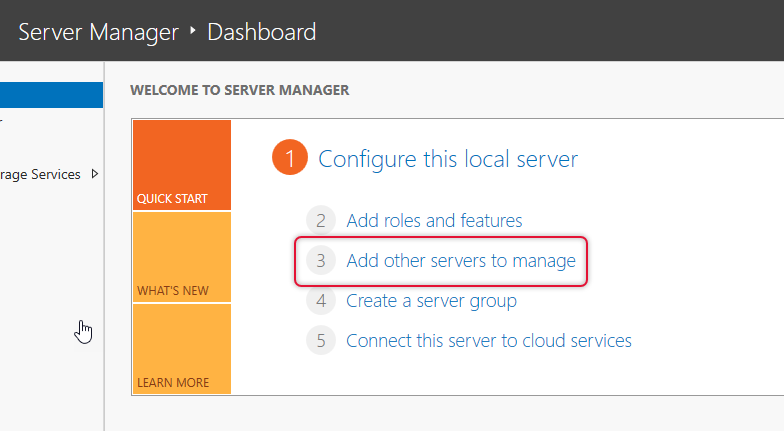
The next part is to deploy RDS roles on one of the servers assigned for RDS deployment. Before doing the deployment, make sure you have added servers that you are configuring with RDS roles already added in the server pool.
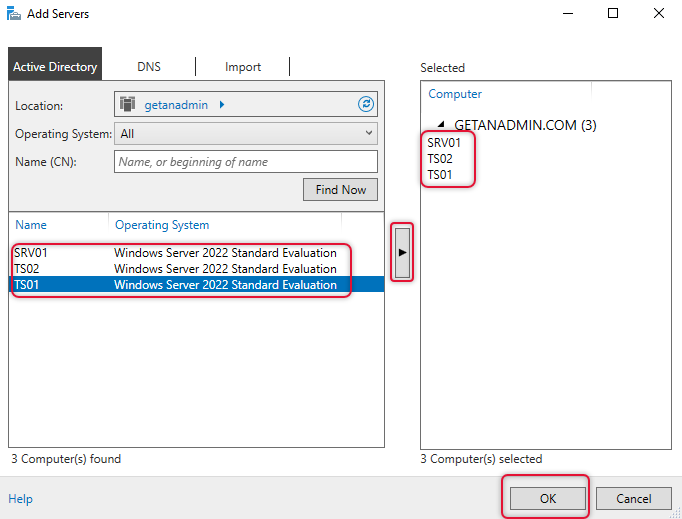
To add servers to the server pool, click Add other servers to manage and add the servers by selecting appropriately
When you click the find now button on the add other servers window, you will be listed out with the list of servers in the network. If your network is big then type the names and add one by one.
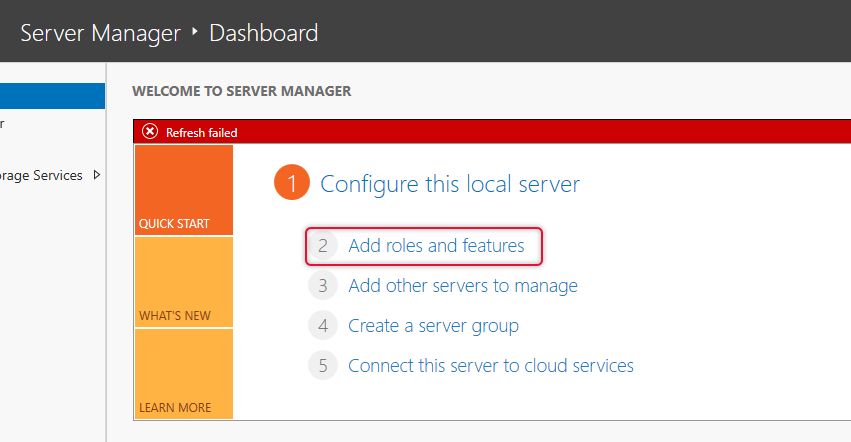
Now servers are added to the server pool, and you are ready to start the deployment of RDS with standard deployment.
Click Add roles and features from the server manager console and the add roles and features wizard will be shown to you for further actions.
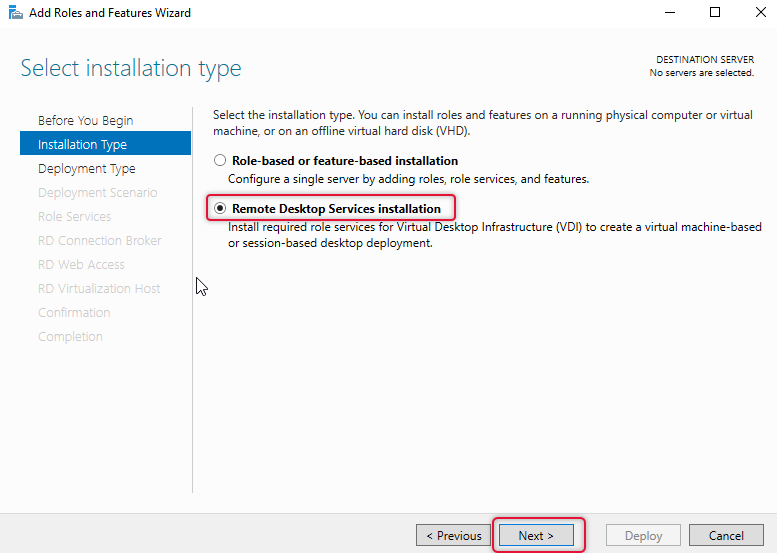
Here, we are installing remote desktop server roles, so select remote desktop services installation and click Next.
On the deployment, type select Standard deployment and click Next.

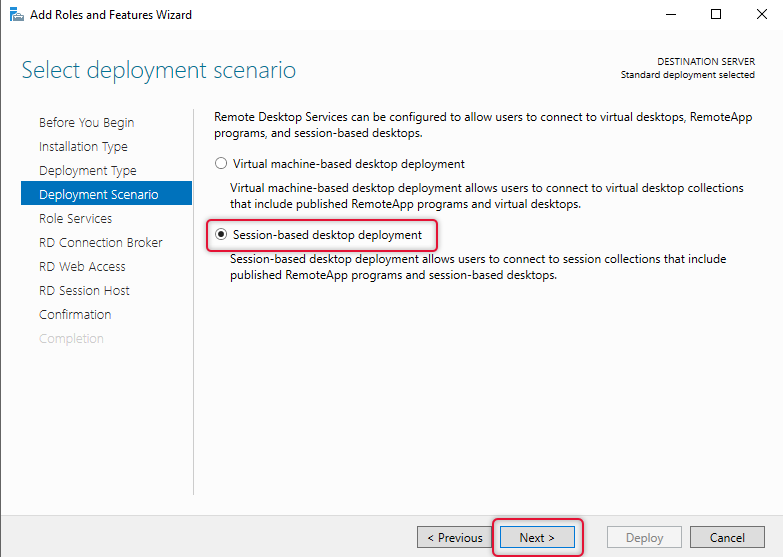
On the Next screen of the adding roles, select session-based desktop deployment and click Next.
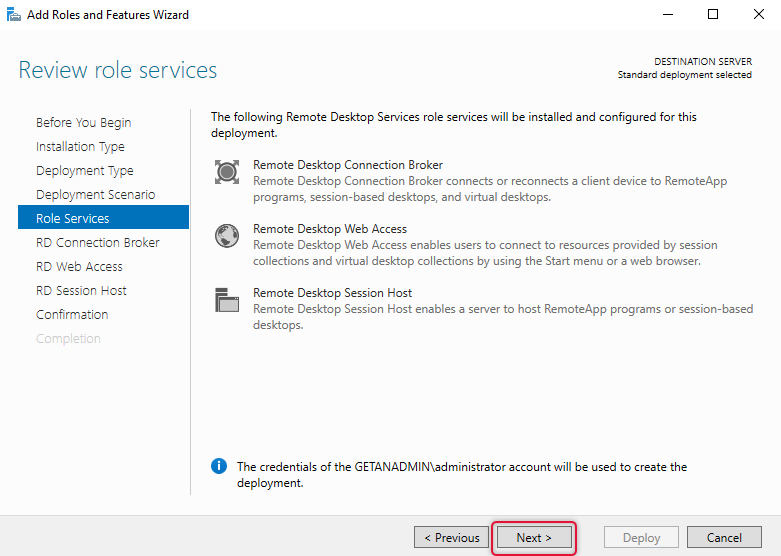
The Review Role services screen goes through the services and clicks Next.
Select the appropriate server for connection broker, this is the first server you are installing you can add only one server to this role service, select the appropriate one and click Next.

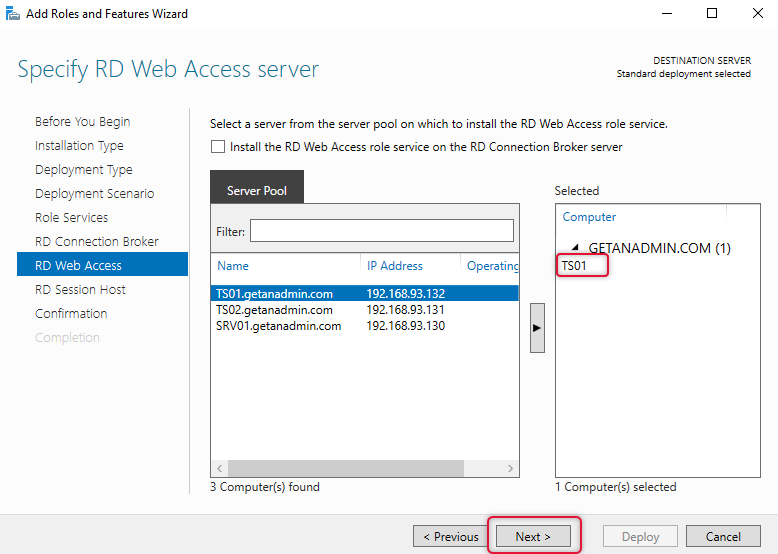
On the RD web service select the web service role server and click next.
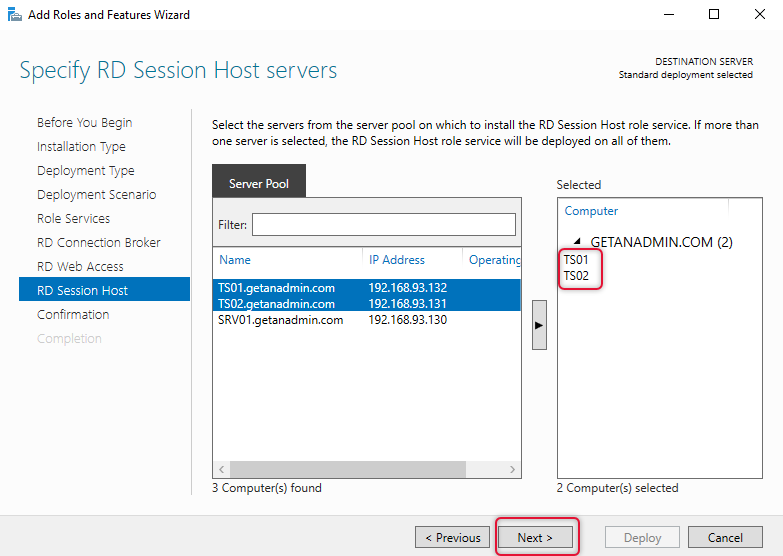
The next screen is to select session hosts, here you can select more than one server, I have selected ts01 and ts02. Click Next to continue.
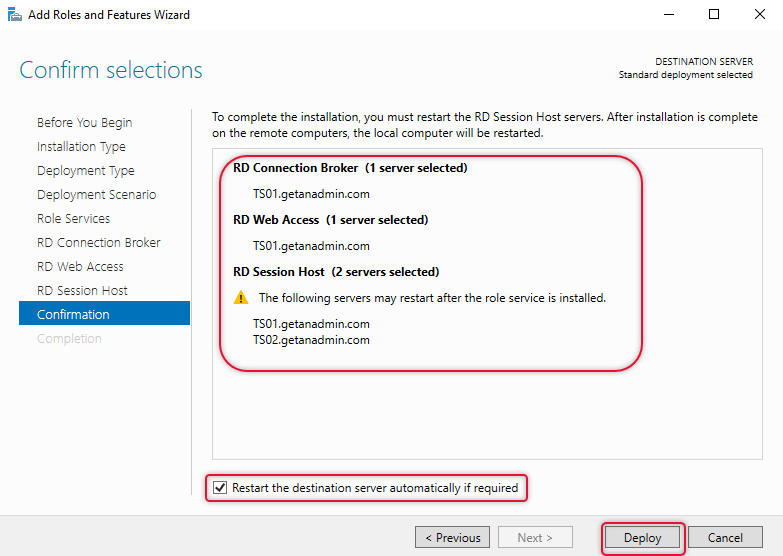
Verify all the server selections are as you intended and click Deploy. Make sure the restart check box is checked.
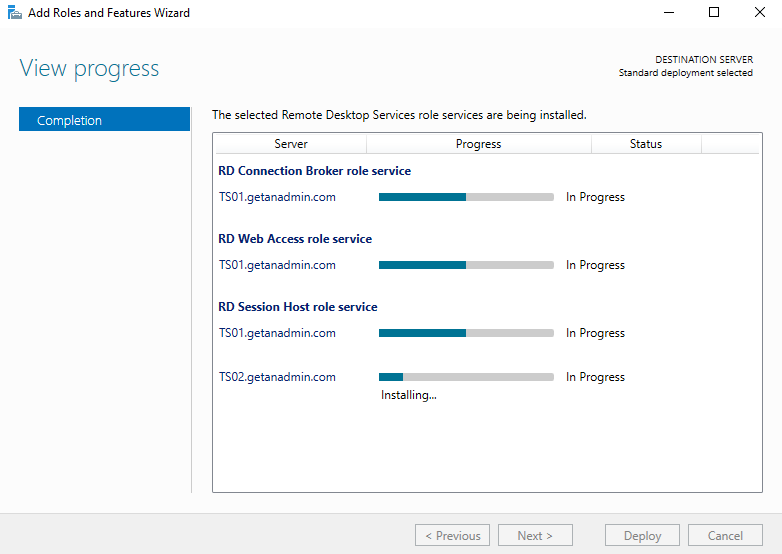
The progress bar indicates the progress of the role services deployment, the server will restart in between and start the installation again when you log in to the server after a restart.
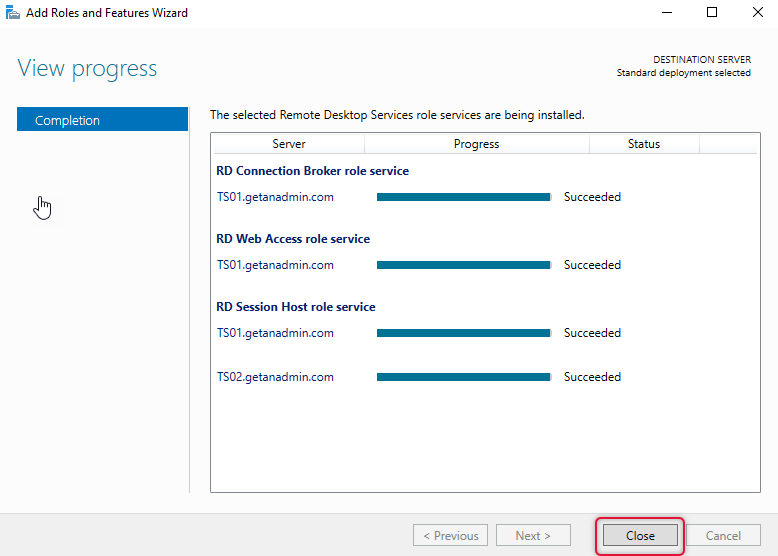
The below screen shows the deployment completion, and all role services are successfully installed. Click close to close out the deployment window.
- Create an Active Directory security group and add connection broker servers to it.
Now, we are going to create a security group and add the connection broker server’s computer accounts to it. We are creating a security group with connection broker servers in it to assign the DB creator role on the MSSQL server so that the connection broker server can create a database on the MSSQL server.
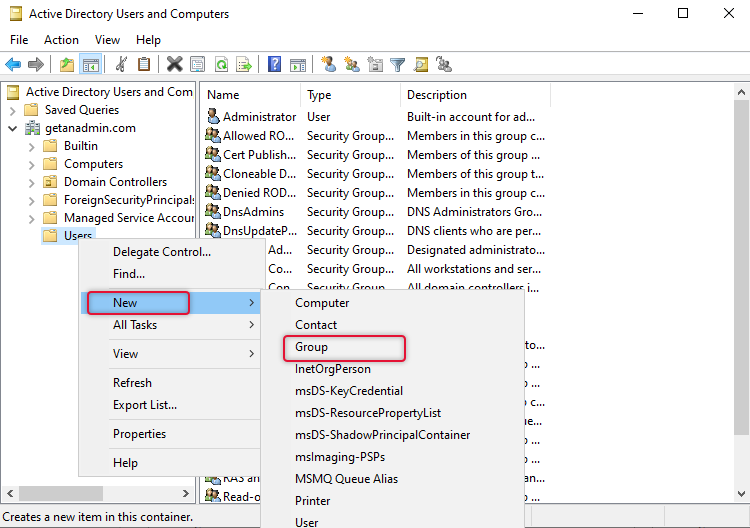
On the domain controller launch Active Directory Users and computer and right-click on an Organizational Unit and point to New/Group to add a security group.
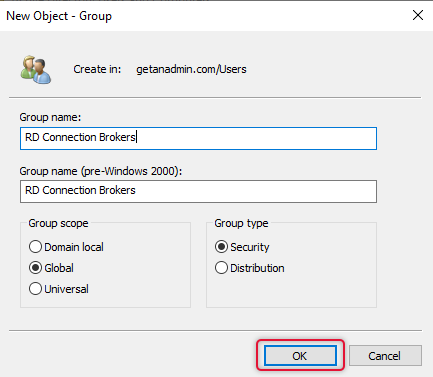
On the New object for group dialogue box opens type a name for this group that would be descriptive and leave security scope and type default and clicks OK.
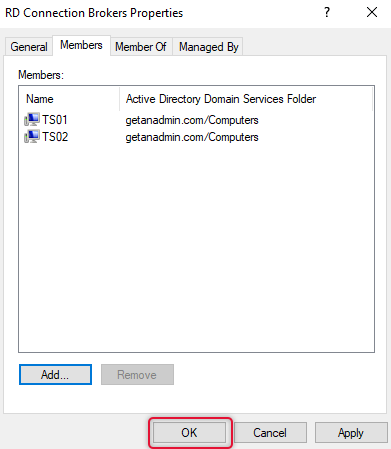
Once the Security group has been created, right-click the group, select properties and go to the Members tab and add connection broker servers that you are intended to configure. Make sure you have selected object type to Computers and location to the active directory domain.
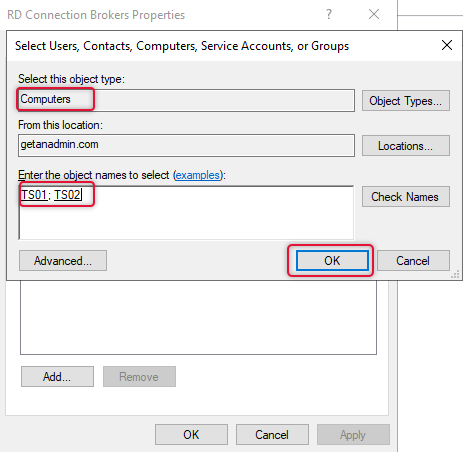
Once the connection broker servers are added, click OK to close the group object properties.
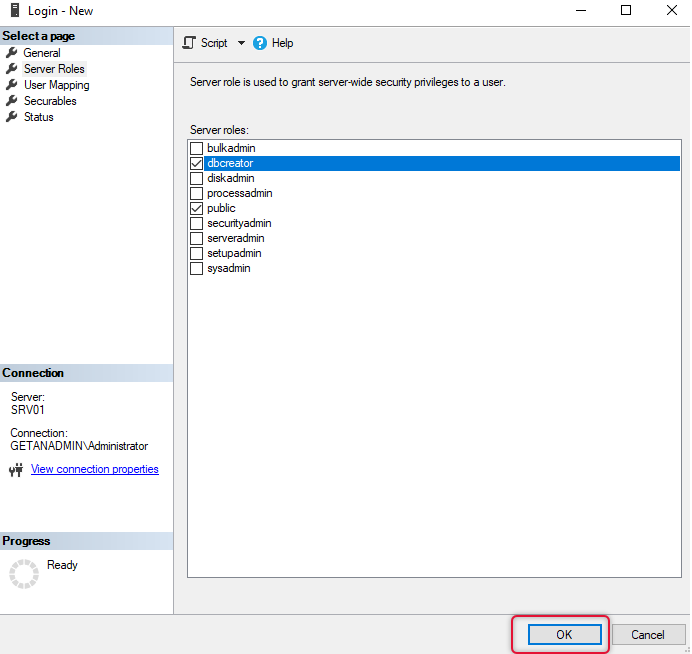
- Add Security group to MSSQL login and give dbcreator server role.
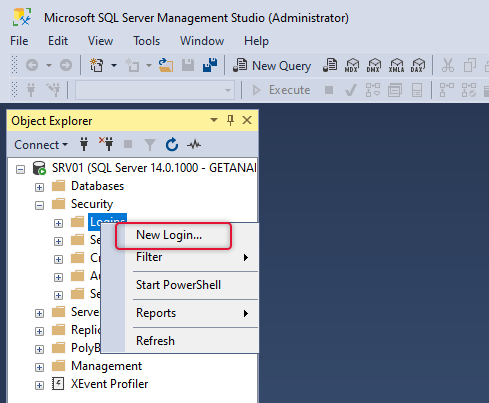
The next step is to add the security group that was created In the previous step in the MSSQL security login menu. Launch SQL Server Management Studio on SQL server and expand security and right-click Logins and select New Login as in the screenshot below.
On the general tab and login name field search for the security group with connection broker computer object in it and leave other settings default.
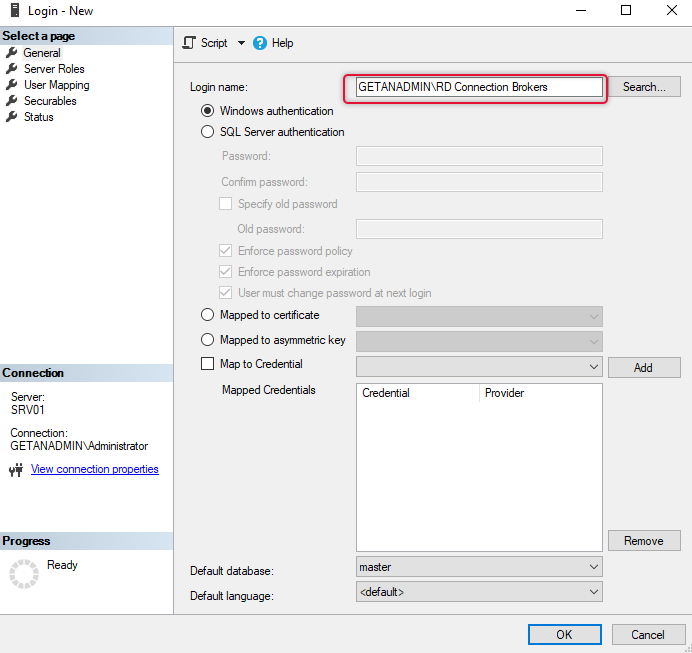
On the Server, roles tab select dbcreator server role and click OK to exit the dialogue box.
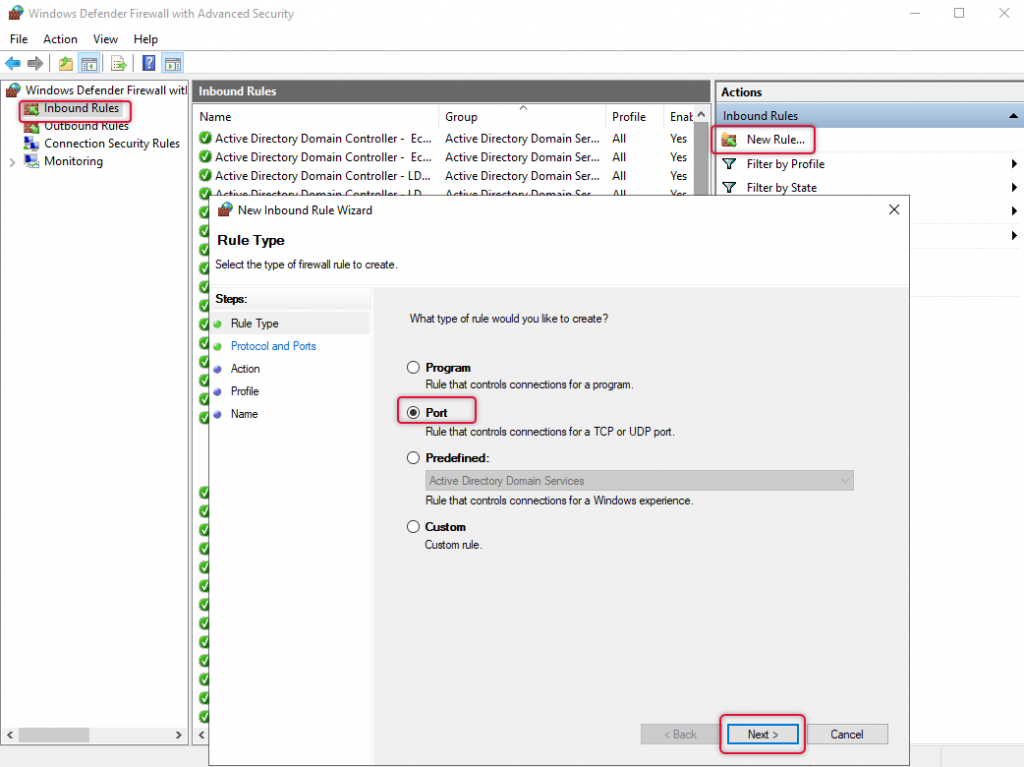
Open port 1433 on the MSSQL server windows firewall.
Once we completed adding connection broker servers to dbcreator role with the security group, the next step is to open the MSSQL default port 1433 on the windows firewall on the MSSQL server, Launch the windows firewall, and follow the steps below.
Select Inbound Roles and on the Actions menu click the new Rule. And on the New inbound rule wizard select Port and click Next.
Leave the apply to TCP and type the specific local ports to 1433 and click Next.

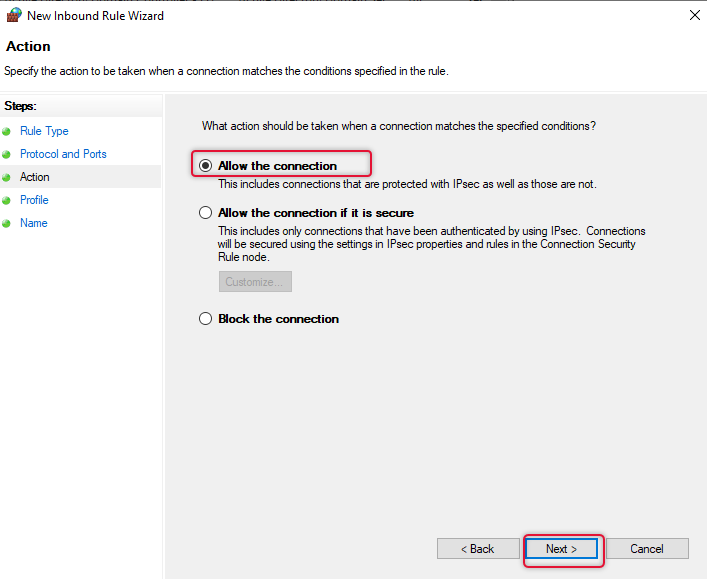
On the Action, tab select “Allow the connection” and click Next.
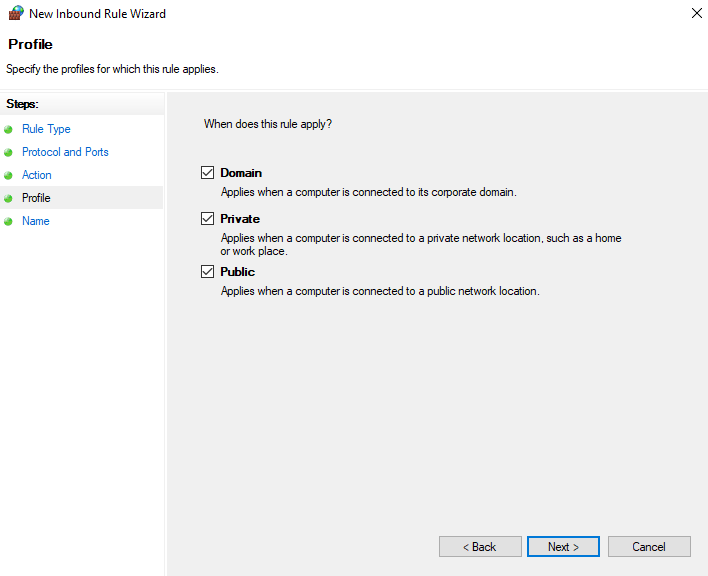
On the profiles tab, leave all profiles selected and click Next.
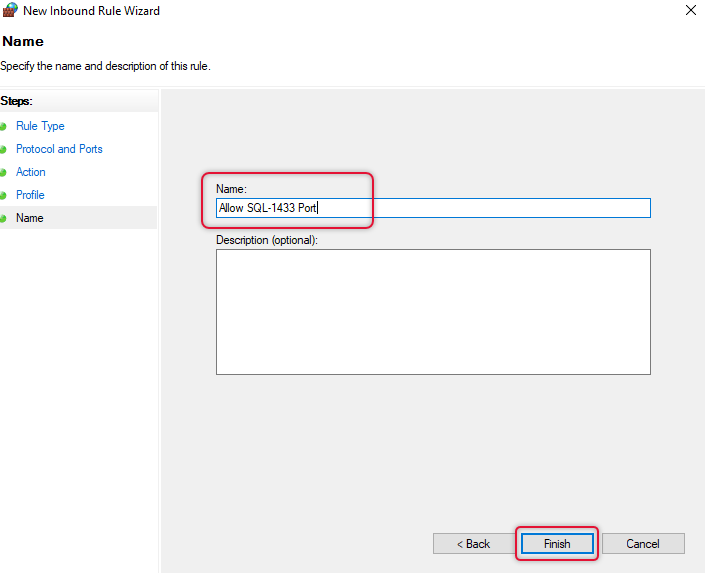
Give a descriptive name and click Finish to end the inbound rule wizard.
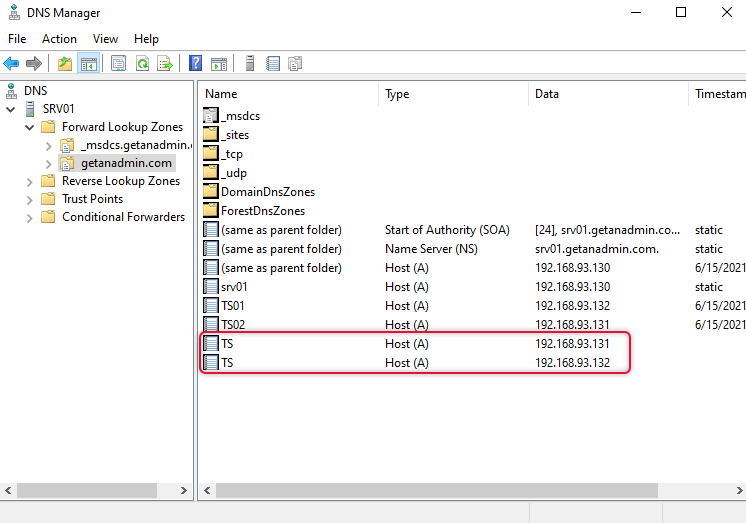
Create DNS A record for the RDS Farm hostname.
We have completed the inbound rule wizard and the next step is going to be to create “DNS Round Robin”. This means creating A records for the farm name and giving the IP address of each connection broker server IP address. The created Farm and its records are depicted on the screen capture below, so create the records as per your environment IP addresses of connection broker servers.
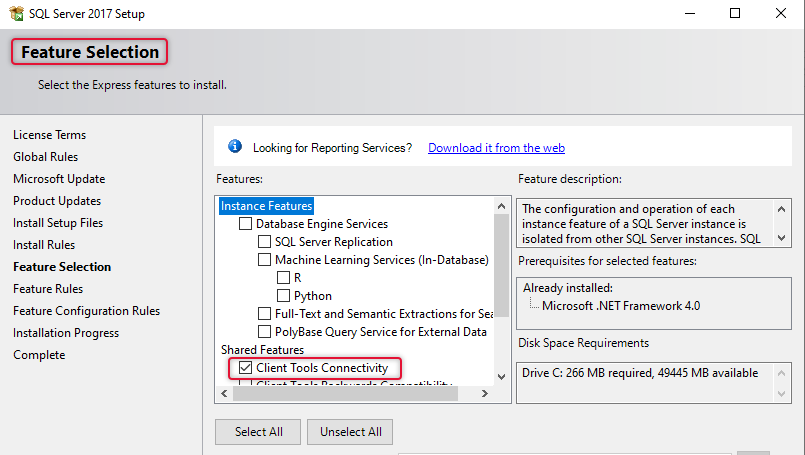
Install MSSQL Client Tools connectivity and add ODBC x64 connection on Connection broker servers
The next action is to install client tools connectivity on each connections broker server. Go to each connection broker serves and launch the MSSQL server setup from the MSSQL server installation media. The only thing we need to select is Client tools connectivity and remove all other selections on the Feature selection. The following steps must be done on each connection broker server. As the steps are identical, I have shown the demo of this installation and configuration one time. You need to do the same on all the connection broker servers.
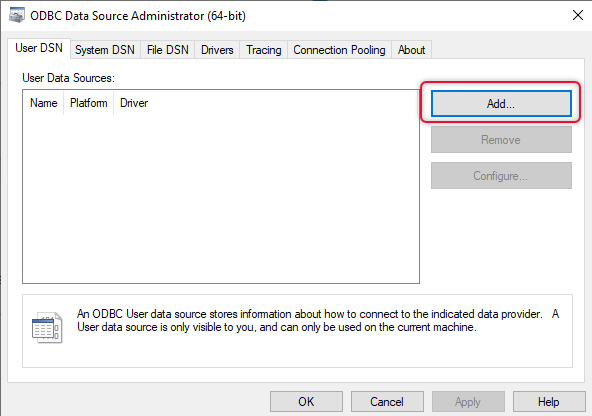
On each connection broker server, go to server manager à Tools and launch ODBC data administrator x64. The following dialogue box pops up and clicks add to add a data source.
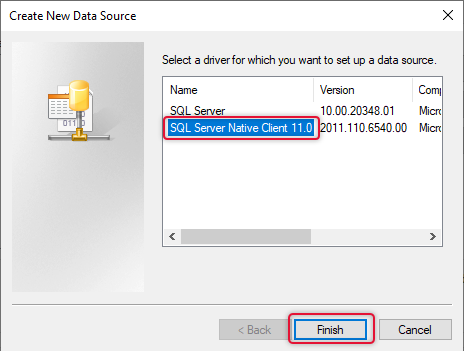
Select SQL Server Native Client 11.0 and click Finish, the Create a new data source to SQL server wizard will open on clicking the Finish button.
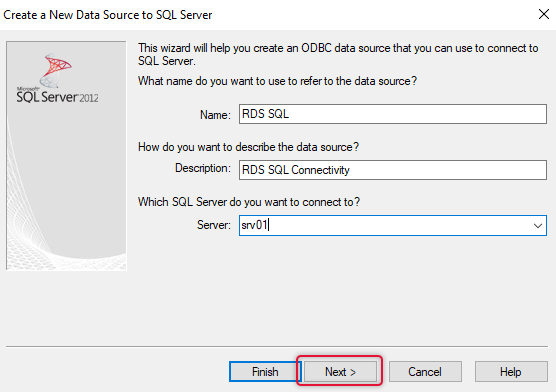
Give some descriptive name and description and type the name of the SQL server and click Next.
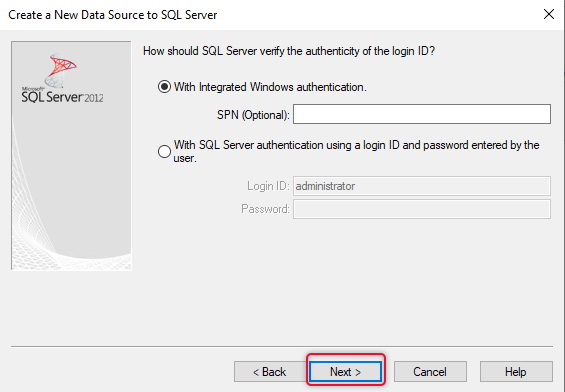
Leave the integrated windows authentication selected and click Next.
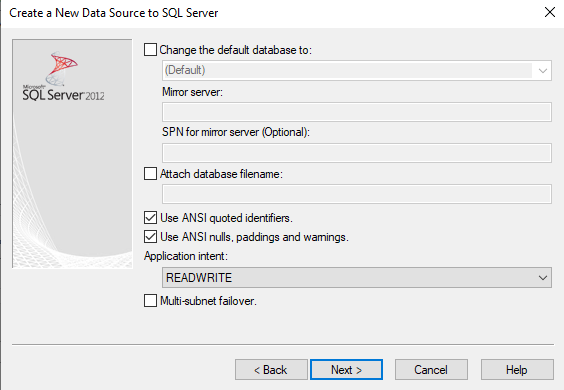
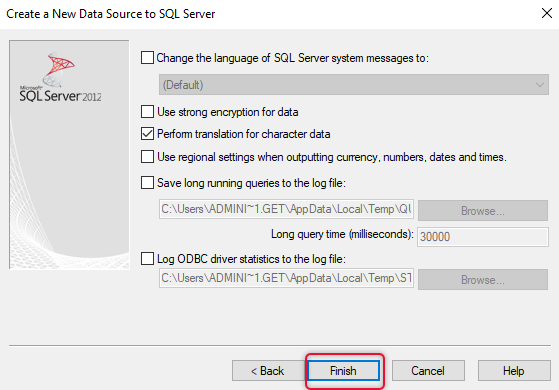
Leave the settings as default and click Next.
Click Finish to end the wizard.
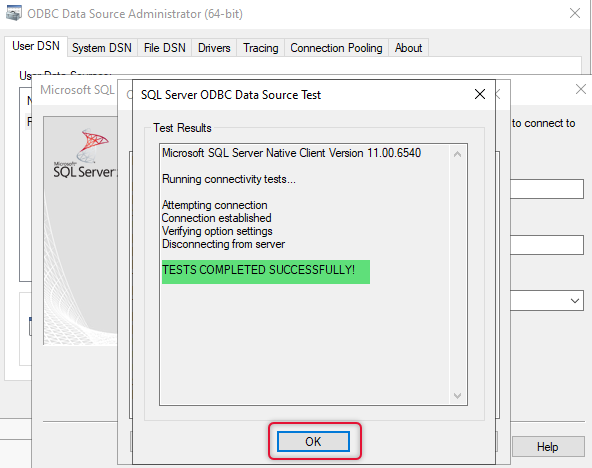
Click Test data source and find the Tests Completed Successfully popup and click OK. Do these steps on other connection broker servers.
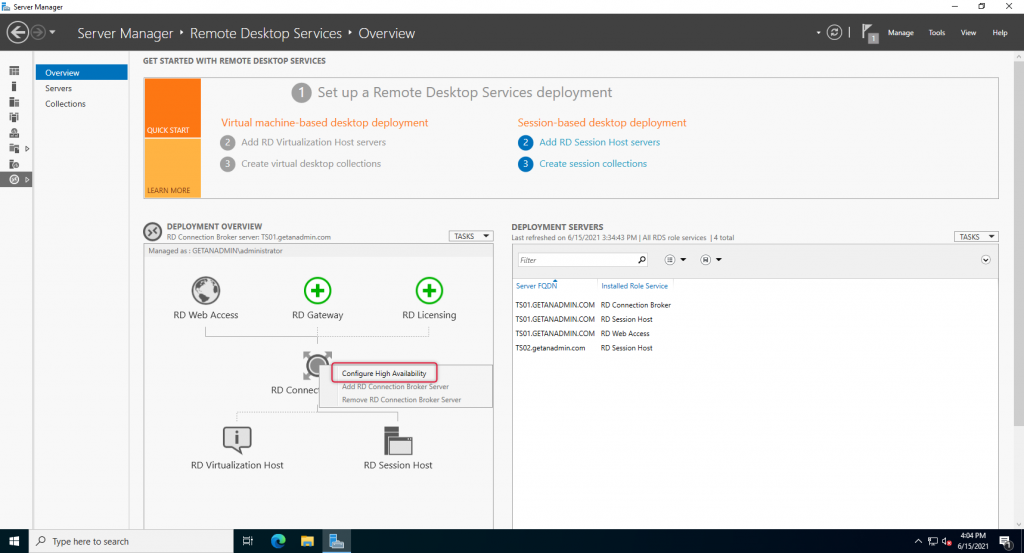
Configure High Availability for Connection broker RDS server role.
Now we are ready to configure the connection broker server’s High Availability. Launch Server manager on remove Desktops services management servers, this happens to be the first server that you install the RDS role service, and right-click on the connection brokers icon and click Configure High Availability.
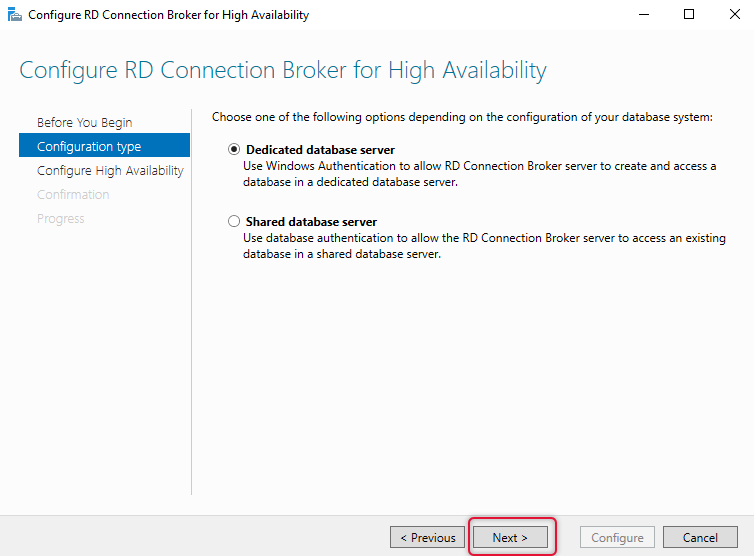
Leave the Dedicated database server radio button selected and click Next.
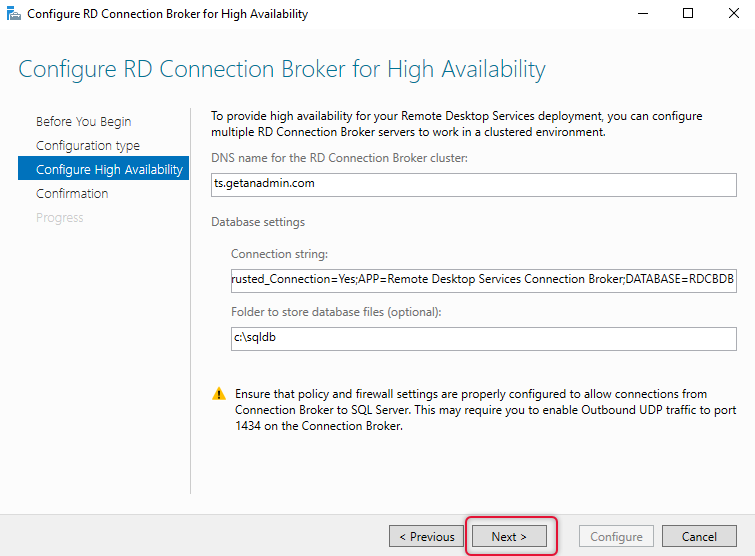
On the Configure High availability tab, type the details intuitive to your environments such as SQL Server, Far, and database name, and click next. The explanation is given below.
DNS Name connection Broker cluster:
Ts.getanadmin.com
Connection string:
DRIVER=SQL Server Native Client 11.0;SERVER=srv01;Trusted_Connection=Yes;APP=Remote Desktop Services Connection Broker;DATABASE=RDCBDB
Physical path:
C:\sqldb
In your environment replace SRV01 with your MSSQL server and RDCBDB with a database name appropriate to you. It’s ok to leave this database name if you have no specific names.
Ensure the folder name you have typed on the physical path exists on the SQL server.
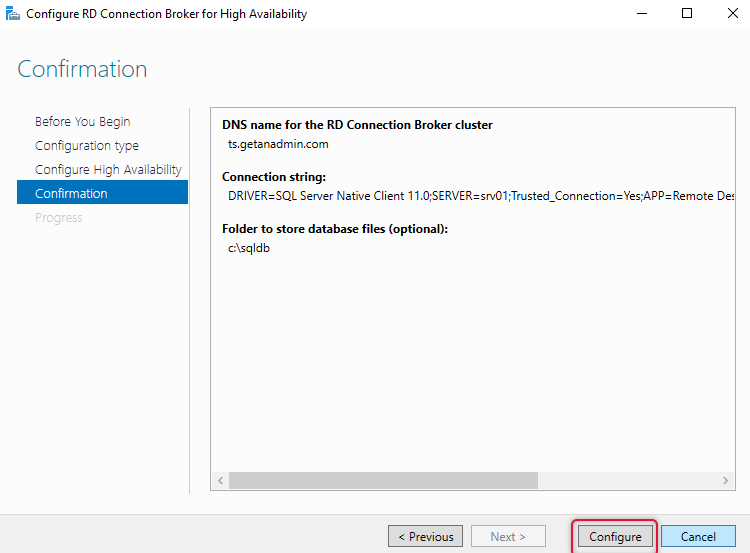
If your high availability details are correct you will be shown with the confirmation dialogue and click configure to configure High Availability.
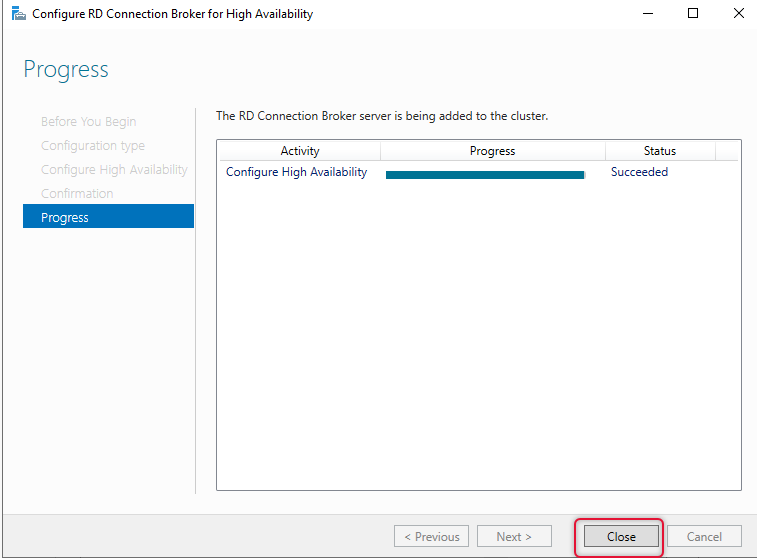
The progress bar indicated that the High availability configuration is succeeded, and you can click close to close the wizard.
The RDS connection broker high availability configuration is completed and now the steps to follow is to add the rest of the connection broker servers to the connection broker configuration.
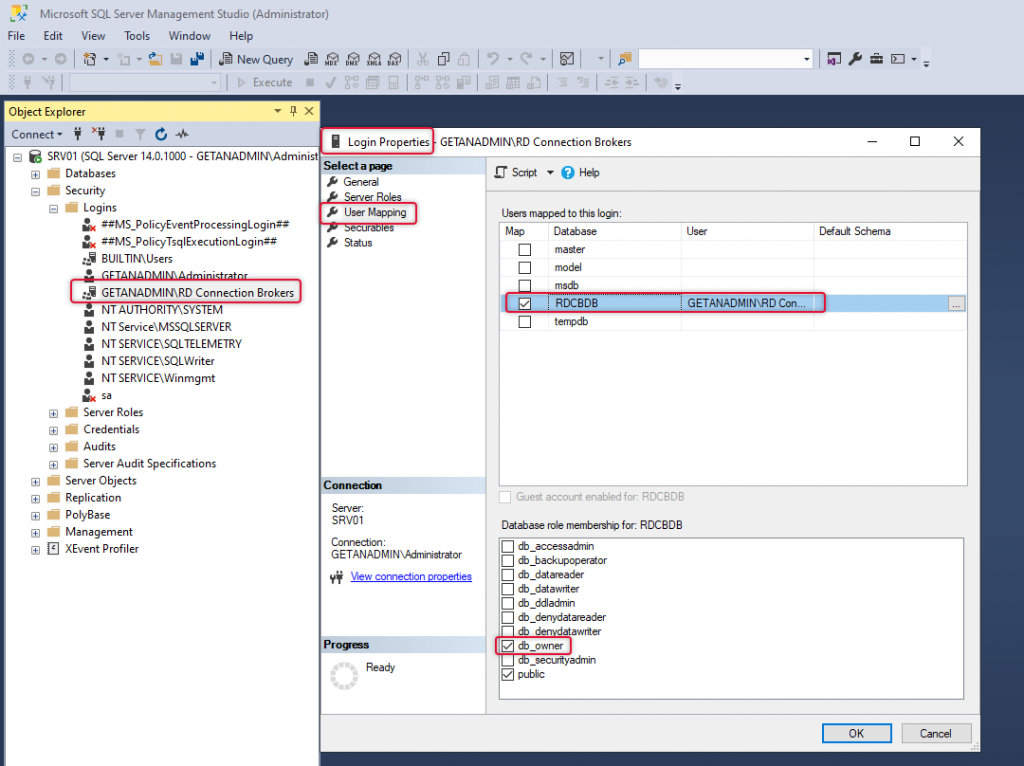
Before adding the connection broker servers, we need to make the security group the owner of the database that we created In the configure high availability wizard in our previous step.
Launch SQL Server Management Studio and go to the Logins tab and select security group to open login properties of the security group. On the User Mapping tab on the left side navigation, select the database that configures the high availability wizard created and change the database role membership to DB owner.
Configure User mapping to the Connection Broker DB as DB owner for the security group created in Step 3
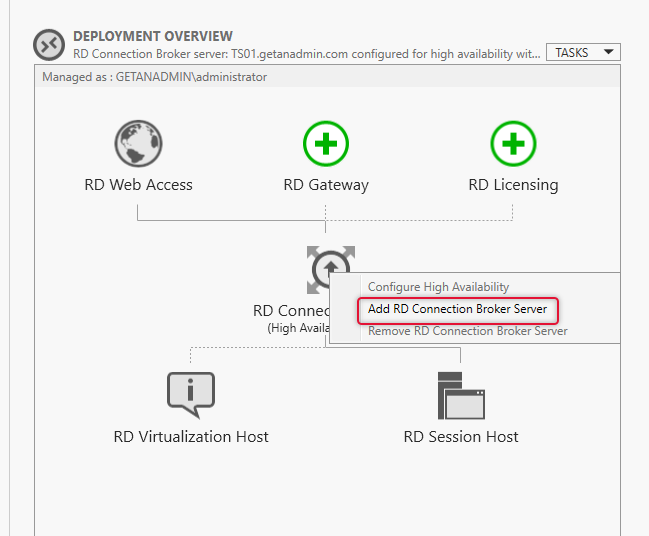
Now the security group is the DB owner of the database, now we go back to RDS Server and launch server manager and right-click the Connection broker icon, and select Add RD Connection Broker Server.
Add a second Connection Broker server to the CB role
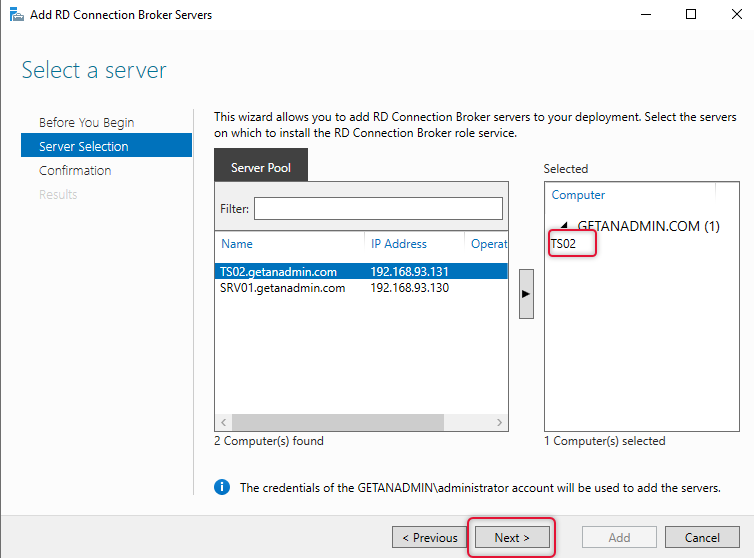
The Add Connection Broker servers wizard pops up and on the server selection tab select the connection broker server that you intended to add and click Next.
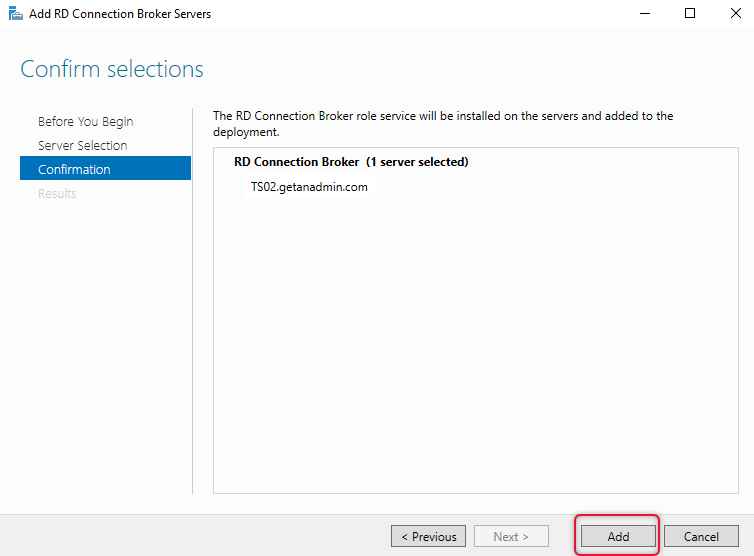
On the confirmation, dialogue click adds to confirm the addition of the second connection broker server.
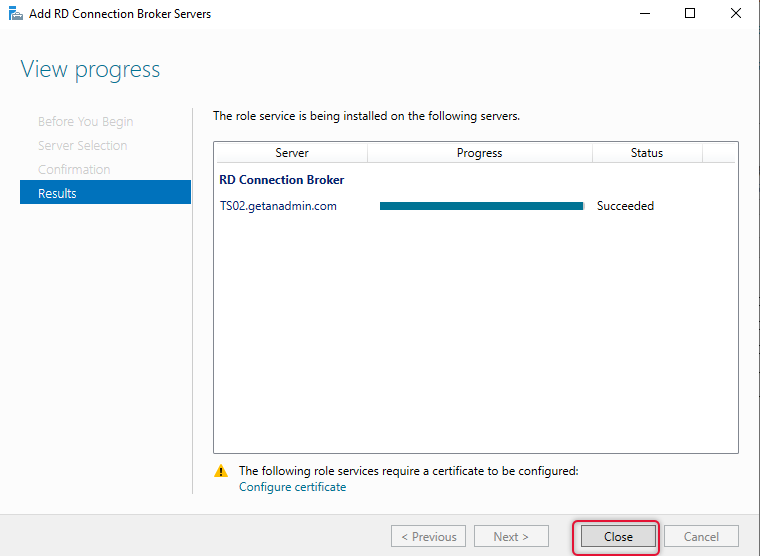
The results tab shows the progress and the “succeeded” status after adding the server to the server pool. Click close to end the ”Add Connection Broker Server” wizard.
The very next and last part of this demonstration is adding RD Licensing Servers to RD Servers Farm. Click on the Green icon with add licensing server to launch add licensing server wizard. Once the add licensing server wizard pops up select the server meant for Licensing and click Next.
Add RD Licensing role to a server in the pool
On the confirmation tab with the Licensing server selected click to add to add this server as Licensing server on the RD Farm.

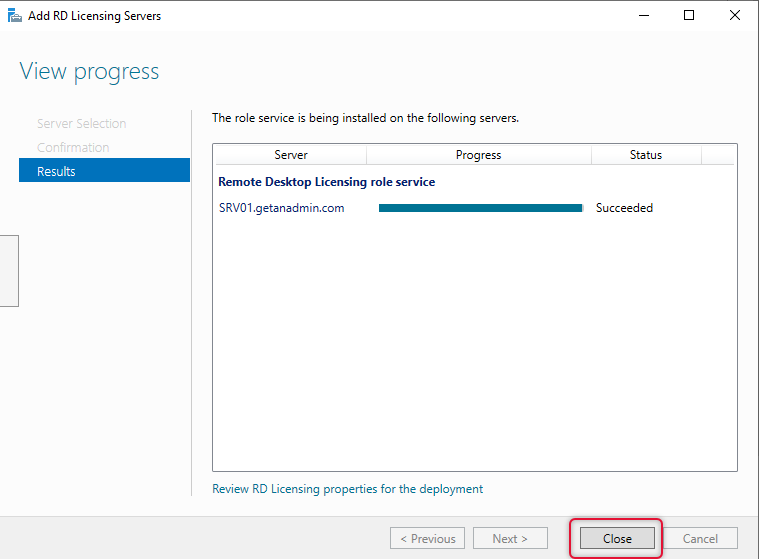
The Wizard shows that the status of adding Licensing server is succeeded and click close to close the wizard and back to server manager with Remote Desktop configuration.
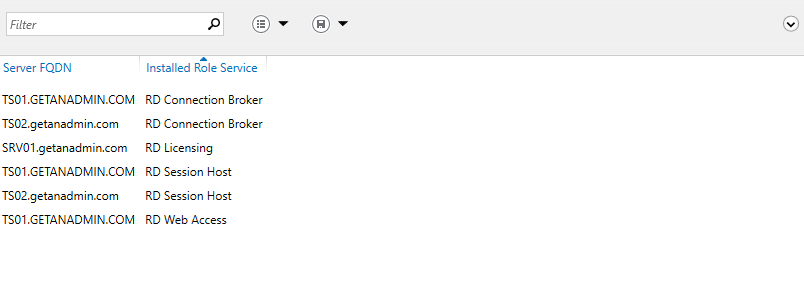
Here is the list of servers and their installed Role services from Remote Desktop Configuration.
High Availability Remote Desktop Services Conclusion:
This is the end of the demonstration and in this article, we have seen how to install and configure Remote desktop Services in infrastructure with multiple servers with different role services using standard Installation. We also looked at how to install and configure the connection broker server’s High Availability and add connection broker servers o the High availability pool. We have seen how to add Licensing server in the end.
I hope this will help administrators assigned with the RD Farm installation and configuration work. I am excited to receive comments from you, send me your comments and feedback to help others and improve this article and other articles on this website. And, I am pleased that you have read this article to the end of it. I look forward to meeting you in some other article that you are expecting to join with. See you next time and I sign off now.