
How to Properly Setup Claims Authentication Using ADFS In Exchange Server
Preface
This document will guide you through the steps to provide Microsoft Exchange Claims Based Authentication Using ADFS to the Outlook on the Web (OWA) and Exchange Admin Center (EAC) of Exchange 2016 Server. The ADFS server configured in this tutorial is deployed on top of Windows Server 2016. Click here to go to the Microsoft website for How to Web Deploy from Visual Studio
How Claims Authentication Using ADFS with Exchange Server Works
In a big picture, the user request token from ADFS (here ADFS is used as Identity Provider) and once it receives the request, the security token provider must authenticate the user. The user claims will be verified with the account store, and in this example, it is Active Directory. The token will be sent to the user after the user is authenticated with the security token service provided by ADFS. The user now has a token to send it to the Exchange Server. The Exchange server checks the token signature and verifies the token issuer which is ADFS. Once the token signature checked and claims verified Exchange server would authenticate the user. The configuration of this process outlined in the tutorial comprises the installation and configuration of the ADFS server and setting up Exchange Server to authenticate using claims-based authentication with the help of federated authentication.
Step by Step
The following steps are involved in implementing Exchange Server claims-based authentication using ADFS. We assume Exchange Server already installed and authenticating using Forms-based authentication for the active directory users. If you are doing it on the test network, please install and configure Exchange Server 2016 before following this step by step document. This document can also be used to implement for Exchange Server 2013 or Exchange Server 2019. As I already mentioned, the ADFS server installed for this demonstration is Windows Server 2016. The Steps are given in the following points.
- Install ADFS Server role on Windows Server 2016
- Create Group Managed Service Account (gMSA)
- Configure Federation Service
- Add Relying Party Trust on AD FS Management Console
- Add Relying Party Trust for OWA
- Add Relying Party Trust for ECP
- Add Claim Issuance Policies for OWA Trust
- Add Claim Issuance Policies for ECP Trust
- Export Token Signing Certificate from AD FS server to Import it to Exchange Server
- Import the Token-Signing Certificate to Exchange Server
- Configure Exchange Organization to authenticate using ADFS
- Configure ECP and OWA virtual directories with ADFS Authentication
- Test OWA and ECP claims based authentication
Install ADFS Server role on Windows Server 2016
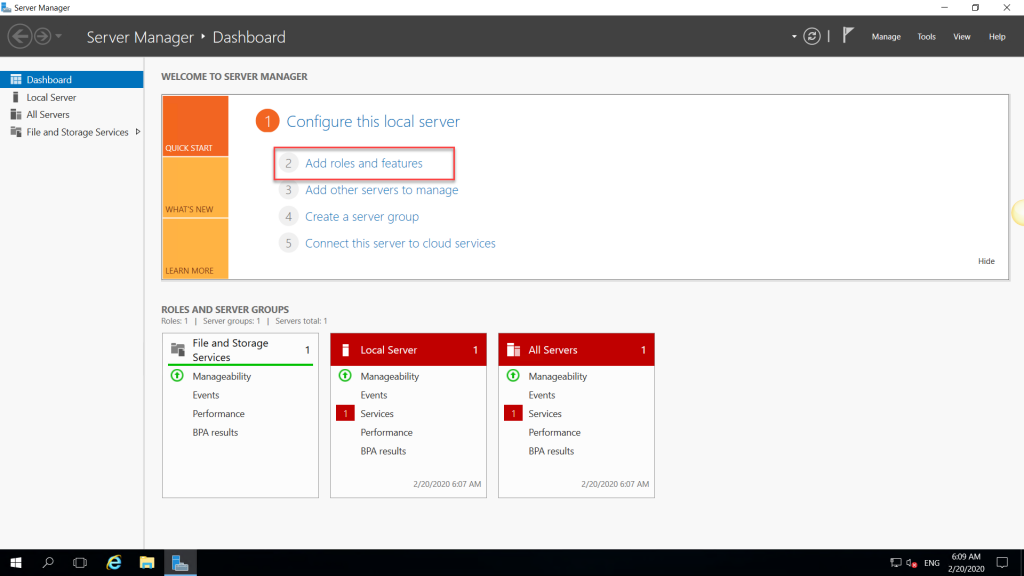
We are going to install the Active Directory Federation Services role on Windows Server 2016. To begin with, start Server Manager windows and click Add roles and features, and Add Roles, and Features Wizard will begin, and we can go through this wizard to complete the Active Directory Federation Services role installation.
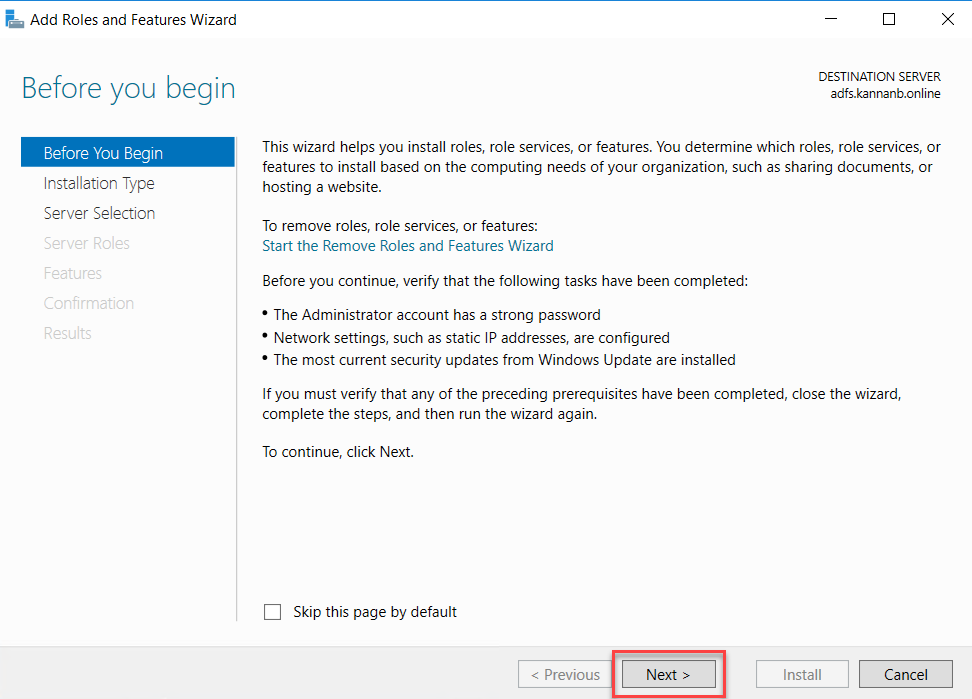
The Add Roles and Features wizard requirements and description outlined in the “Before you begin page” if you have not selected Skip this page by default checkbox before you would see this page; otherwise, the wizard would start from the installation type selection page. Click Next to continue.
Exchange Server Claims Authentication Using ADFS
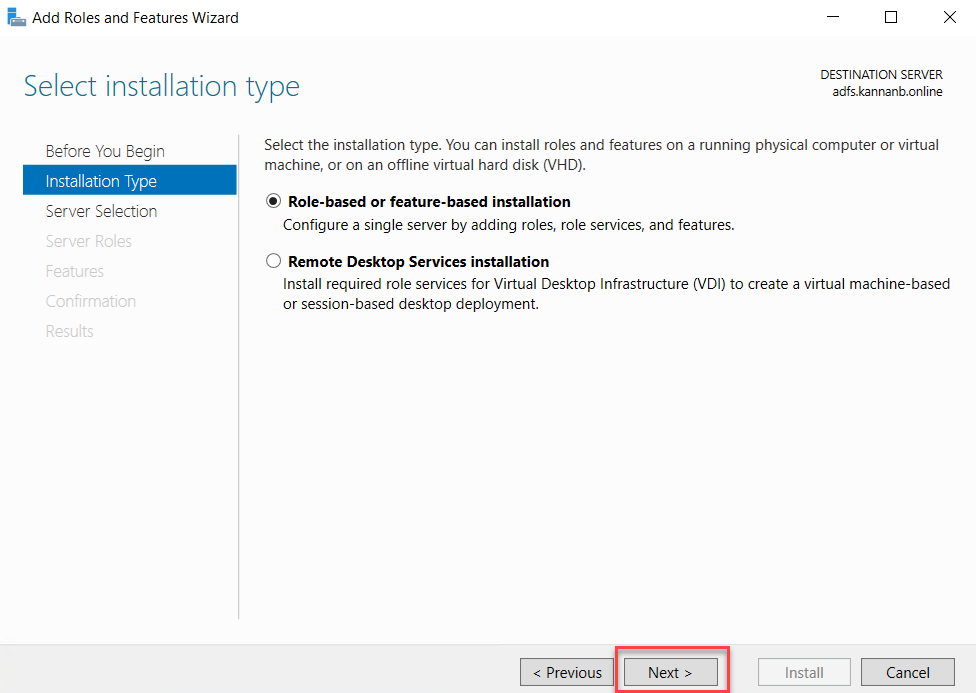
In this wizard, we are going to use the role-based installation to add this role, so select Role-based or Feature-based Installation to begin with and click Next to continue.
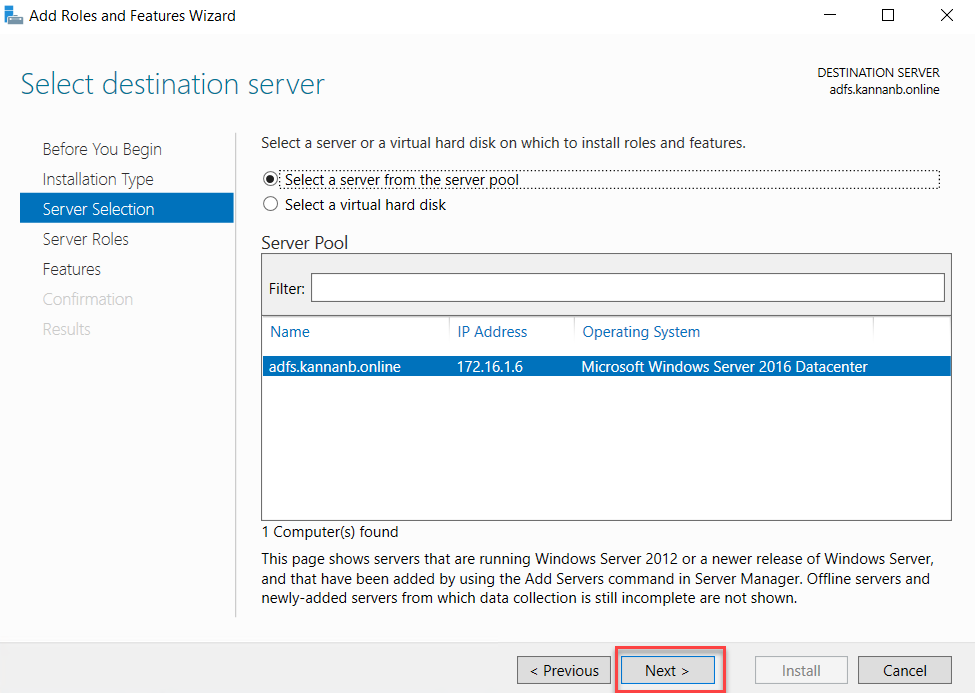
Make sure the local server in the server pool and select it and click Next.
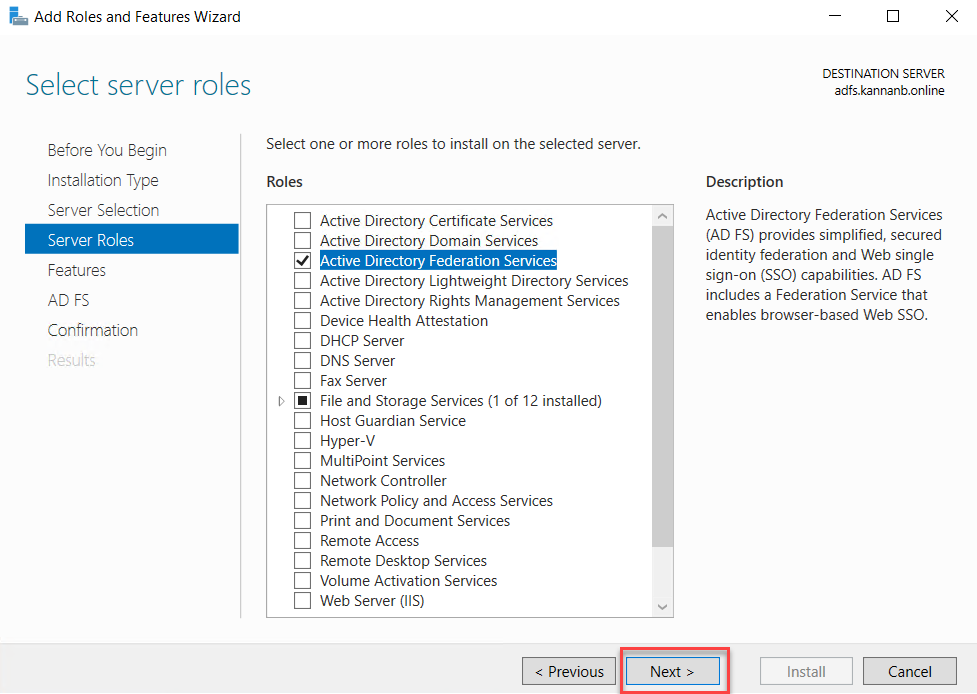
On the select roles page, select Active Directory Federation Services, and click Next.
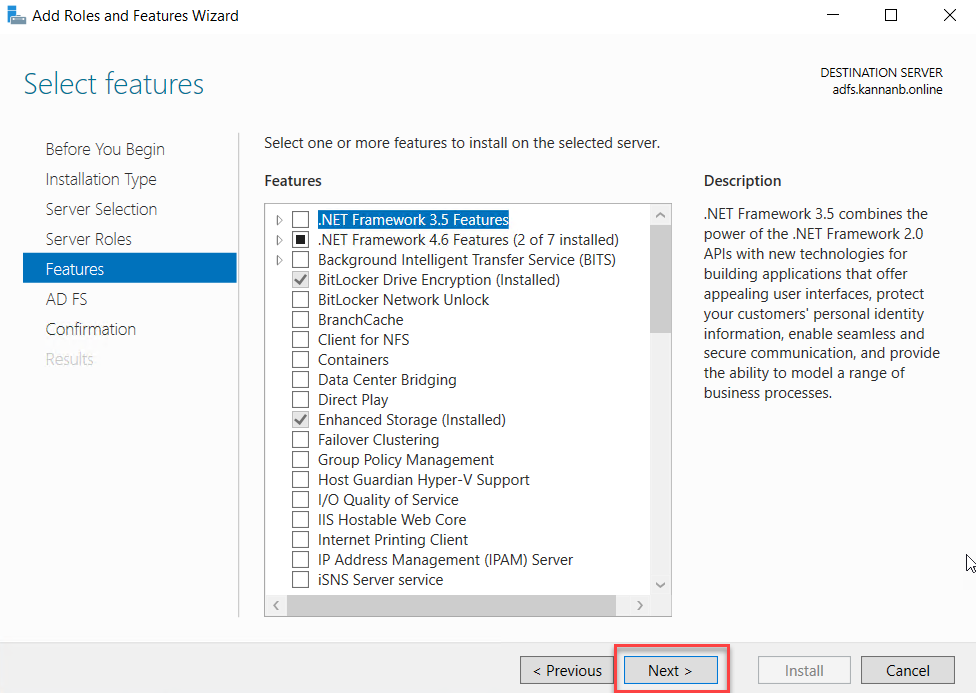
On the Select Features page, leave the selection and no additional selection needed on this page and click next to continue.
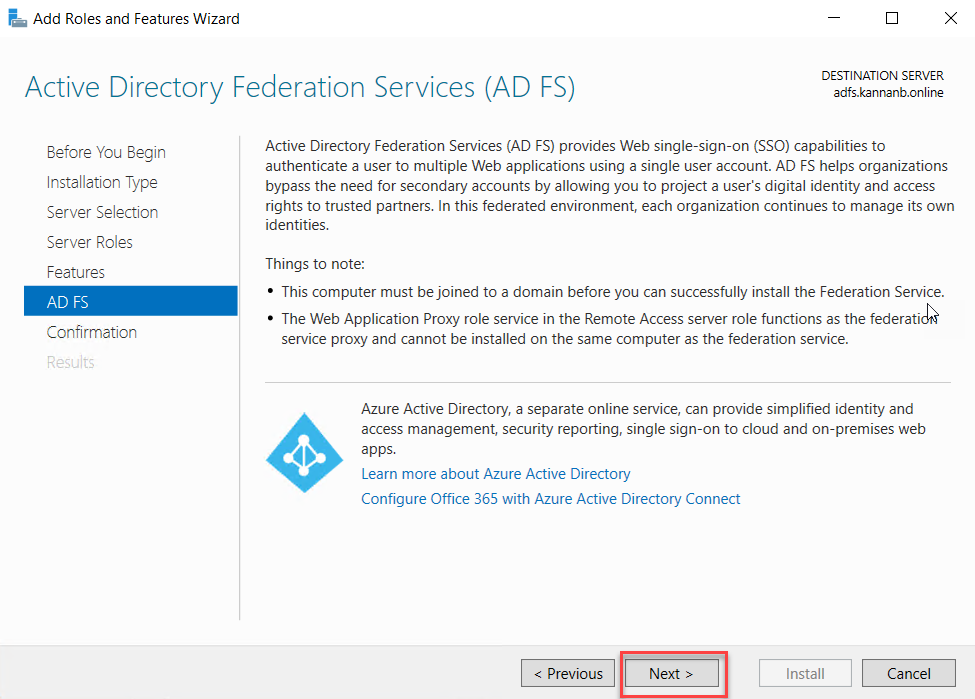
On the page with the title, AD FS shows the details of AD FS server roles and goes through this page for a better understanding of the role AD FS and Click Next when you have completed reading.
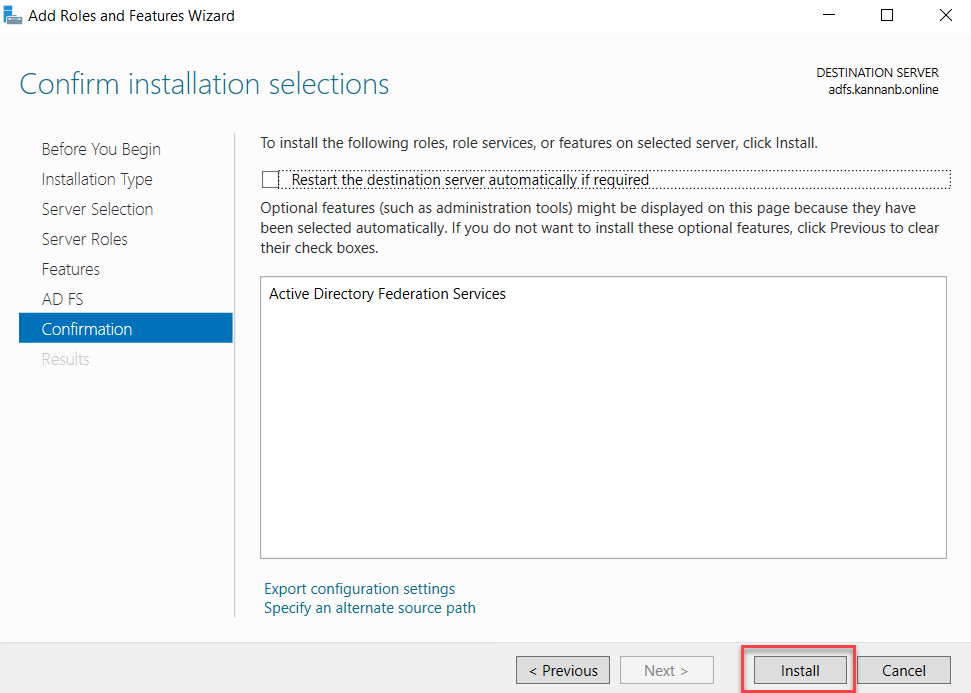
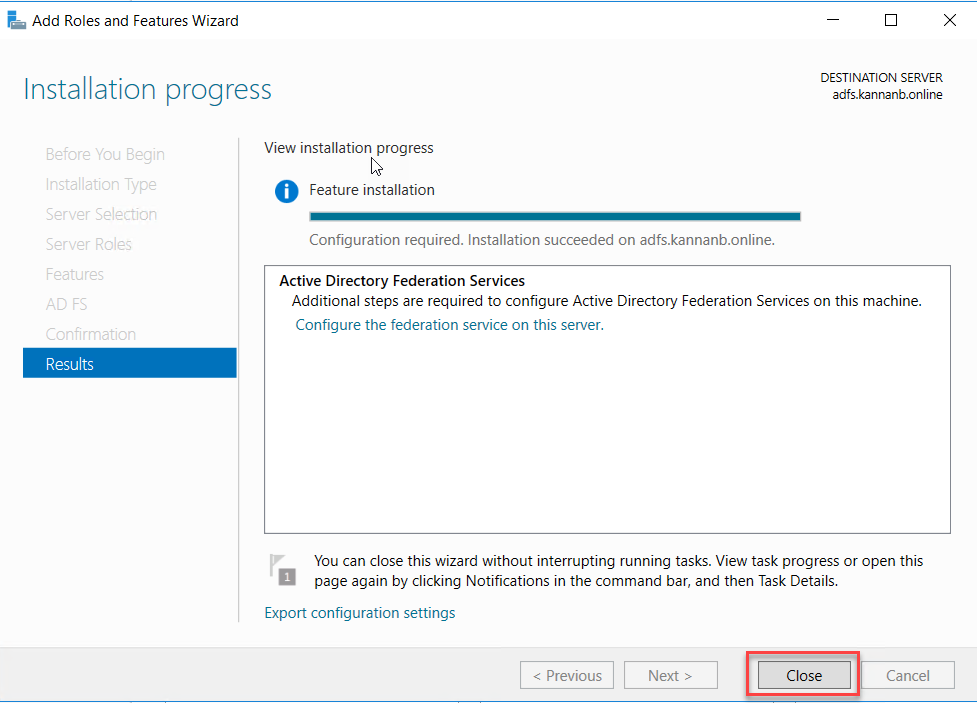
The confirmation page shows the role that we have selected, and this is the end of Add Roles and Features Wizard and click Install to start the installation of AD FS role services.
Once the AD FS role services installation completed you would have an option to configure the AD FS role, but wait a moment before starting the configuration we need a prerequisite when we configure it, we need group managed service account (gMSA) to assign as service account so that next step will be creating gMSA account, so go to your domain controller and start the steps provided next. Click close to end the wizard, but remember you always have an option to start the configuration of AD FS from the Server Manager notification drop down, so we are good to close the wizard for now.
Related:
Create Group Managed Service Account (gMSA)
Exchange Server Claims Authentication Using ADFS
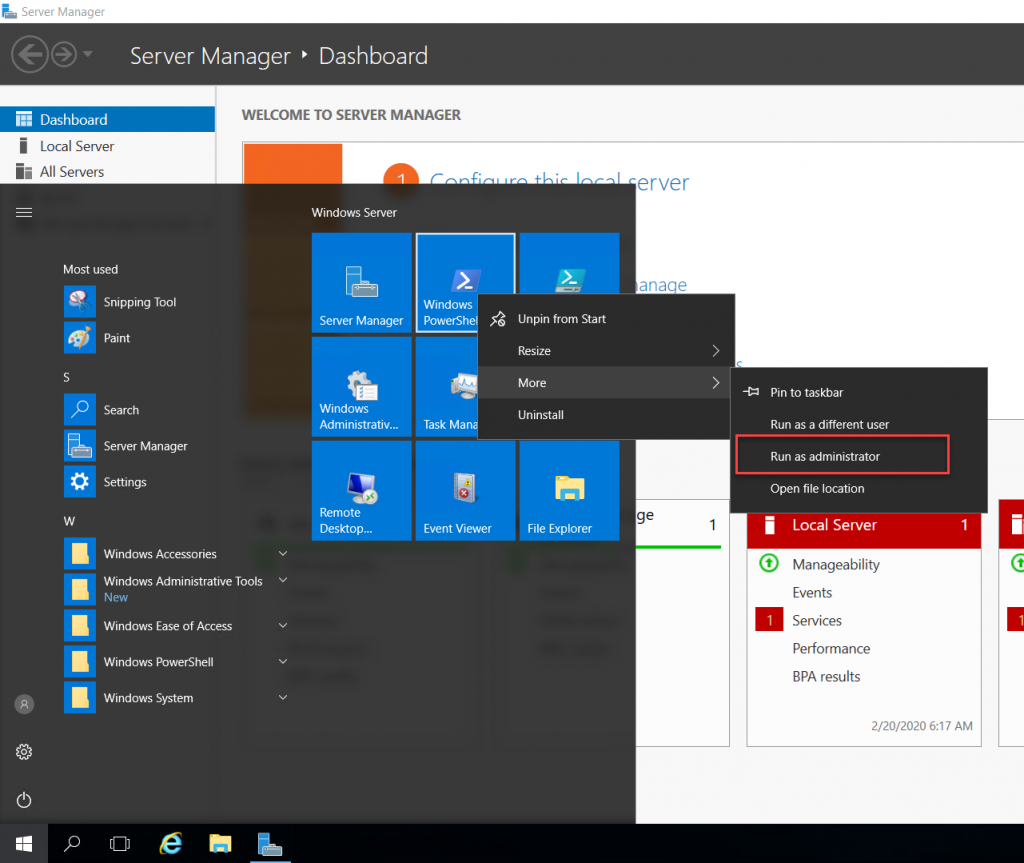
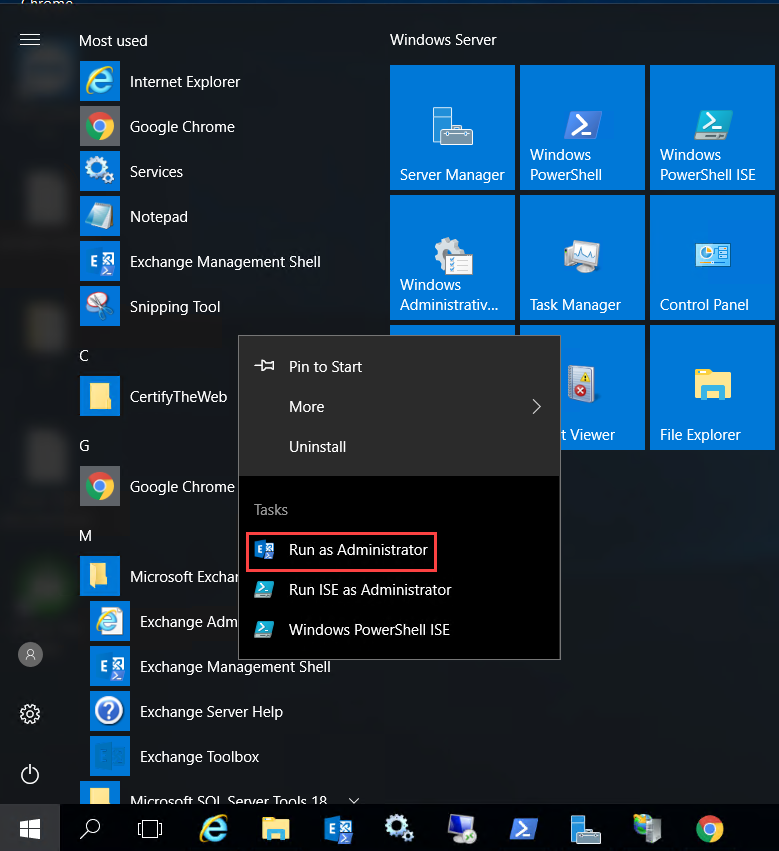
We need a group managed service account as the service account for AD FS service. This gMSA account has to be created on the Domain Controller and start an elevated Windows PowerShell window to create the one. The elevated PowerShell prompt can be launched at the Start button and select Windows PowerShell and select run as an administrator, as in the screen below.
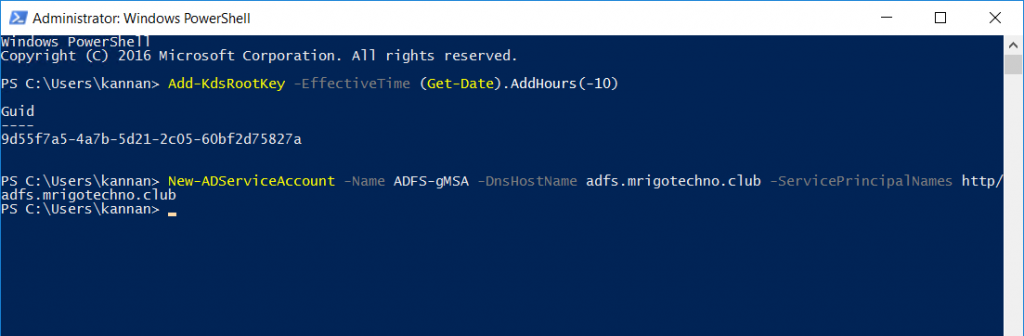
Domain Controllers (DC) require a root key to begin generating gMSA passwords. The domain controllers will wait up to 10 hours from the time of creation to allow all domain controllers to converge their AD replication before allowing the creation of a gMSA. To immediate effectiveness, run the command below
Add-KdsRootKey -EffectiveTime (Get-Date).AddHours(-10)
A GUID will be shown on the successful completion of the command above. The next command to run is to create the gMSA account using the New-ADServiceAccount, modify the command to match your service account name and DNS Host Name for the AD FS server on your environment. You would see the command will go to the next prompt without any information, and no information means the command completed successfully.
New-ADServiceAccount -Name adfs-gMSA -DnsHostName adfs.mrigotechno.club -ServicePrincipalNames http/adfs.mrigotechno.club
The output of the commands will be something like below screen.
Configure Federation Service
Exchange Server Claims Authentication Using ADFS
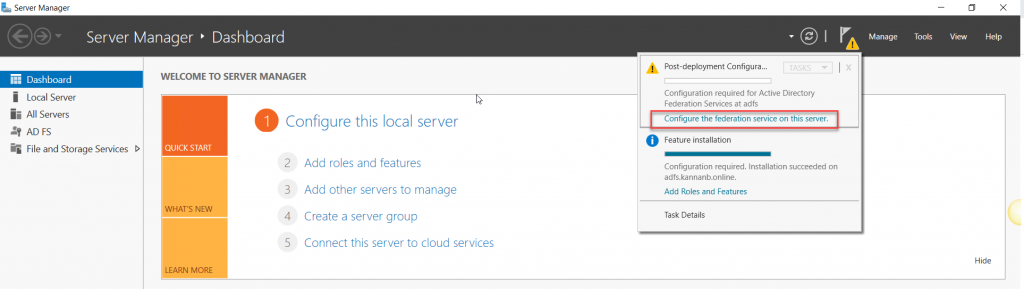
Now we have come back to Server Manager to start the configuration of the AD FS role that we left off in the previous AD FS role installation step. Go to Notification and select Configure Federation Services o the Server to begin the AD FS configuration wizard.
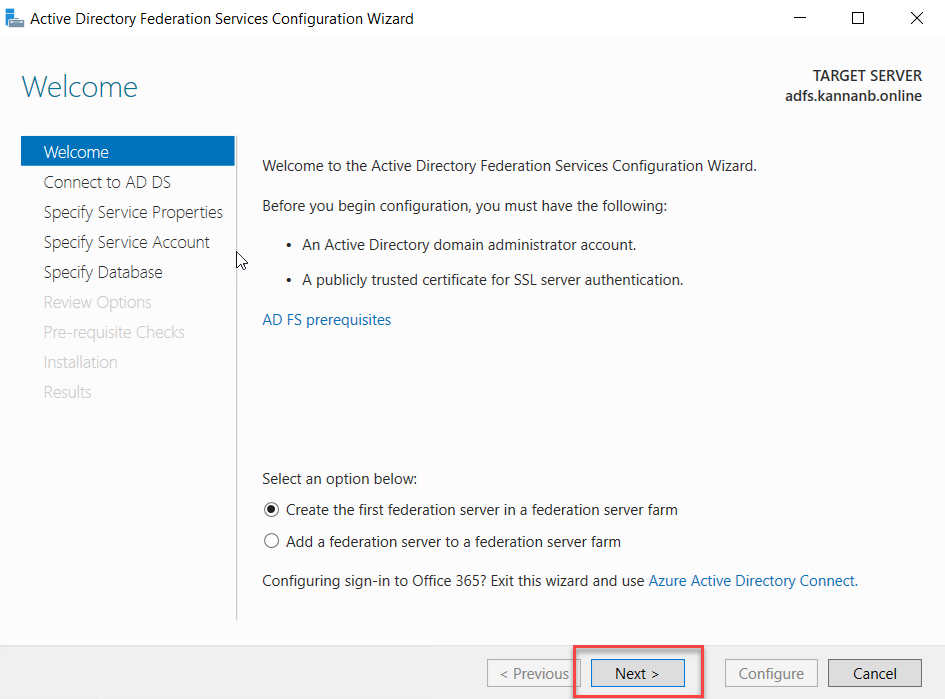
It is a new installation of the AD FS server role and only server in that AD FS farm, so select the “Create the first federation server in the federation server farm” radio button to create the server farm with this server as the first federation server. Click Next to continue.
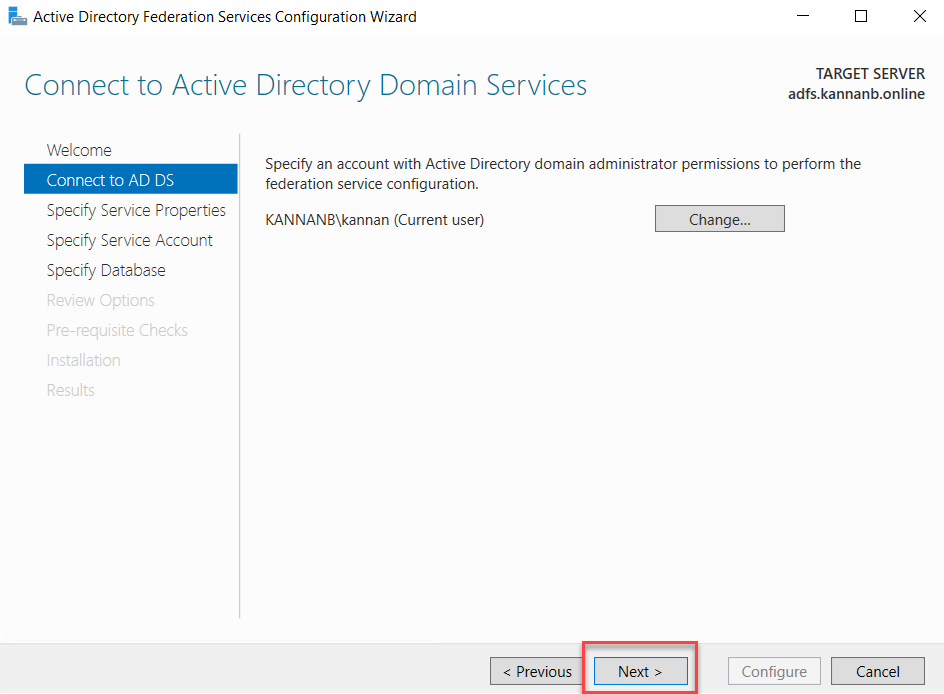
The AD FS runs on Active Directory, to connect to the active directory we need to use an Administrator account, the logged-on user will be selected by default considering as an administrator on the Active Directory domain, if the account is correct to go to next otherwise click change and select the one with administrative access. Click Next to continue.
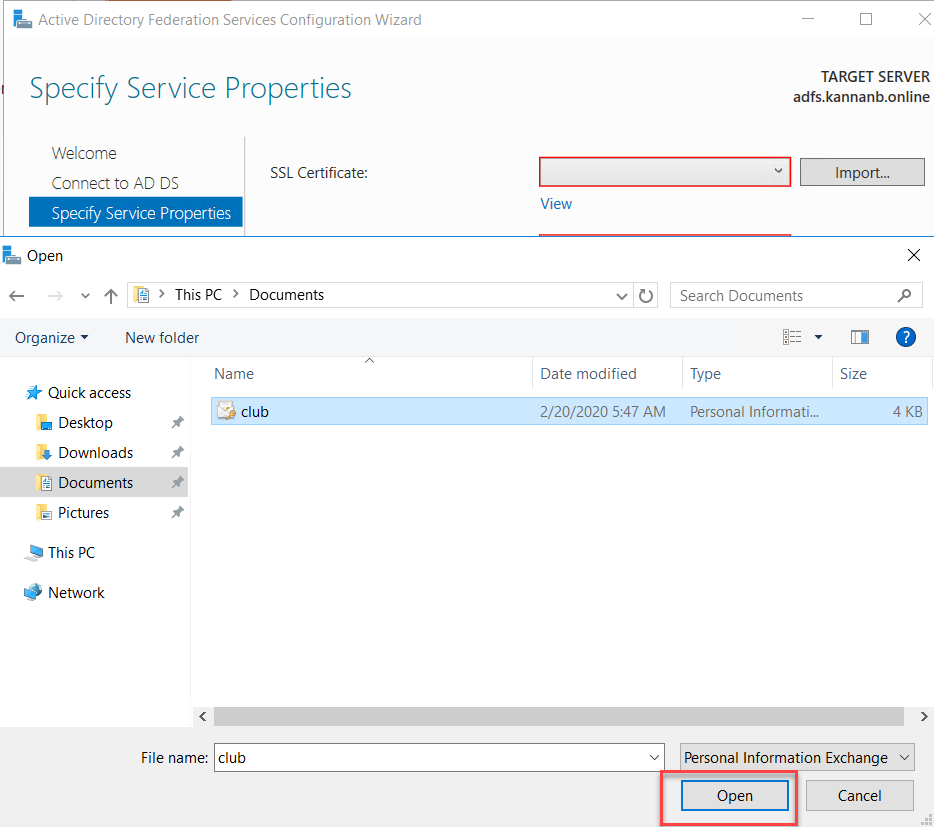
The next page is to import the certificate to the AD FS certificate store; I already have a public CA certificate, which is a wildcard certificate of my domain and has it ins pfx format. If you don’t have a certificate generated yet, recommend a third-party CA certificate with the single hostname or SAN or wildcard certificate, whichever is chosen and ready with the certificate in pfx format, so that can be imported as mentioned in the step below. Once the pfx file is ready, click Import to import the certificate.

Browse to certificate file location and select the certificate file and click open.
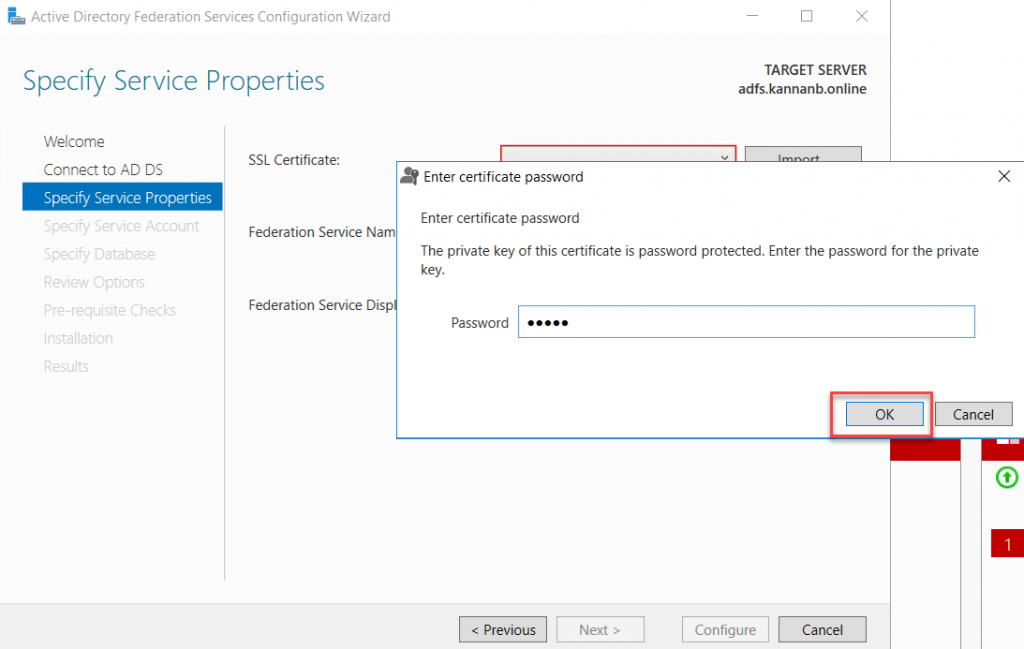
If the pfx certificate has a password assigned to it, you would be prompted for the password, type the password and click OK.
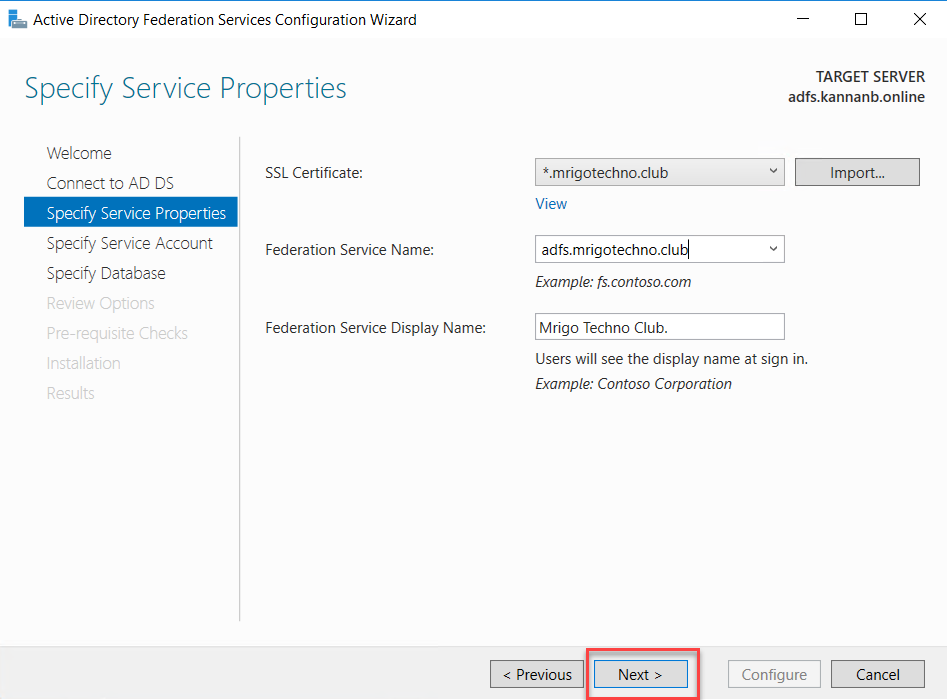
Once the certificate has been imported, in the box in the middle with Federation service name type the AD FS external server name. In my scenario, it is adfs.mrigotechno.club. Also, on the next box with the Federation Service Display Name type, a name describes the name of the organization or something similar. This name will be shown at the sign-in page.
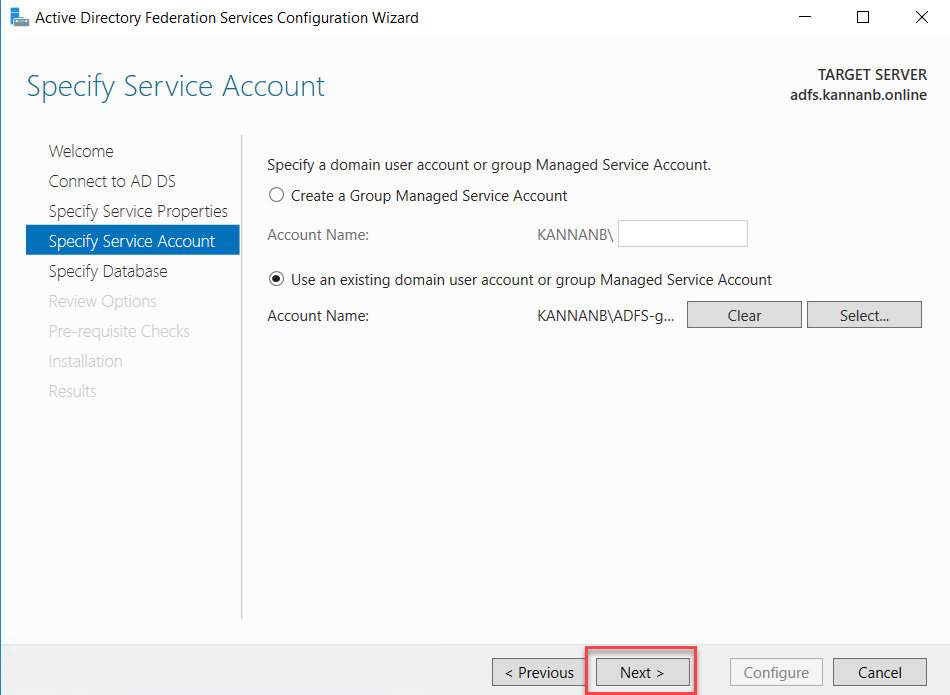
On the next Specify Service Account page, select the service account that we created previously.
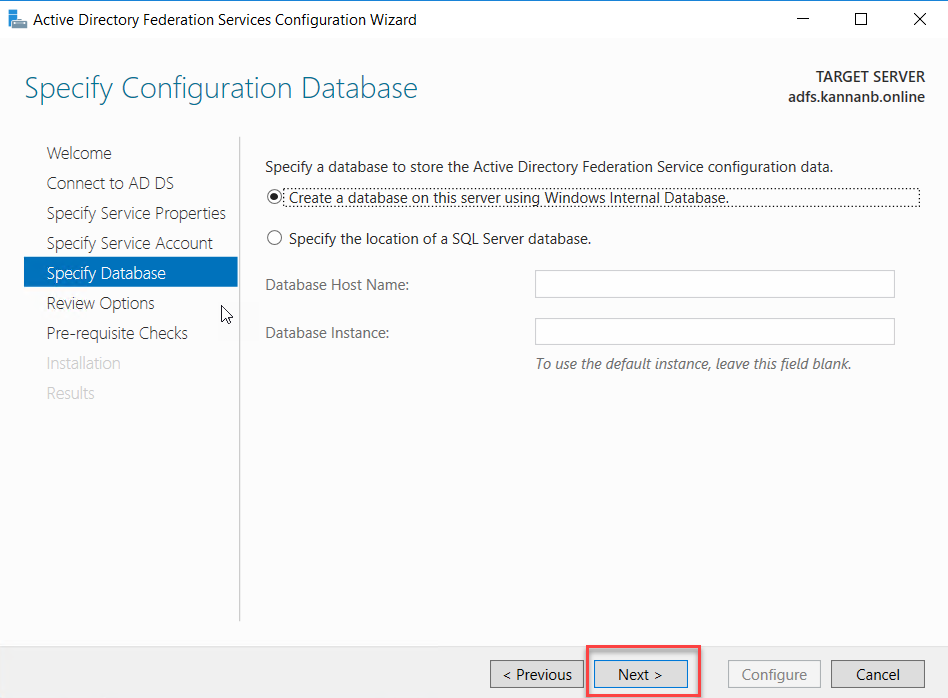
We are using Windows Internal Database for this demo configuration, and if you have SQL server installed on your network and want to use that you can select the second option, for this demonstration, I select Create a database on this server using Windows Internal Database radio button. Click Next to continue.
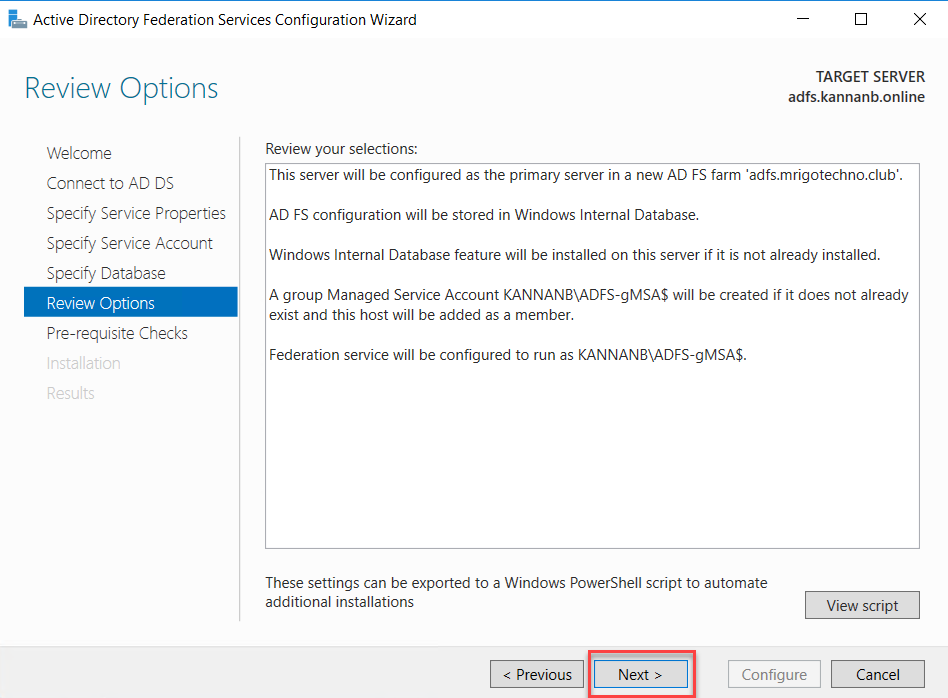
Review the options selected and click next to continue.
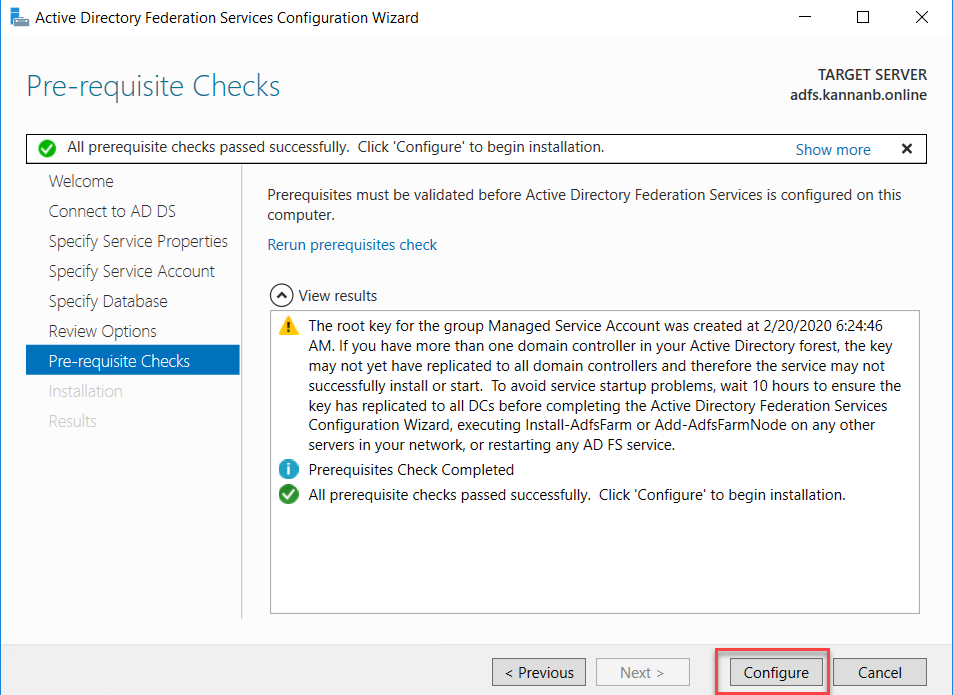
If the configuration is correct till this moment, you will get a green tick mark with “All prerequisite checks passed successfully. Click ‘Configure’ to begin the installation.”
Once the Configuration is successful, you would see a green tick with “This server was successfully configured” message. Click ‘close’ to close the wizard.

Add Relying Party Trust on AD FS Management Console
Exchange Server Claims Authentication Using ADFS
We have completed the installation and configuration of Active Directory Federation Services role. The next step is to add relying party trust for OWA and ECP URL.
Add Relying Party Trust for OWA
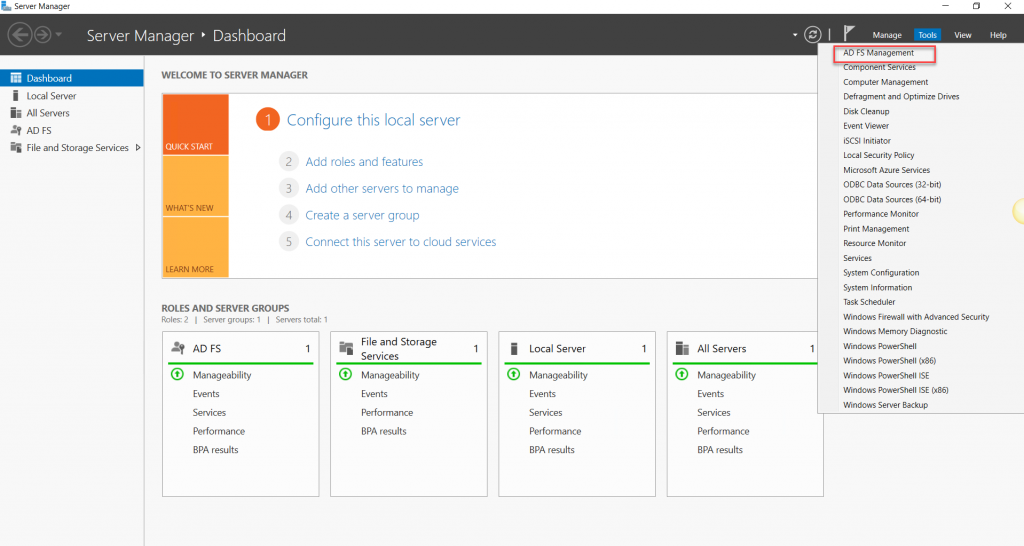
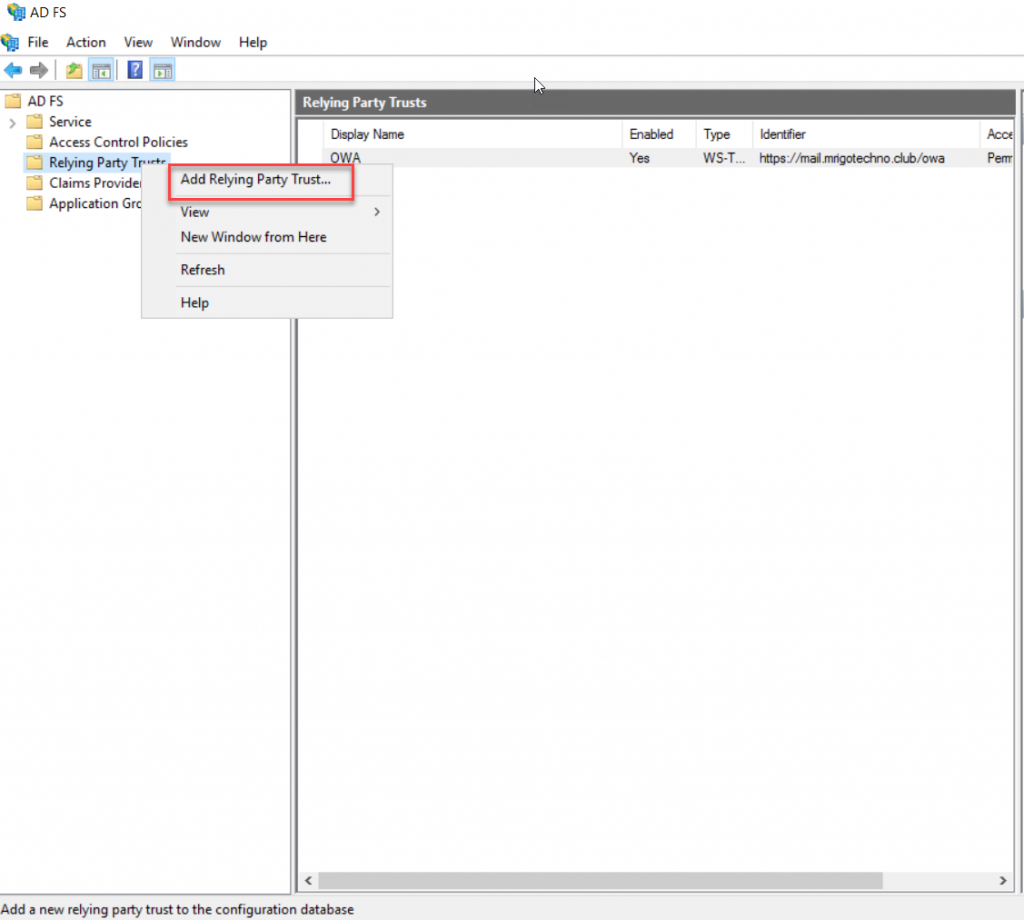
Go to Server Manager, on the Tools menu select Active Directory Federation Service. The ADFS Management console will be opened and where we can add Relying Party trust.
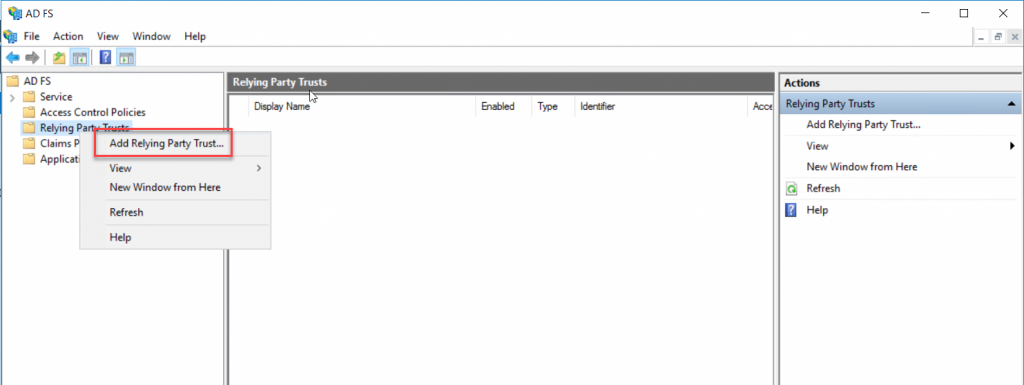
On the AD FS Console, either right-click Relying Party Trusts and select Add Relying Party Trust or select Relying Party Trusts and on the action pane click Add Relying Party Trust.
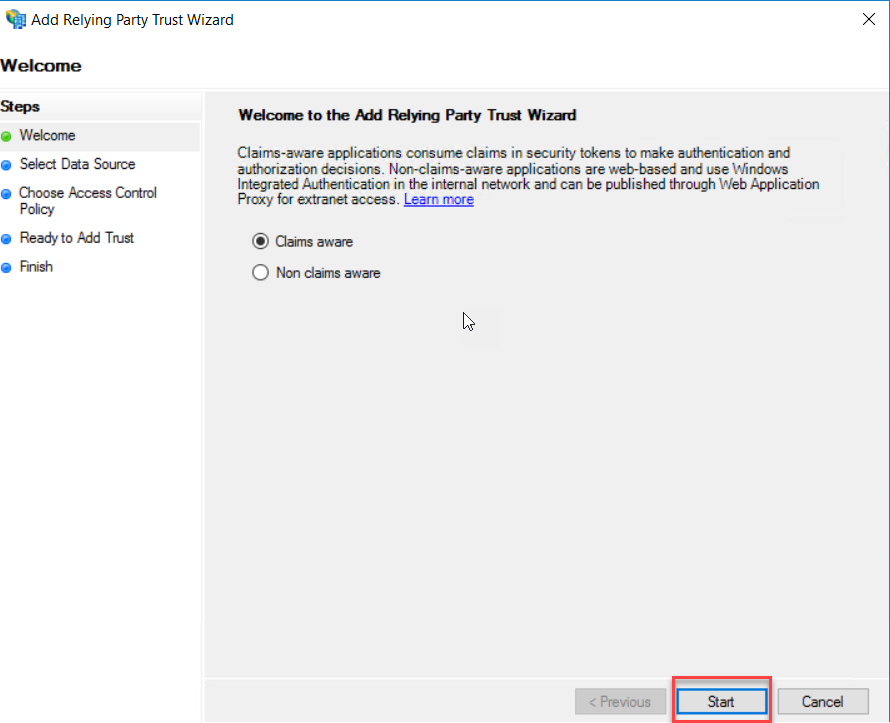
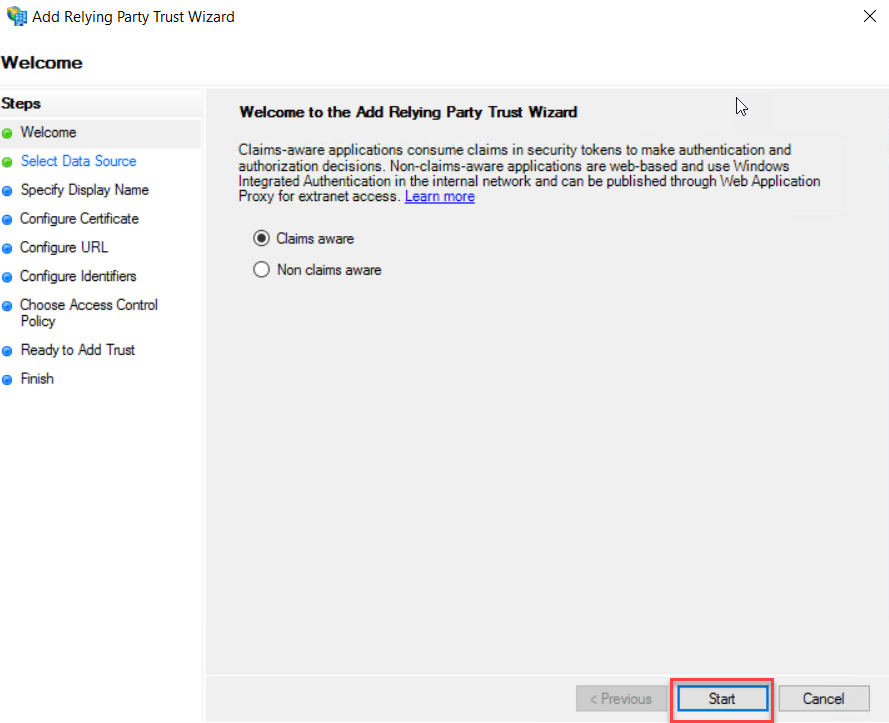
On the Welcome page, select Claims aware radio button and click start.
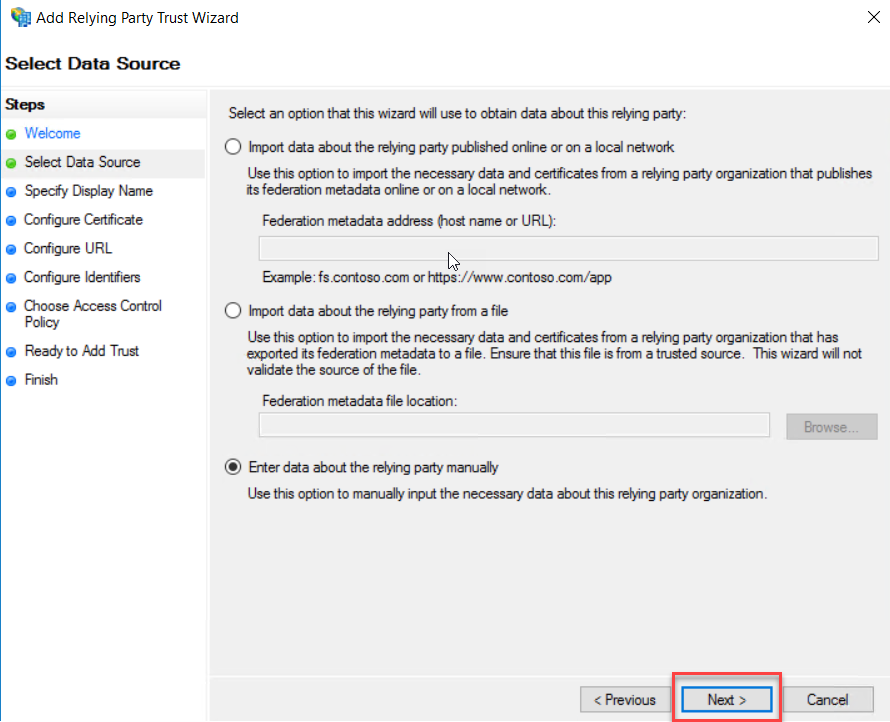
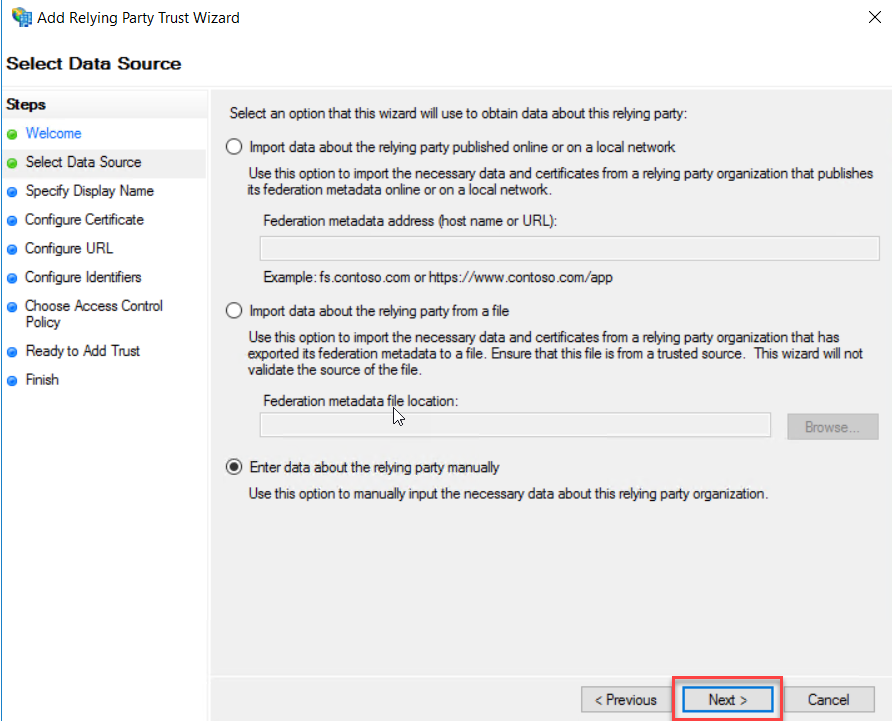
On the next page, select “Enter data about the relying party manually” and click Next.
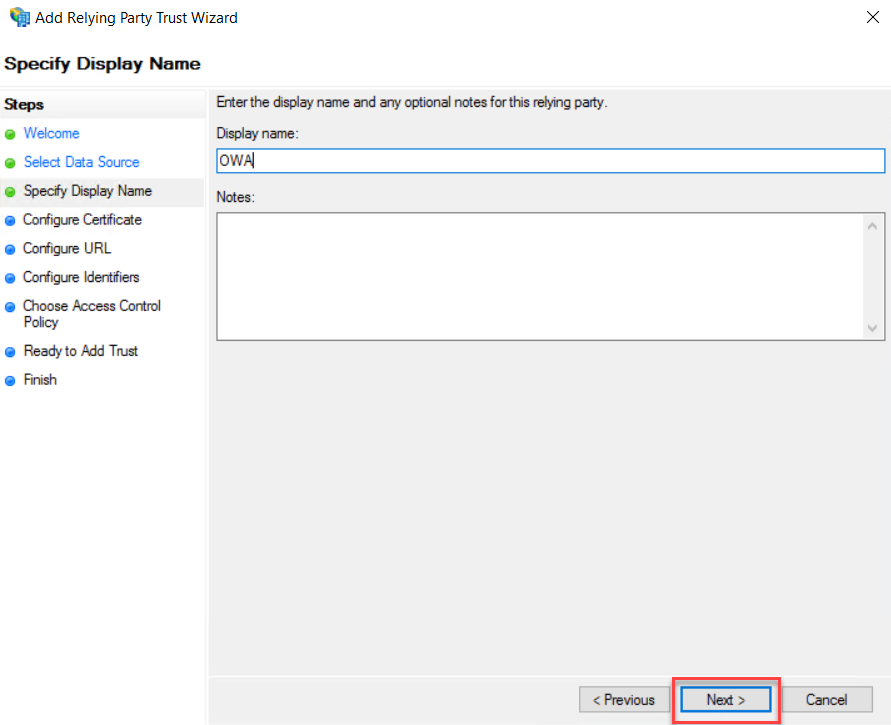
Type a Display Name and description as you want. This first relying party trust is for the outlook on the web, so I typed Display name as “OWA” for this demonstration. Click Next to continue.
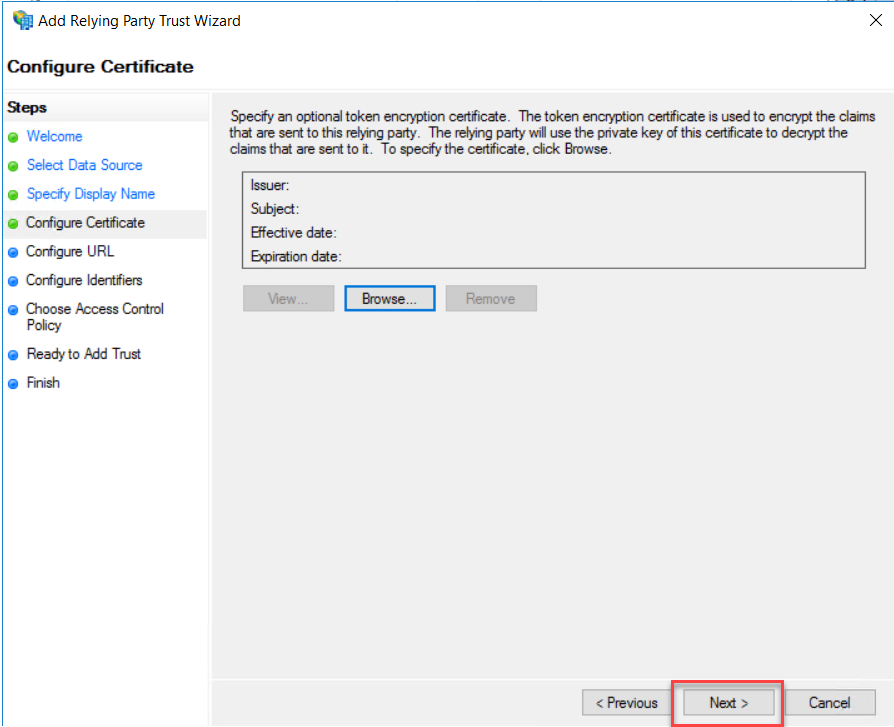
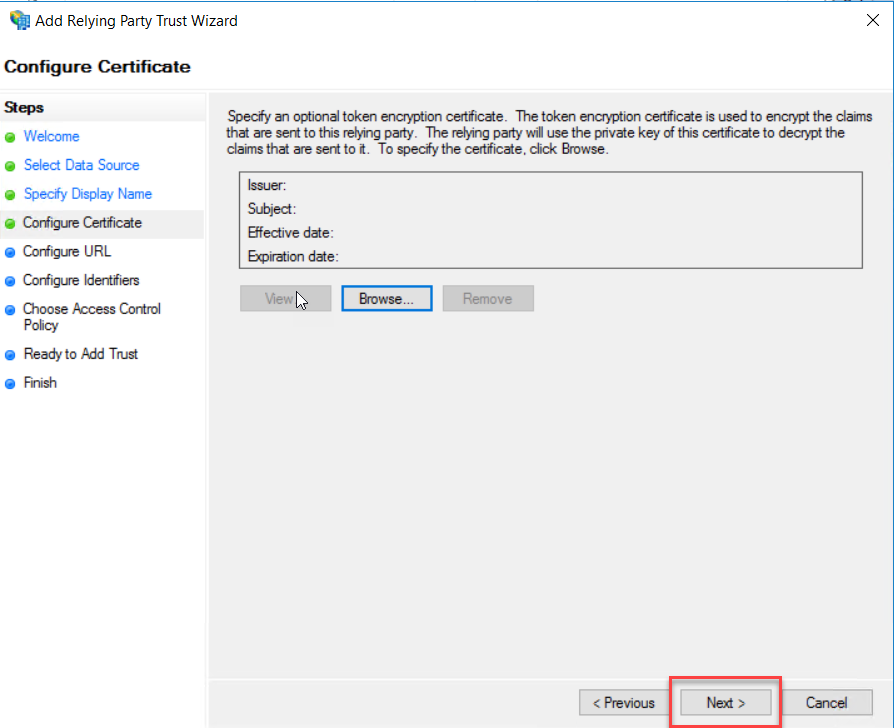
On the Configure Certificate page, leave the default and click Next.
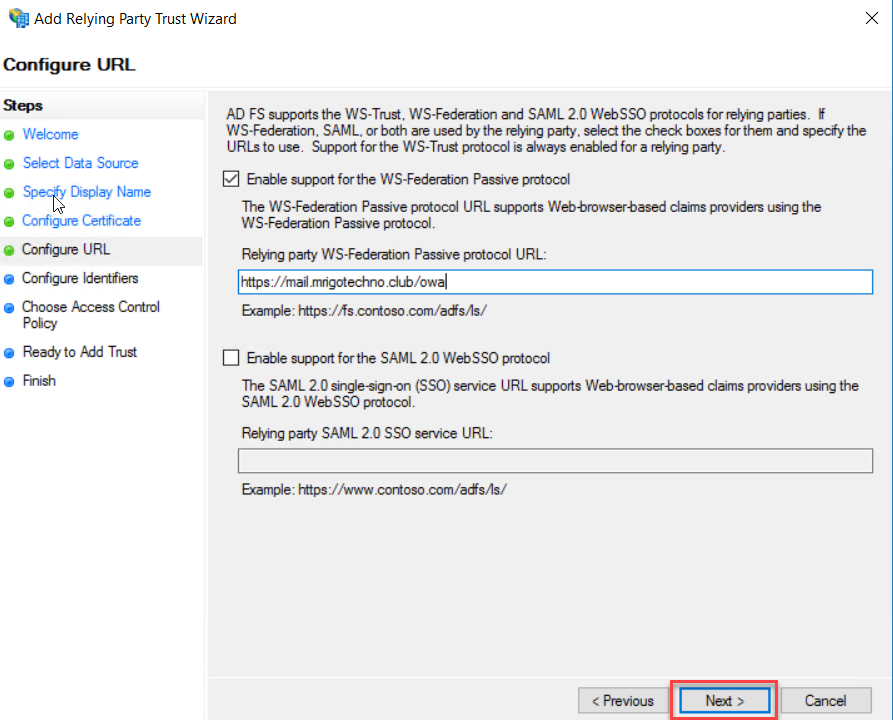
On Configure URL, select “Enable support for the WS-Federation Passive Protocol” and type the OWA external URL as per your Exchange Server OWA external URL. Click Next.
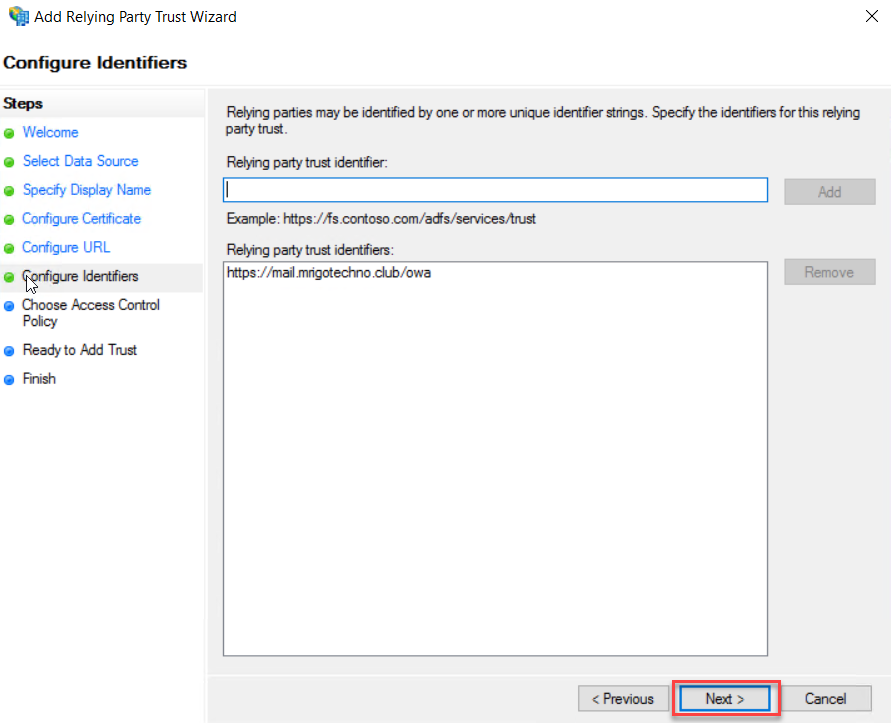
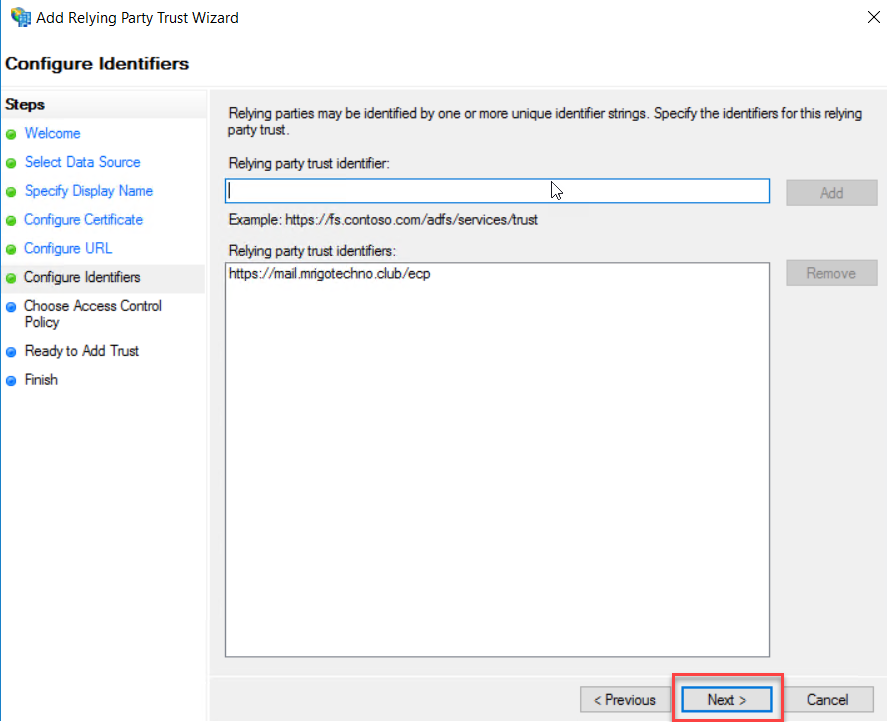
Make sure the OWA URL has added a “Relying party trust identifiers” in the configure Identifiers page and click Next.
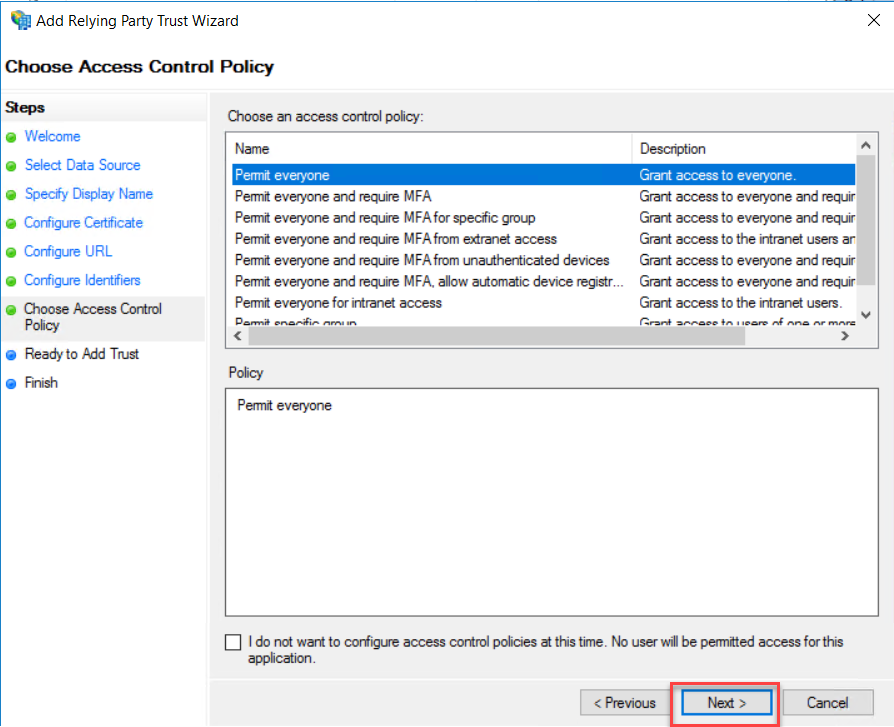
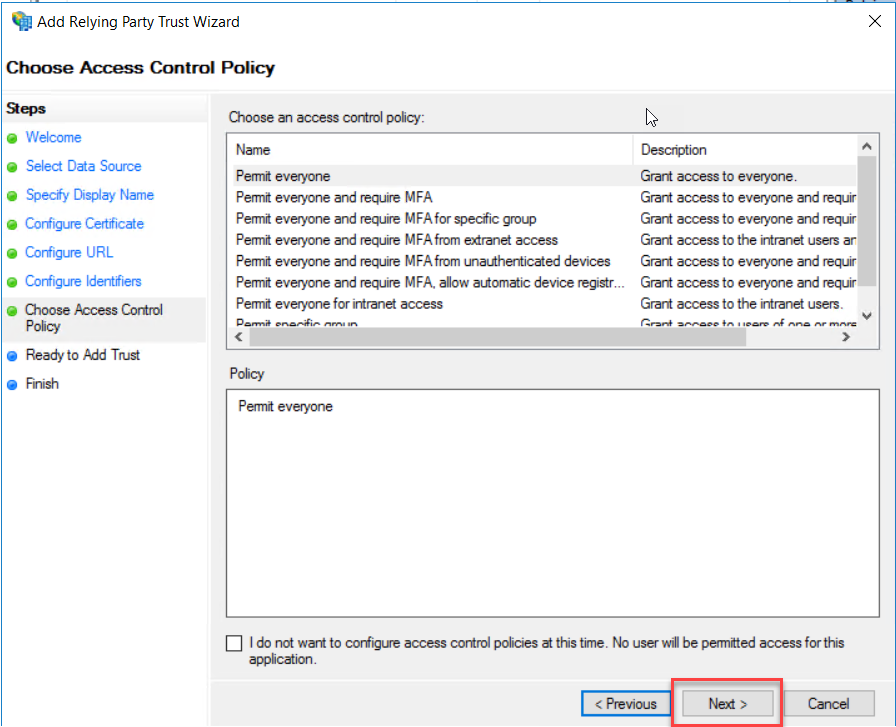
On the Choose an access control policy, choose a policy that relevant to you for this demonstration purpose. I choose to Permit everyone. Click Next to continue.
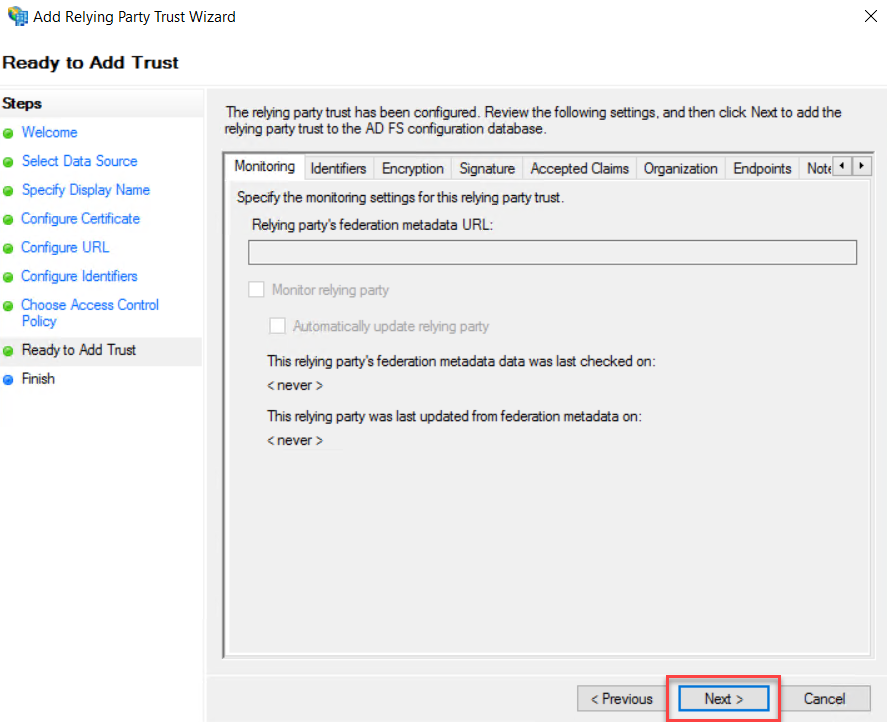
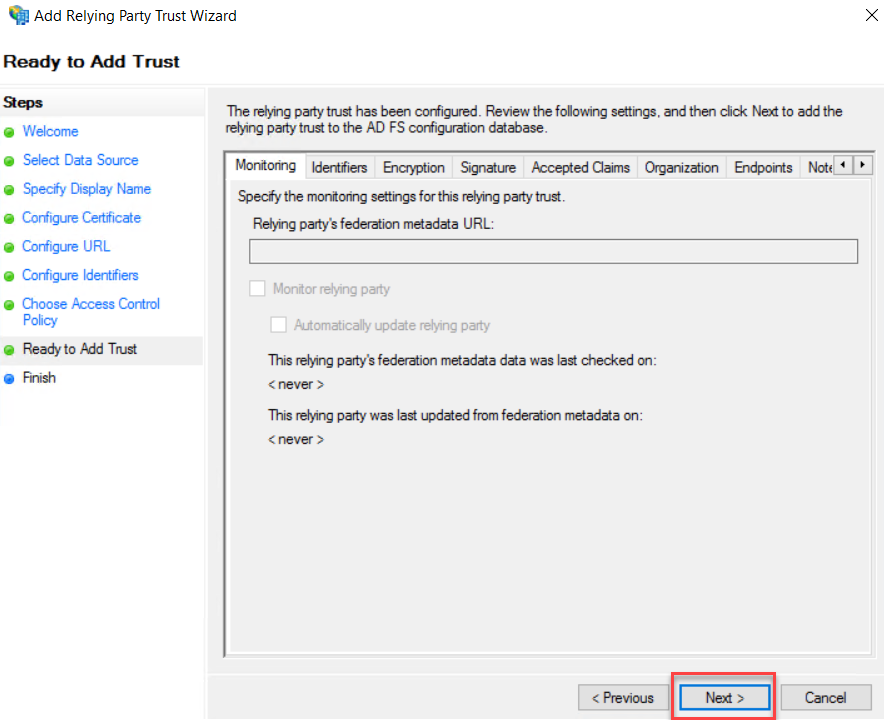
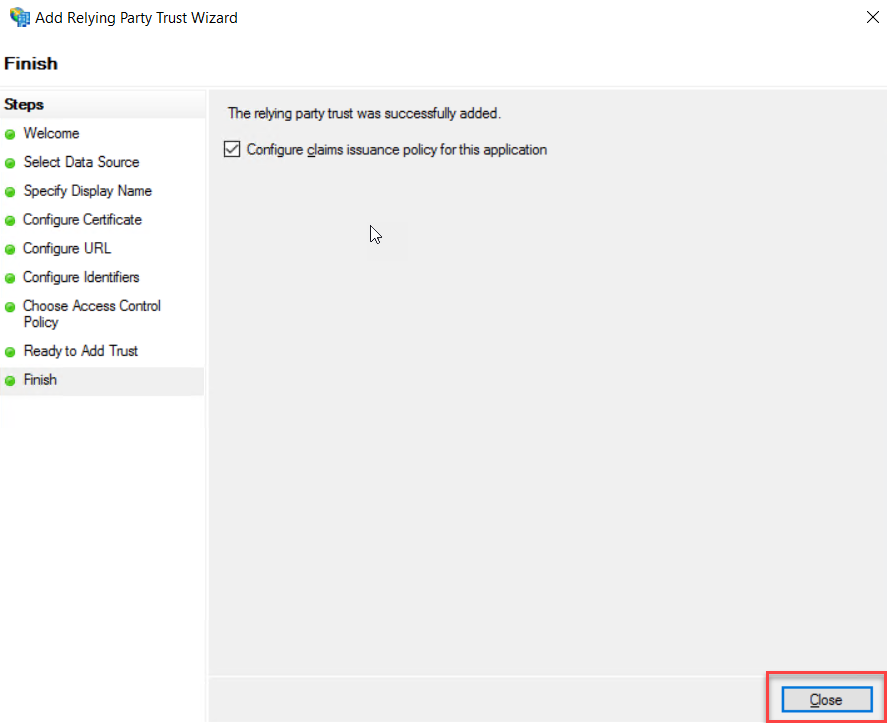
On the ready to add trust page, click Next to add trust.
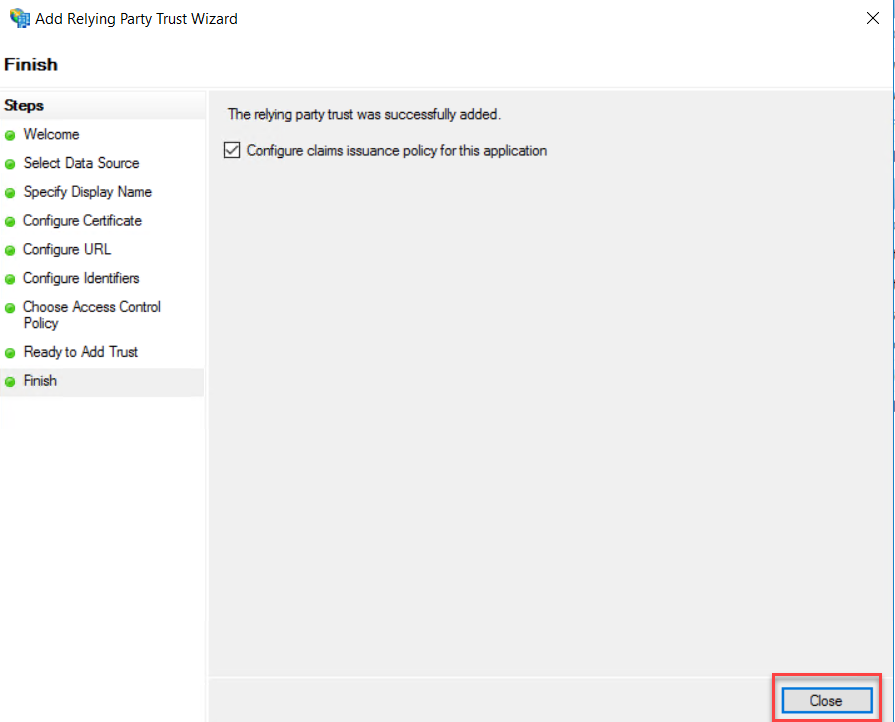
Click Close to end the Add Relying Party Trust wizard.
Add Relying Party Trust for ECP
Exchange Server Claims Authentication Using ADFS
We are going to go through the same step that we had gone through for Add Relying Party Trust for OWA, but with the purpose of the ECP URL instead of the OWA URL this time, the steps are the same as above.
On the AD FS Console, either right-click Relying Party Trusts and select Add Relying Party.
On the Welcome page, select Claims aware radio button and click start.
On the next page, select “Enter data about the relying party manually” and click Next.
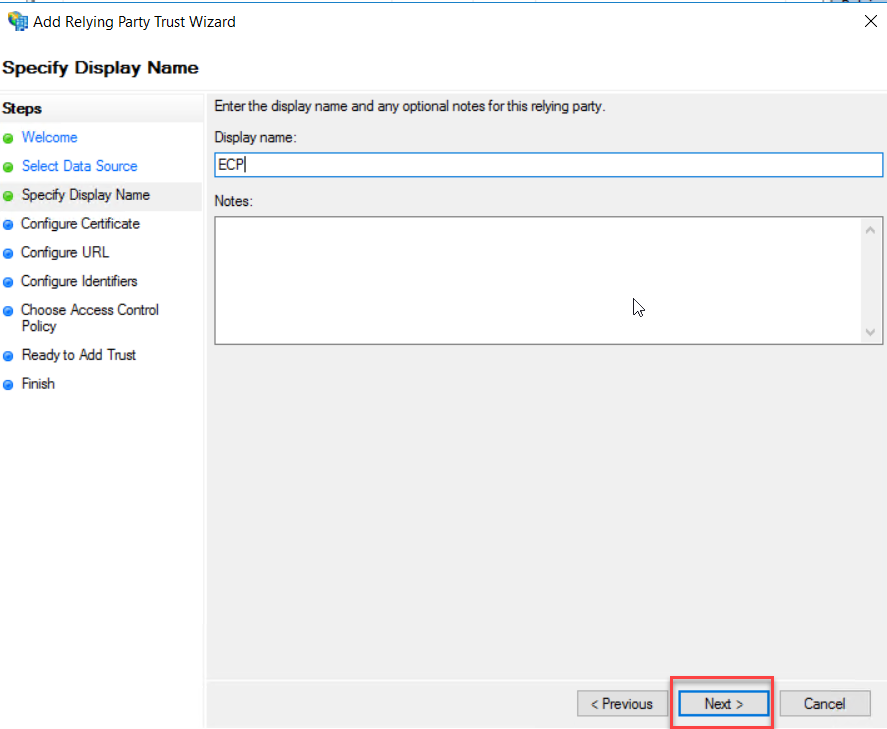
Type a Display Name and description as you want. This second relying party trust is for Exchange Admin Center, so I typed Display name as “ECP” for this demonstration. Click Next to continue.
On the Configure Certificate page, leave the default and click Next.
On Configure URL, select “Enable support for the WS-Federation Passive Protocol” and type the ECP external URL as per your Exchange Server ECP external URL. Click Next.

Make sure the ECP URL is added a “Relying party trust identifiers” in the configure Identifiers page and click Next.
On the Choose an access control policy, choose a policy that relevant to you for this demonstration purpose. I choose to Permit everyone. Click Next to continue.
On the ready to add trust page, click Next to add trust.
Click Close to end the Add Relying Party Trust wizard.
Add Claim Issuance Policies for OWA Trust
Exchange Server Claims Authentication Using ADFS
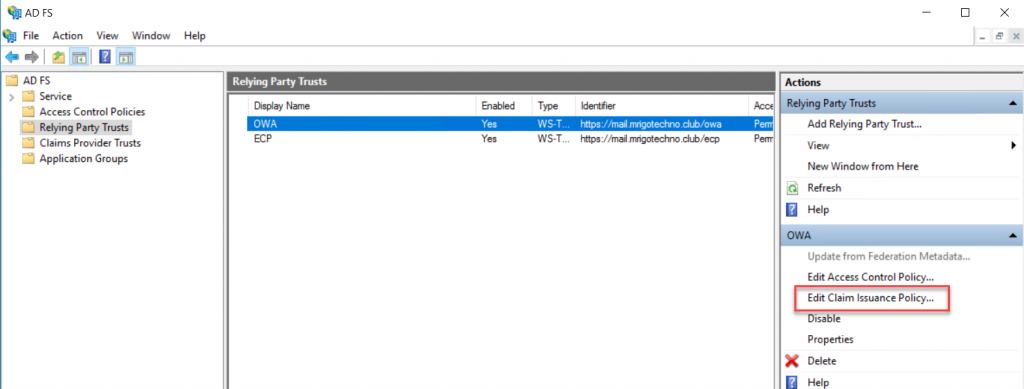
On the Relying Party Trusts middle pane, select OWA trust, and click Edit Claim Issuance Policy to add rules.
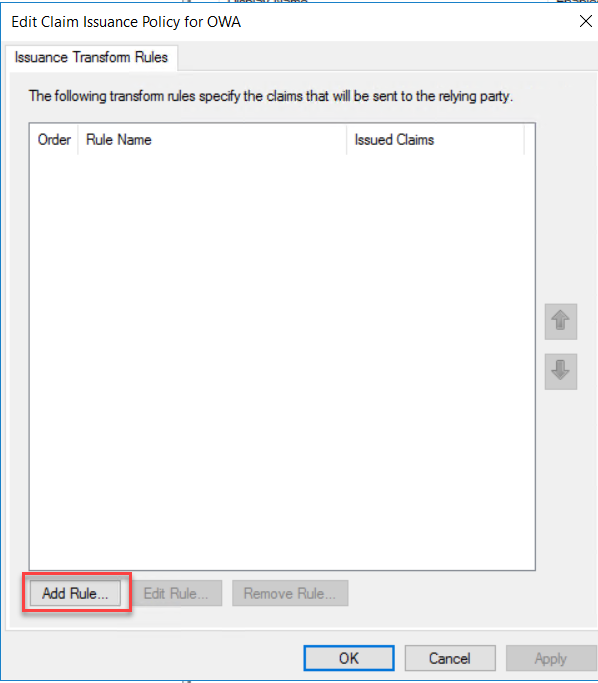
We are going to add two issuance policy rules for OWA Policy. On the Issuance, Transform rules click add Rules to start the wizard.
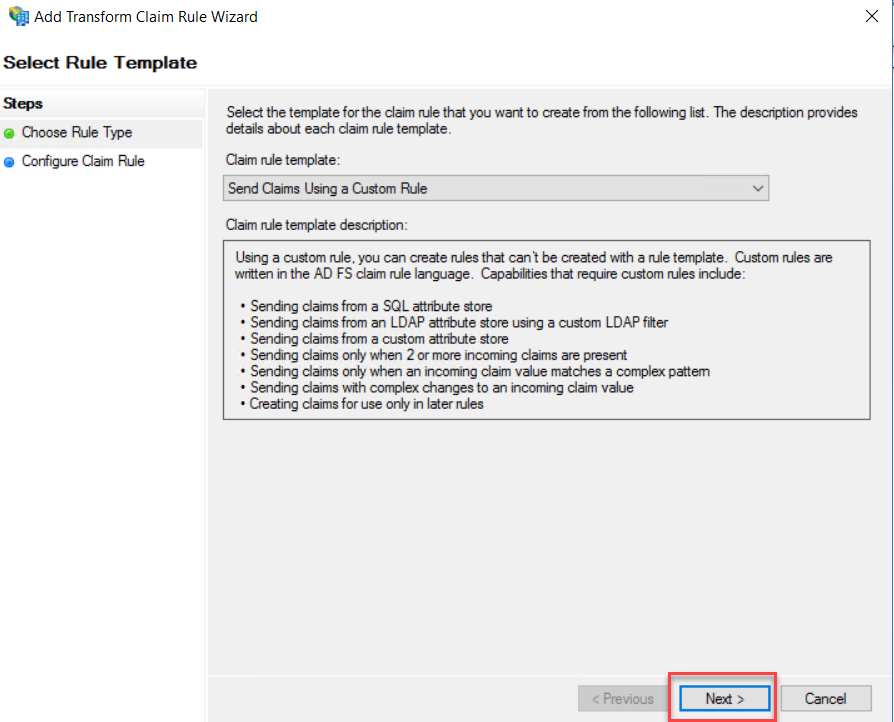
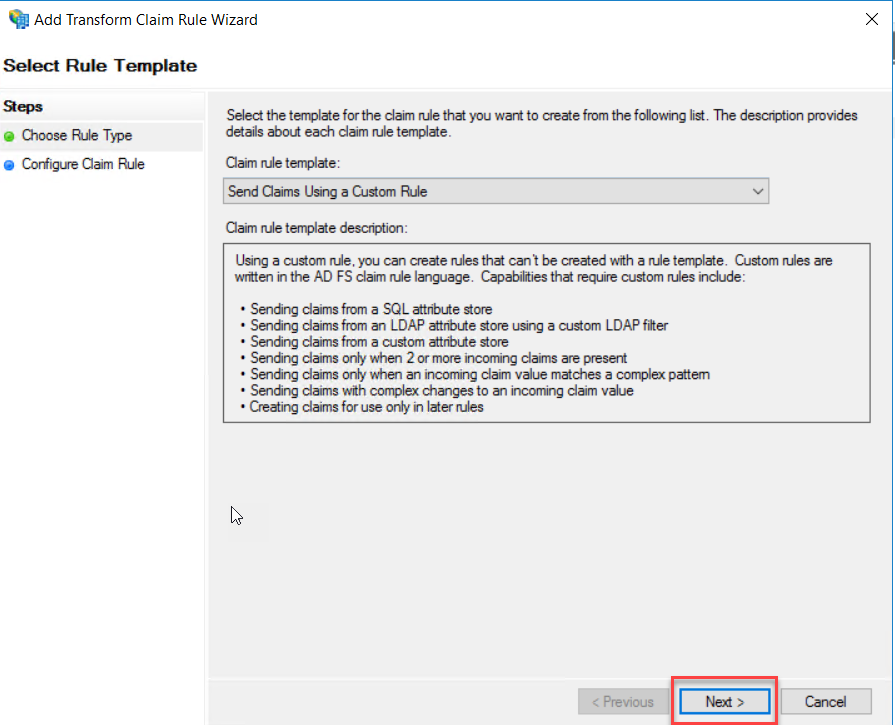
On the Claim rule template drop-down, select “Send Claims Using a Custom Rule” and click Next.
Type a claim rule name, this rule is for Active Directory SID identifier, so I have named it AD-SID-ID. On the custom rule area, type following rule
c:[Type == "http://schemas.microsoft.com/ws/2008/06/identity/claims/windowsaccountname", Issuer == "AD AUTHORITY"] => issue(store = "Active Directory", types = ("http://schemas.microsoft.com/ws/2008/06/identity/claims/primarysid"), query = ";objectSID;{0}", param = c.Value);
Click Finish to End rule wizard.
Next, we are going to add one more rule for UPN. Click Add Rule.
On the Claim rule template drop-down, select “Send Claims Using a Custom Rule” and click Next.
On the Claim Rule Name, type a name for the Claim Rule, this rule is for Active Directory UPN, so I have typed name as AD-UPN. On Claim Rule Area copy and paste the following rule
c:[Type == "http://schemas.microsoft.com/ws/2008/06/identity/claims/windowsaccountname", Issuer == "AD AUTHORITY"] => issue(store = "Active Directory", types = ("http://schemas.xmlsoap.org/ws/2005/05/identity/claims/upn"), query = ";userPrincipalName;{0}", param = c.Value);
Click Finish to end the Rule wizard.
On the Edit Claim Issuance Policy window, click OK
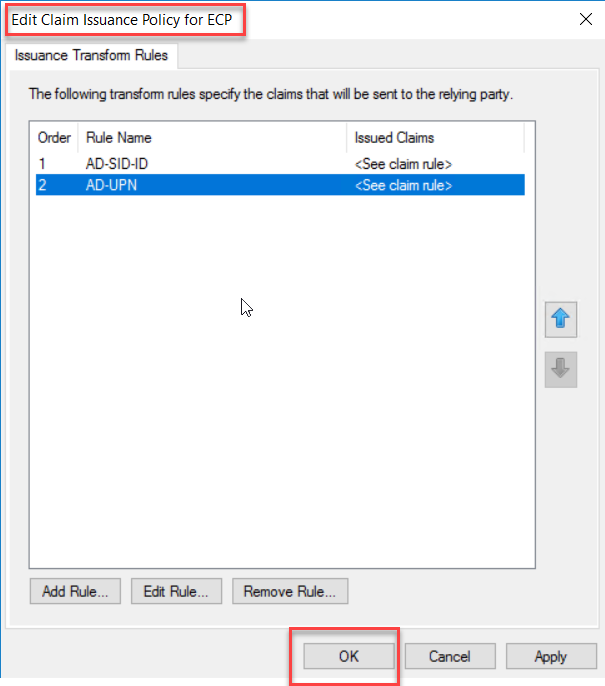
.
Add Claim Issuance Policies for ECP Trust
Exchange Server Claims Authentication Using ADFS
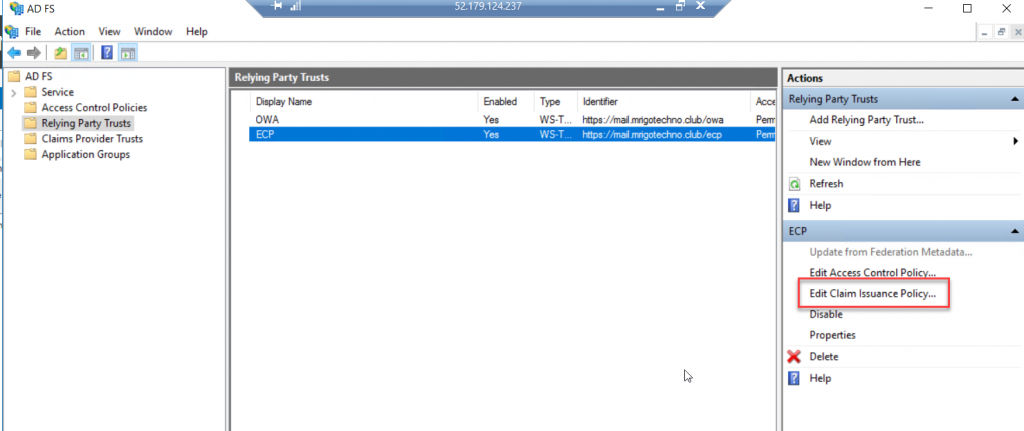
We are going to replicate the steps that we did for OWA Relying Party Trust to ECP Relying Party Trust, so we are going to duplicate the steps above.
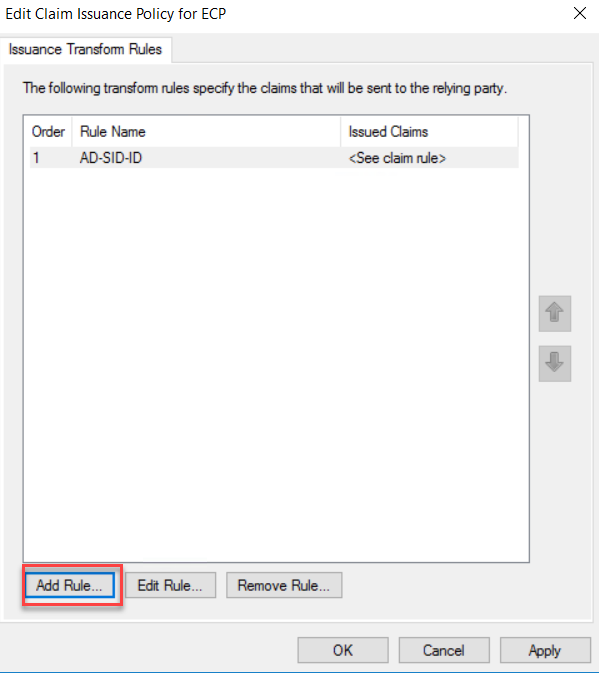
On the Relying Party Trusts middle pane, select OWA trust, and click Edit Claim Issuance Policy to add rules.
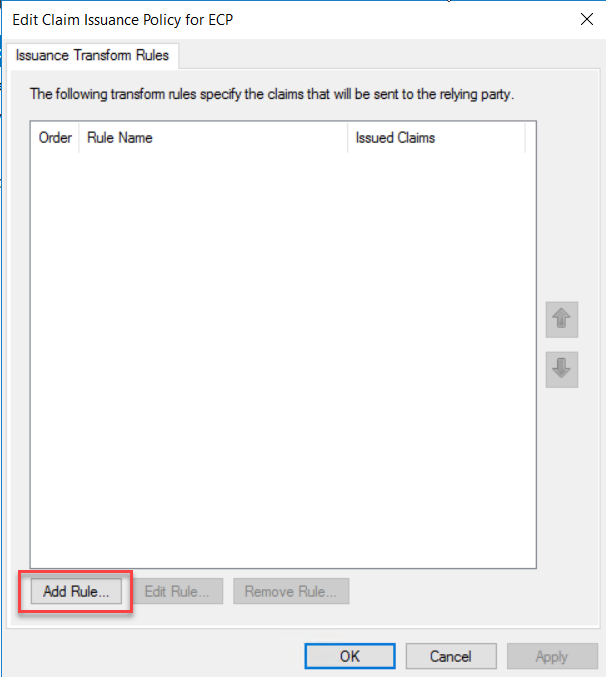
We are going to add two issuance policy rules for ECP Policy. On the Issuance, Transform rules click add Rules to start the wizard.
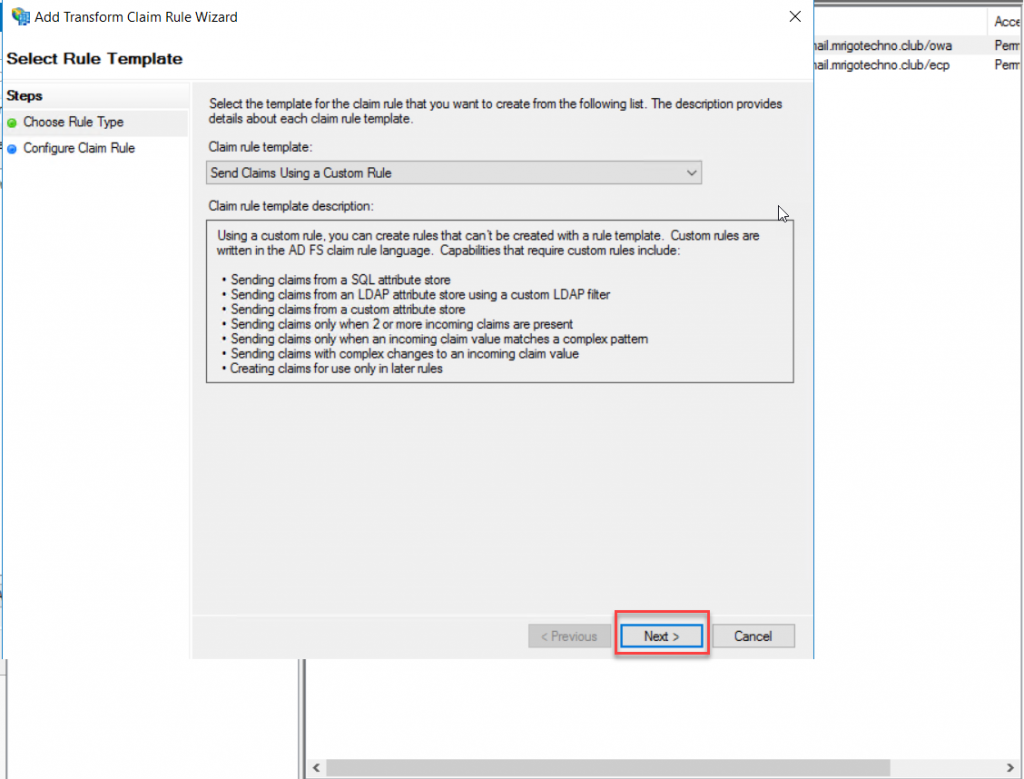
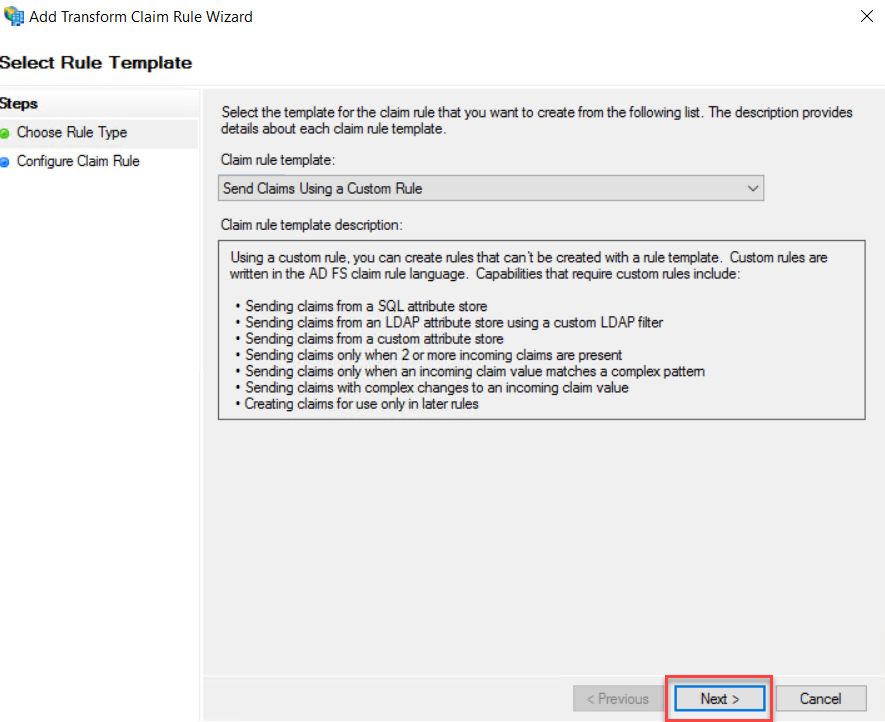
On the Claim rule template drop-down, select “Send Claims Using a Custom Rule” and click Next.
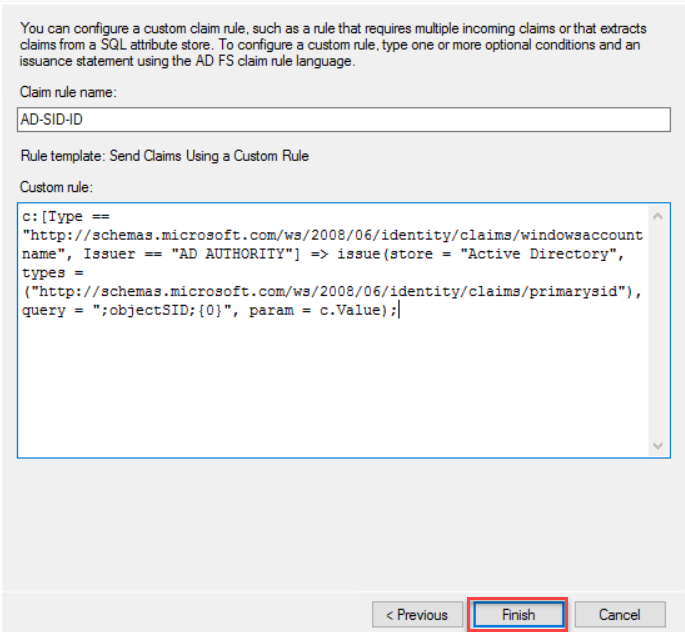
Type a claim rule name, this rule is for Active Directory SID identifier, so I have named it AD-SID-ID. On the custom rule area, type following rule
c:[Type == "http://schemas.microsoft.com/ws/2008/06/identity/claims/windowsaccountname", Issuer == "AD AUTHORITY"] => issue(store = "Active Directory", types = ("http://schemas.microsoft.com/ws/2008/06/identity/claims/primarysid"), query = ";objectSID;{0}", param = c.Value);
Click Finish to End rule wizard.

Next, we are going to add one more rule for Active Directory UPN. Click Add Rule.

On the Claim rule template drop-down, select “Send Claims Using a Custom Rule” and click Next.
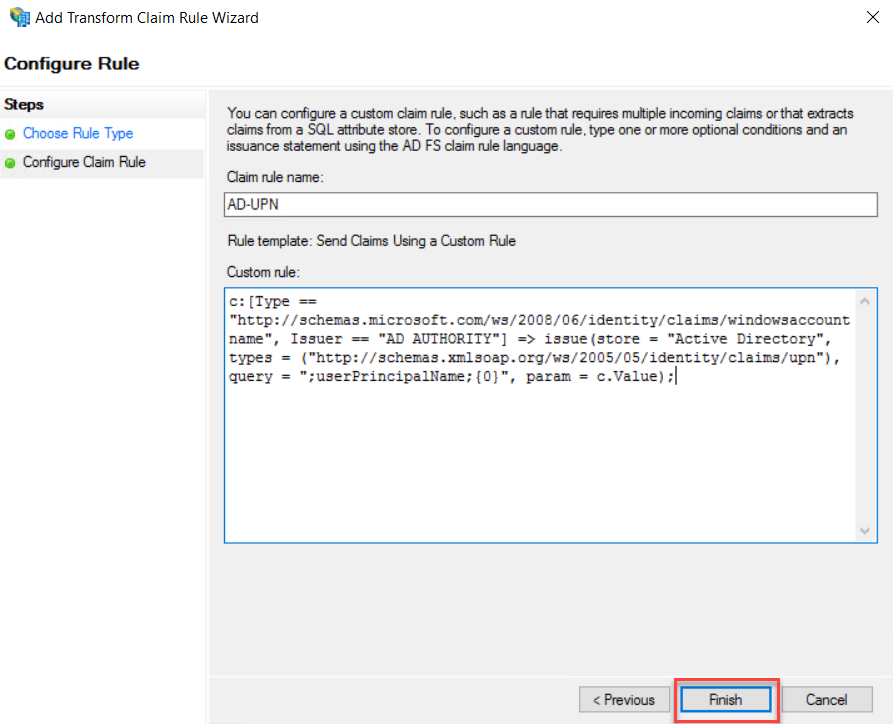
On the Claim Rule Name, type a name for the Claim Rule, this rule is for Active Directory UPN, so I have typed name as AD-UPN. On Claim Rule Area copy and paste the following rule
c:[Type == "http://schemas.microsoft.com/ws/2008/06/identity/claims/windowsaccountname", Issuer == "AD AUTHORITY"] => issue(store = "Active Directory", types = ("http://schemas.xmlsoap.org/ws/2005/05/identity/claims/upn"), query = ";userPrincipalName;{0}", param = c.Value);
Click Finish to end the Rule wizard.

On the Edit Claim Issuance Policy window, click OK.

Export Token Signing Certificate from AD FS server to Import it to Exchange Server
Exchange Server Claims Authentication Using ADFS
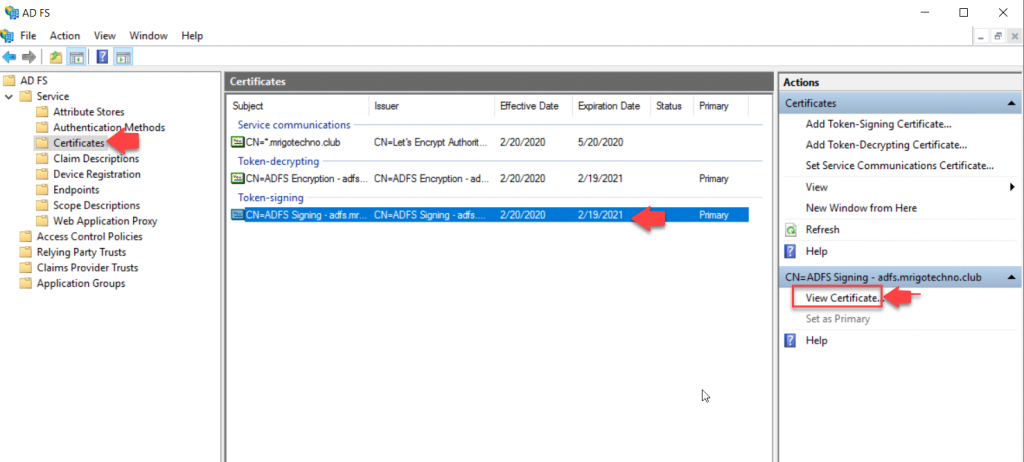
Go to AF FS Management Console and select certificates under Service. On the middle (Certificates) pane, select the subject CN=ADFS Signing; and on the action pane, click View Certificate.

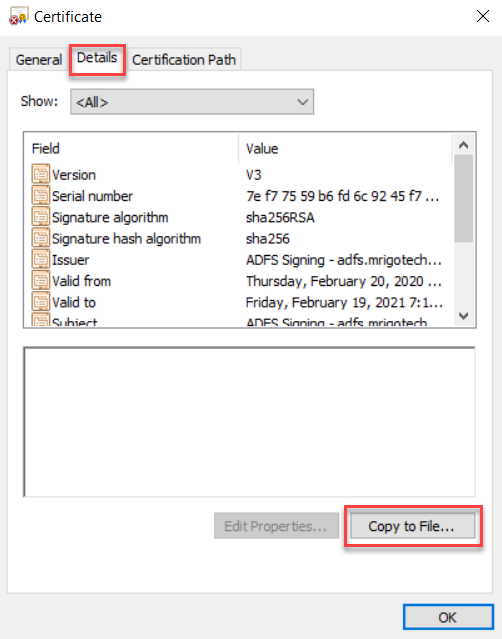
Select the Details tab and click Copy to File in the bottom.

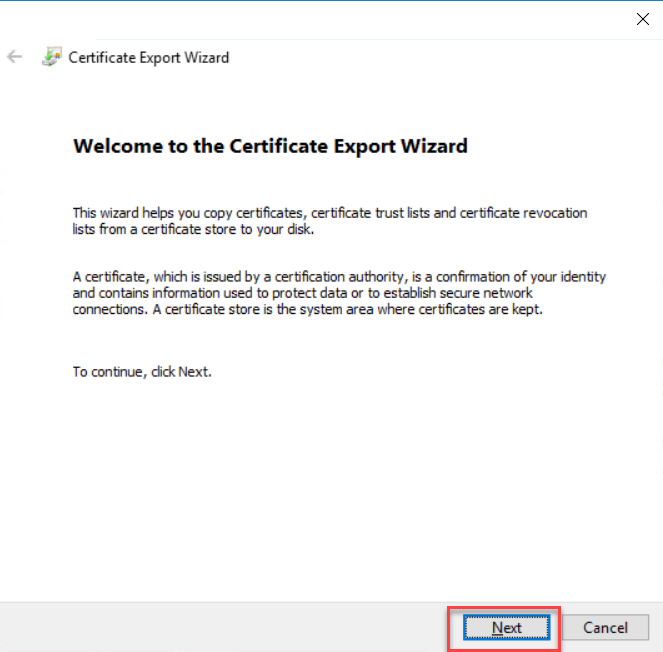
Click Next on the certificate export wizard welcome screen.
Select the Details tab and click Copy to File in the bottom.
Click Next on the certificate export wizard welcome screen.
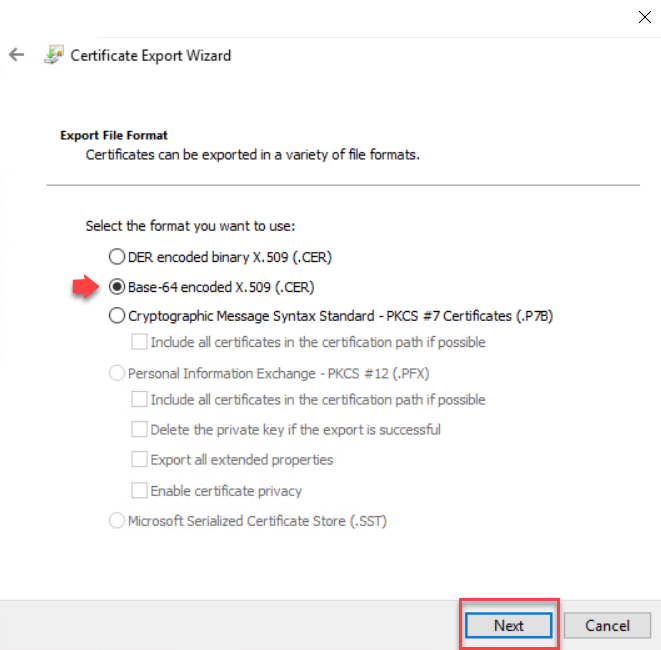
On the export file format, choose the Base-64 encoded X.509 (.CER) file format, Click Next.
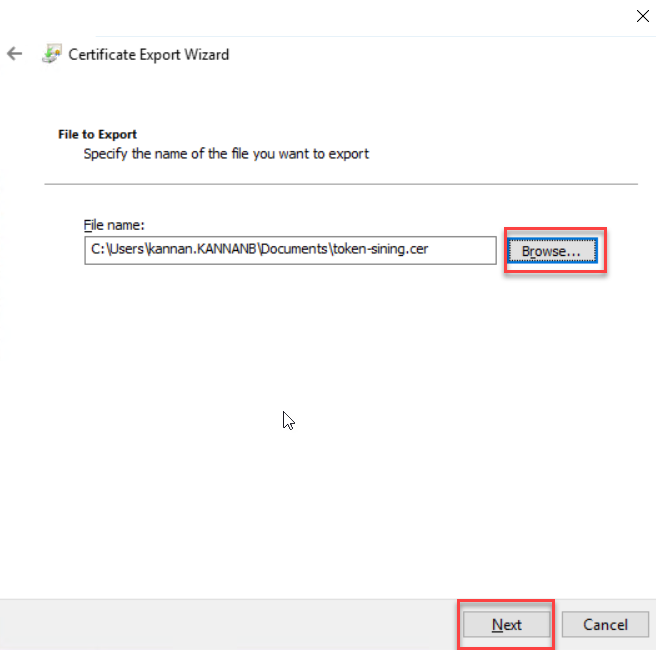
Click Browse and select a certificate file path and a name with .CER extension. Click Next to continue.
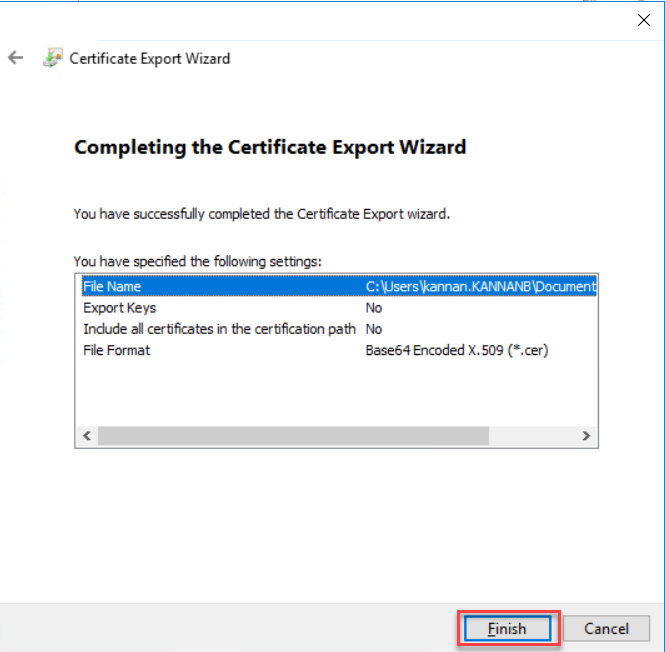
Click Finish to complete the certificate export wizard. Copy the exported file to Exchange Server to Import.
Import the Token-Signing Certificate to Exchange Server
Exchange Server Claims Authentication Using ADFS
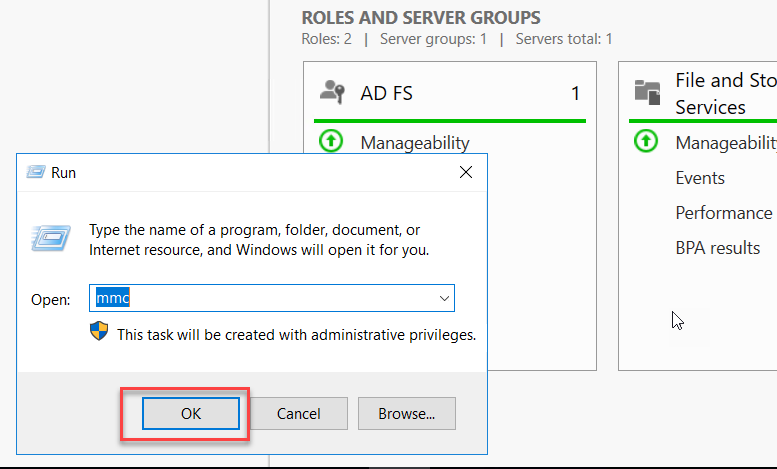
Go to StartàRun and type MMC and click OK
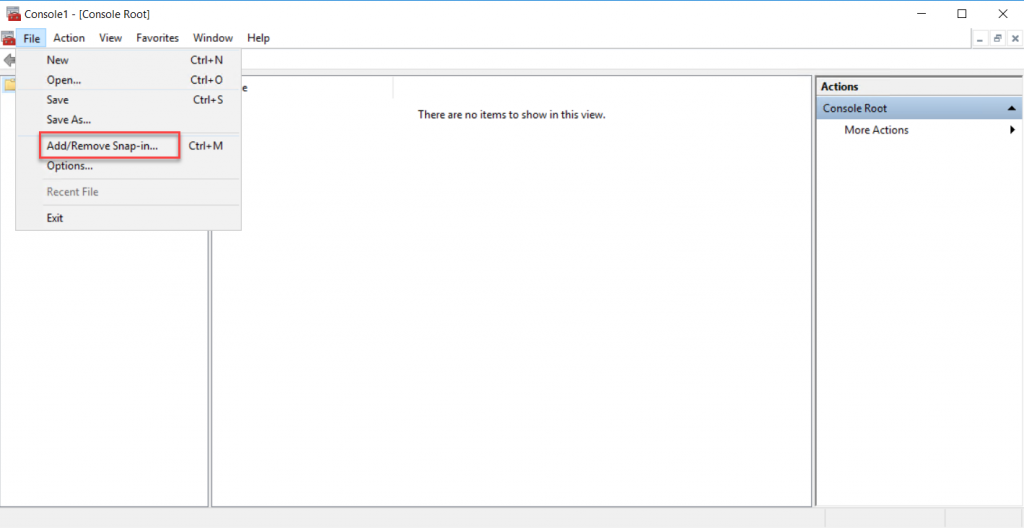
On the Microsoft Management Console(MMC), click the file menu, and Add Remove snap-in.
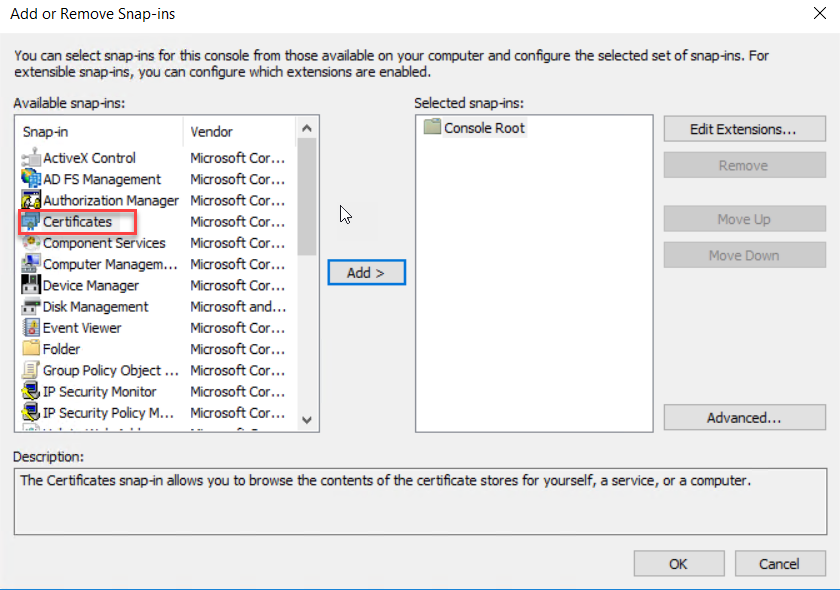
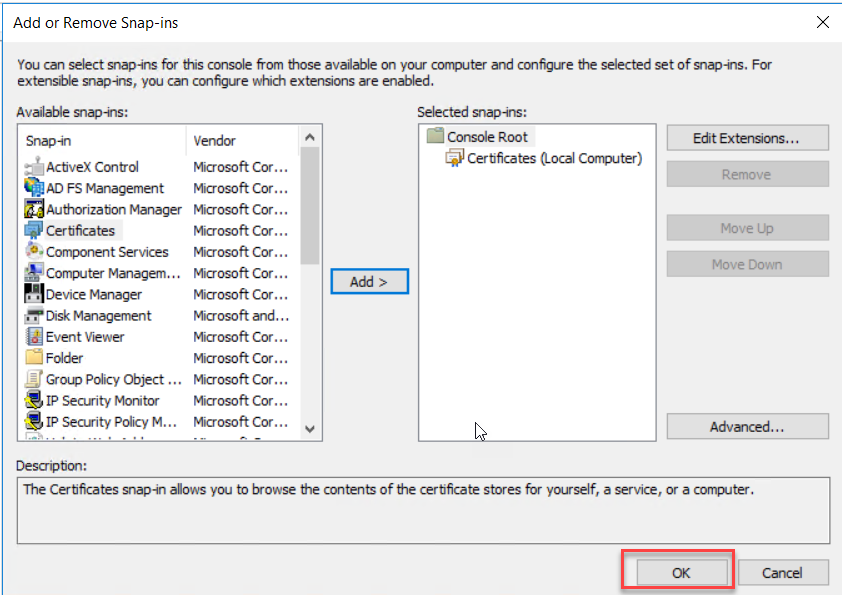
On the Add or Remove snap-ins select Certificate snap-in from the available snap-ins and click add.
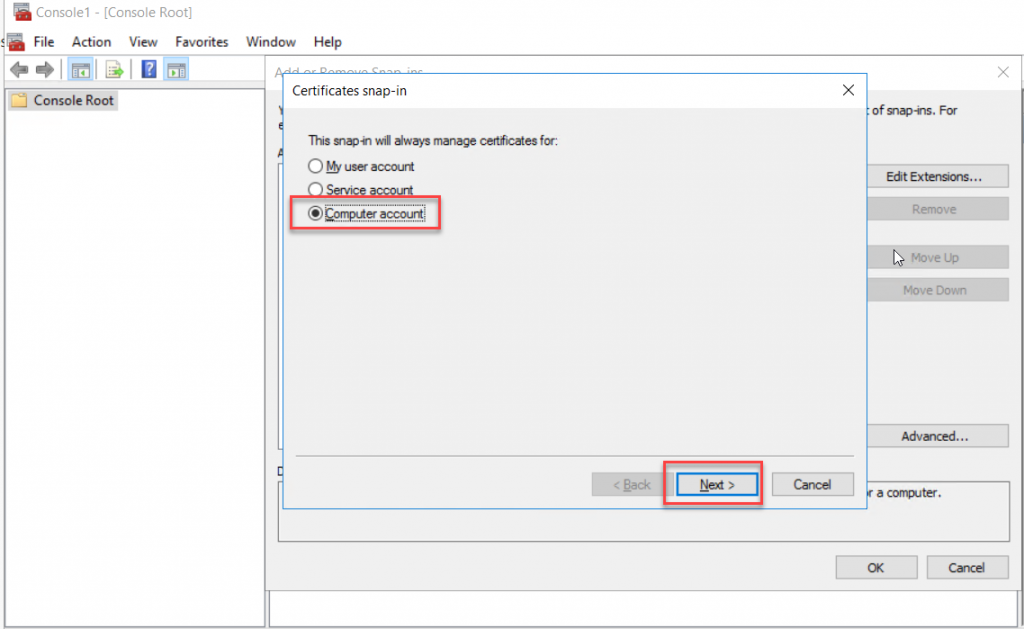
On the Certificate snap-in wizard select Computer Account and click Next
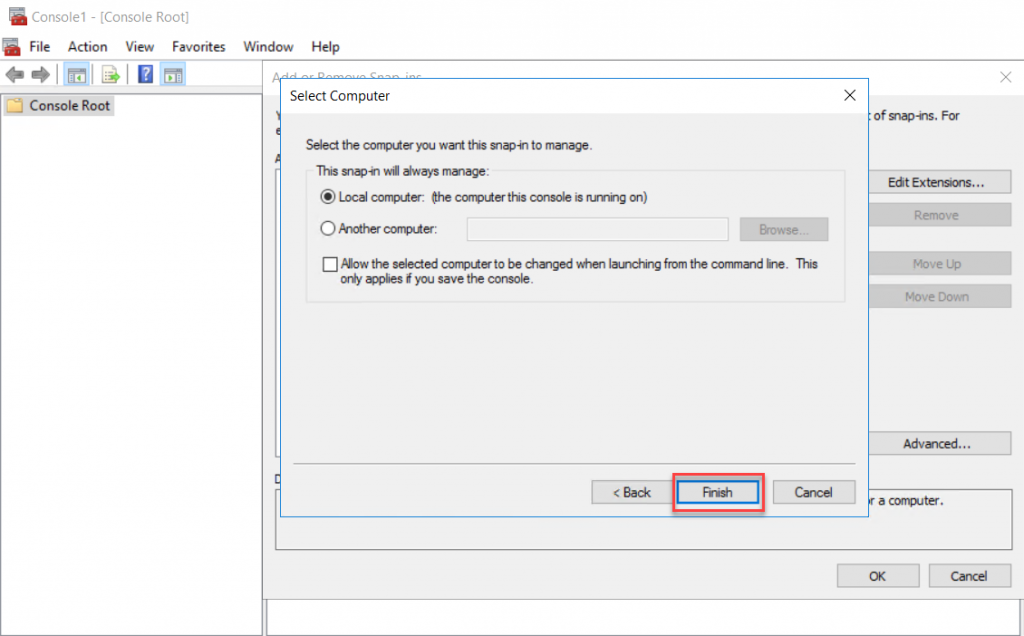
Select Local Computer on the manage snap-in computer page and click Finish to end the snap-in wizard.
As the Certificate snap-in selected, click OK to open the Certificates Console.
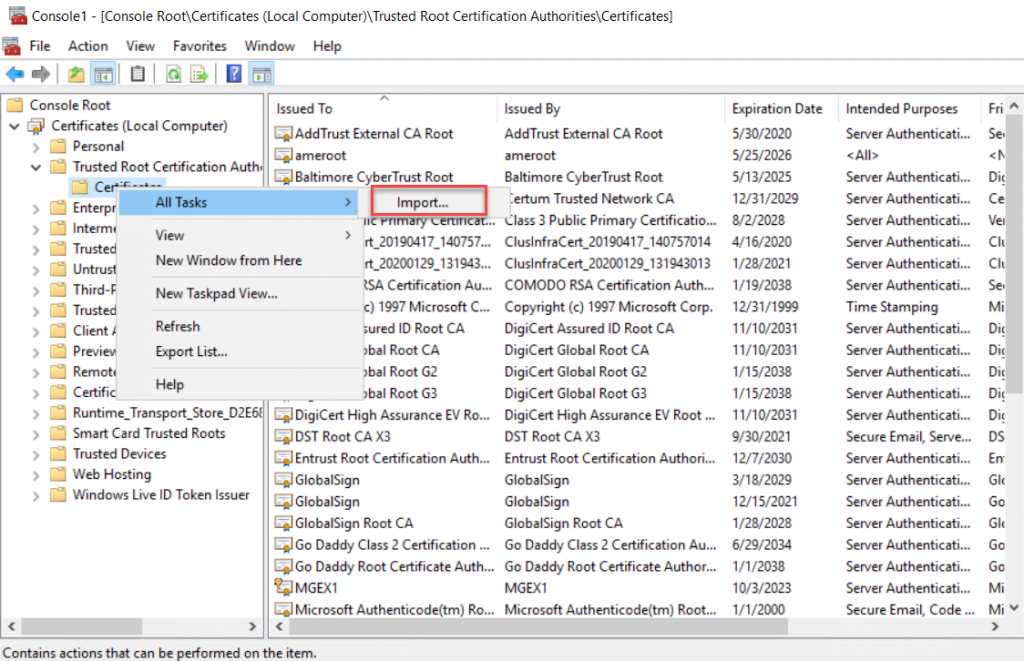
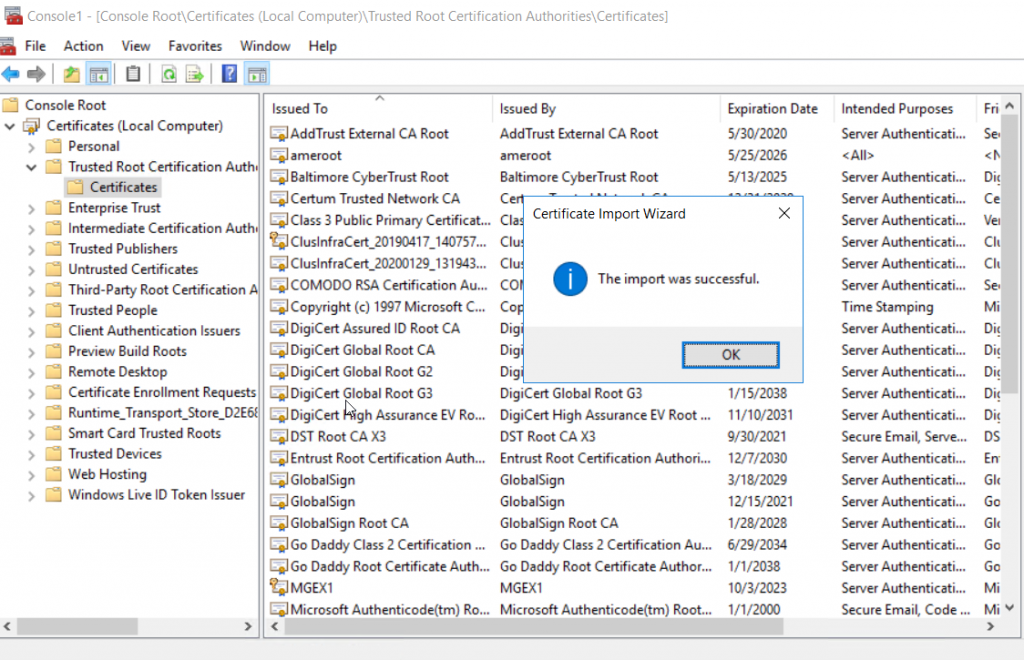
Right-Click Certificates on Console Root/Trusted Root Certification Authority/Certificates, and click “Import” under All Tasks.
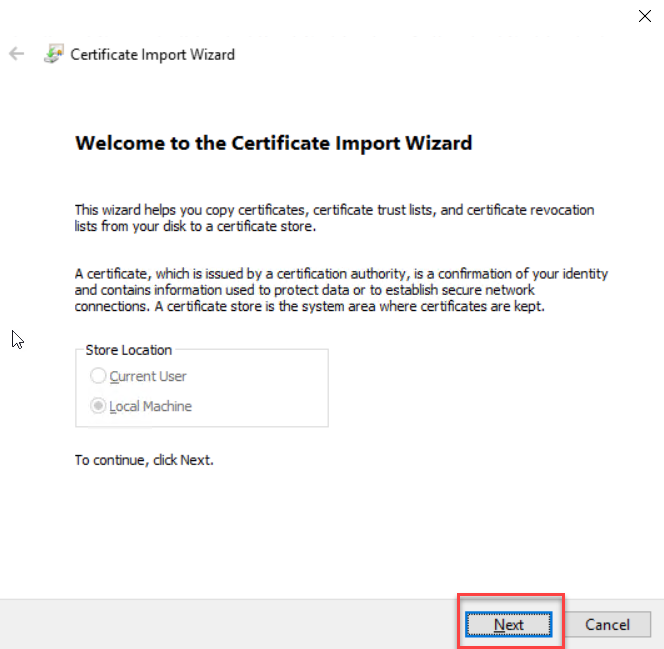
Click Next on the Certificate Import Wizard welcome screen. Click Next to continue
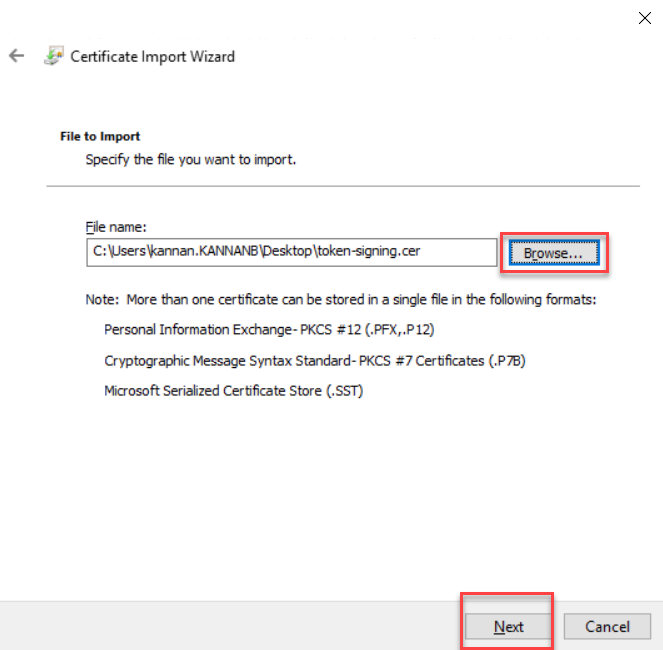
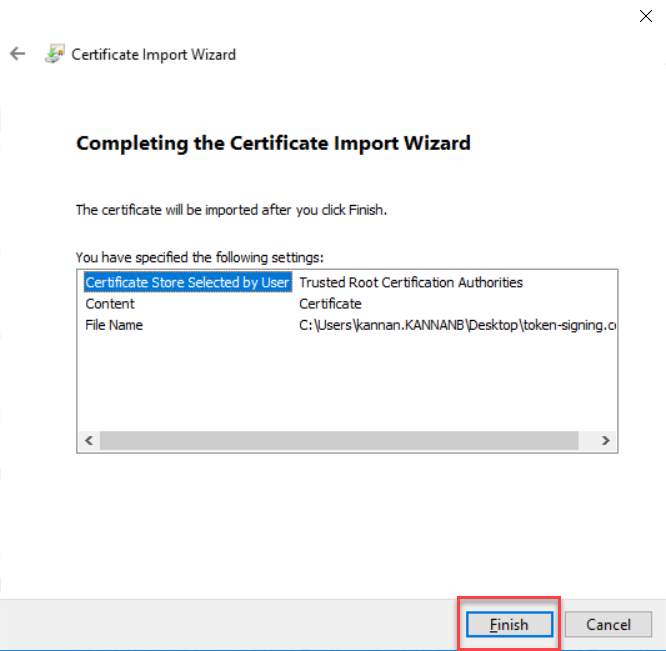
Select the token-signing.cer file that we exported from the AD FS server and copied to the Exchange server. Click Next to continue.
Click Finish on Certificate Importing wizard.
Click the OK button on the “The import was Successful” popup message.
Configure Exchange Organization to authenticate using ADFS
Exchange Server Claims Authentication Using ADFS
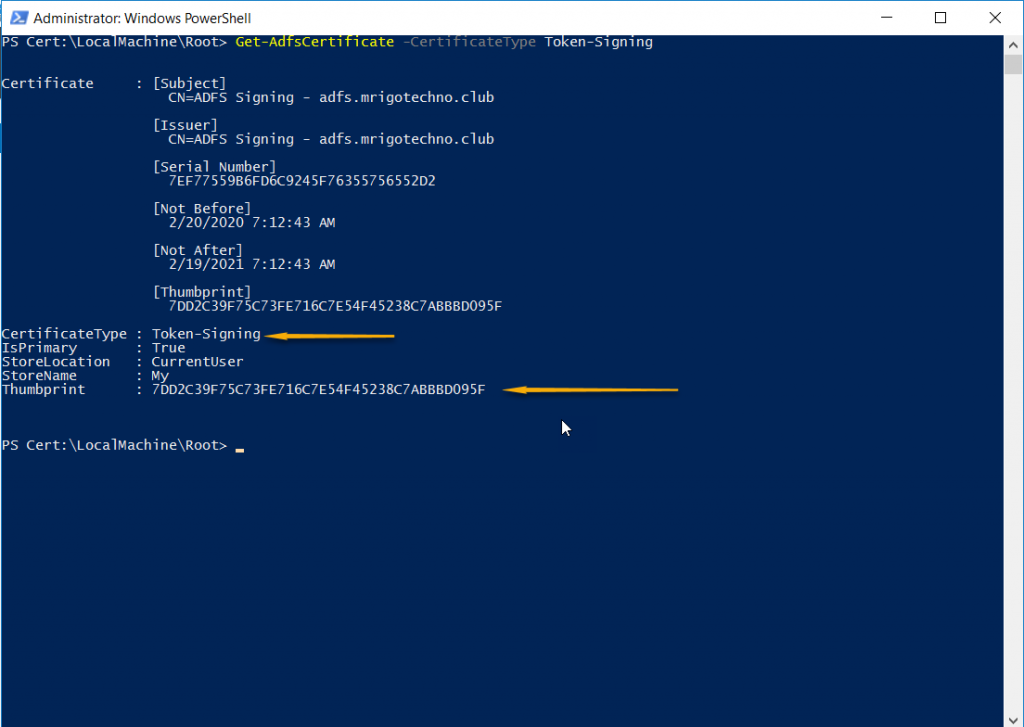
On AD FS server launch PowerShell prompt and type the following command to get the token signing certificate thumbprint
Get-AdfsCertificate –CertificateType token-signing
Start Exchange Management Shell on Exchange server, from StartàExchange Server 2016, right-click Exchange Management Shell, and click Run as Administrator to start elevated EMS.
Construct the set-organizationconfig command with 1. ADFS Issuer Uri 2. ADFS Audience Uris (OWA and ECP Uris) and 3. AD FS sign certificate thumbprint (In the previous step, we took thump print of ADFS Signing certificate).
Set-OrganizationConfig -AdfsIssuer https://adfs.mrigotechno.club/adfs/ls/ -AdfsAudienceUris "https://mail.mrigotechno.club/owa/","https://mail.mrigotechno.club/ecp/" -AdfsSignCertificateThumbprint "7DD2C39F75C73FE716C7E54F45238C7ABBBD095F"

Configure ECP and OWA virtual directories with ADFS Authentication
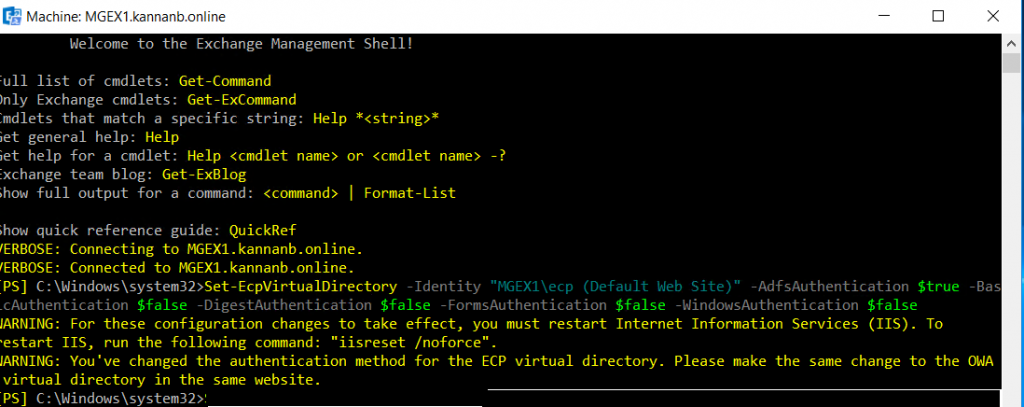
Run Set-ECPVirtualDirectory command on Exchange management shell to set ECP authentication. The -identity on the command is “ServerName\ecp (Default Web site)” type your server name. Also, except Adfs authentication, set all other authentication to false (make it off).
Set-EcpVirtualDirectory -Identity "MGEX1\ecp (Default Web Site)" -AdfsAuthentication $true -BasicAuthentication $false -DigestAuthentication $false -FormsAuthentication $false -WindowsAuthentication $false
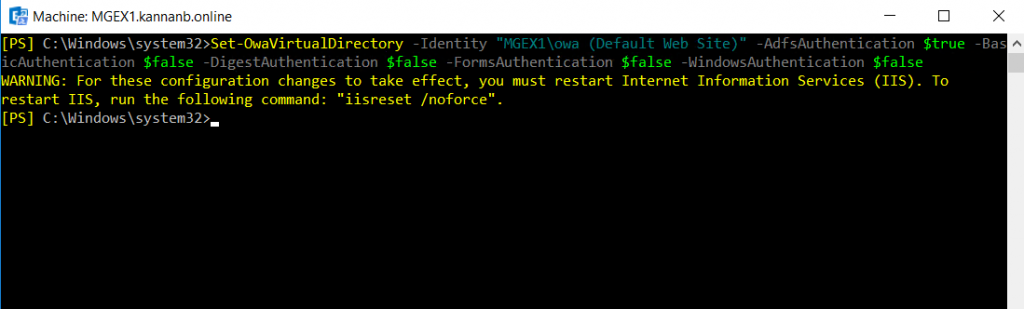
Run Set-OwaVirtualDirectory command on Exchange management shell to set OWA authentication. The -identity on the command is “ServerName\owa (Default Web site)” type your server name. Also, except Adfs authentication, set all other authentication to false.
Set-OwaVirtualDirectory -Identity "MGEX1\owa (Default Web Site)" -AdfsAuthentication $true -BasicAuthentication $false -DigestAuthentication $false -FormsAuthentication $false -WindowsAuthentication $false
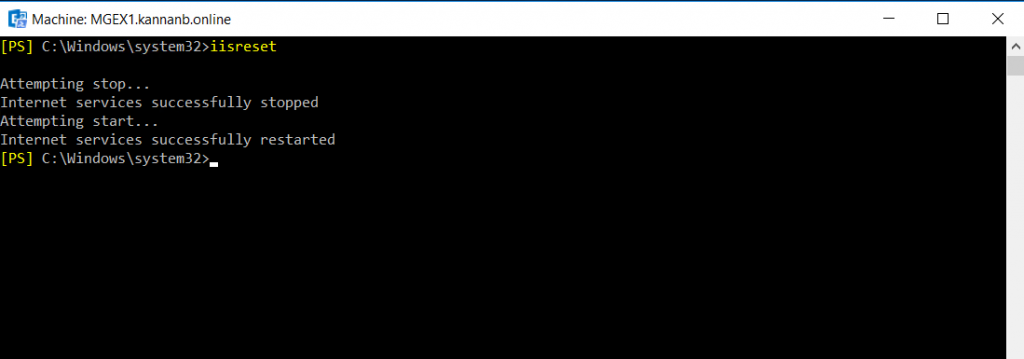
Once the OWA and ECP virtual directories configured, restart Internet Information Services.
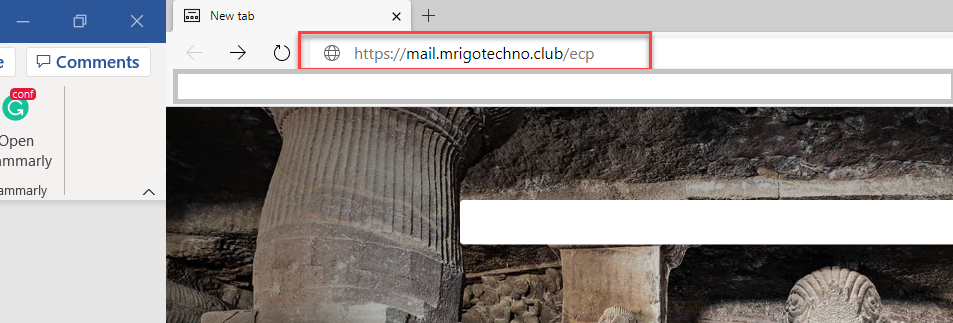
Test OWA and ECP claims based authentication
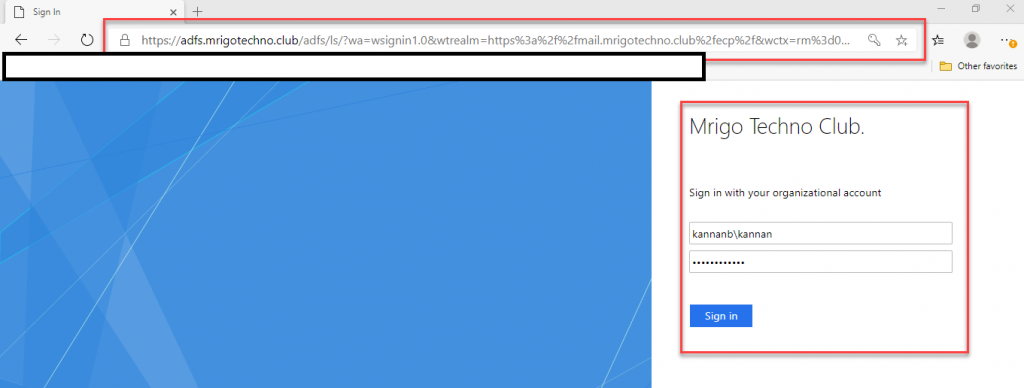
Open a browser window and type Exchange Admin Center(ECP), or Outlook on the web (OWA) URL
The browser will redirect to the Federation services login page, type the username and password.
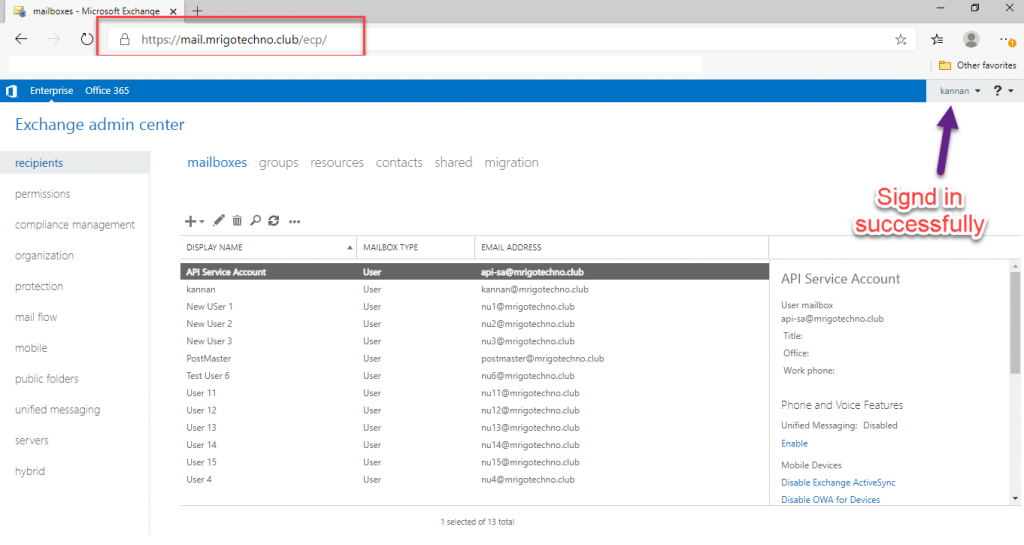
After authentication with AD FS, the URL will redirect back to ECP
Conclusion
In this article, we have gone through how to setup claims-based authentication for Exchange Server OWA and ECP URLs on the ADFS server installed on Windows server 2016. We have covered how to install and configure Active Directory Federation service (AD FS), configured Relying party trusts, and Claim issuance rules for OWA and ECP URLs. We configured Exchange organization to authenticate to AD FS and configured ECP and OWA virtual directories and then demonstrated AD FS authentication by login to ECP site.
I hope this article gives all the details to set up an Exchange environment to implement claims-based authentication for Exchange Server OWA and ECP using AD FS. You may have some questions or feedback to share with me, please click the comments below and share your thoughts. I’m so happy to answer your questions.