How To Schedule Auto Stop/Start Azure VM During Off-Hours For Cost-Control
We are going to take a complete Azure VM Automation solution to start and stop during Off-Hours. I’m going to explain to you this automation on the Azure Portal GUI method. In order to configure Azure Virtual-Machines to auto start/stop, we need to create Automation Account and Import the StopAzureV2VM and StartAzureV2VM runbooks from the Azure Gallery.
I would suggest you follow the steps outlined here.
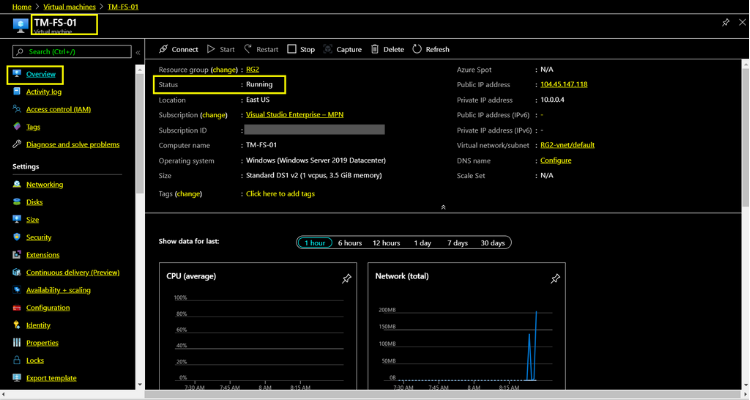
The Azure VM with a name TM-FS-01 is being used to configure Azure automation.
The following steps are taken to configure the automation.
- Create Automation Account.
- Import Runbooks
- Schedule Stop and Start VMs with imported runbooks
- Check the Strat and Stop Runbooks scheduled Jobs
1. Create Azure VM Automation Account
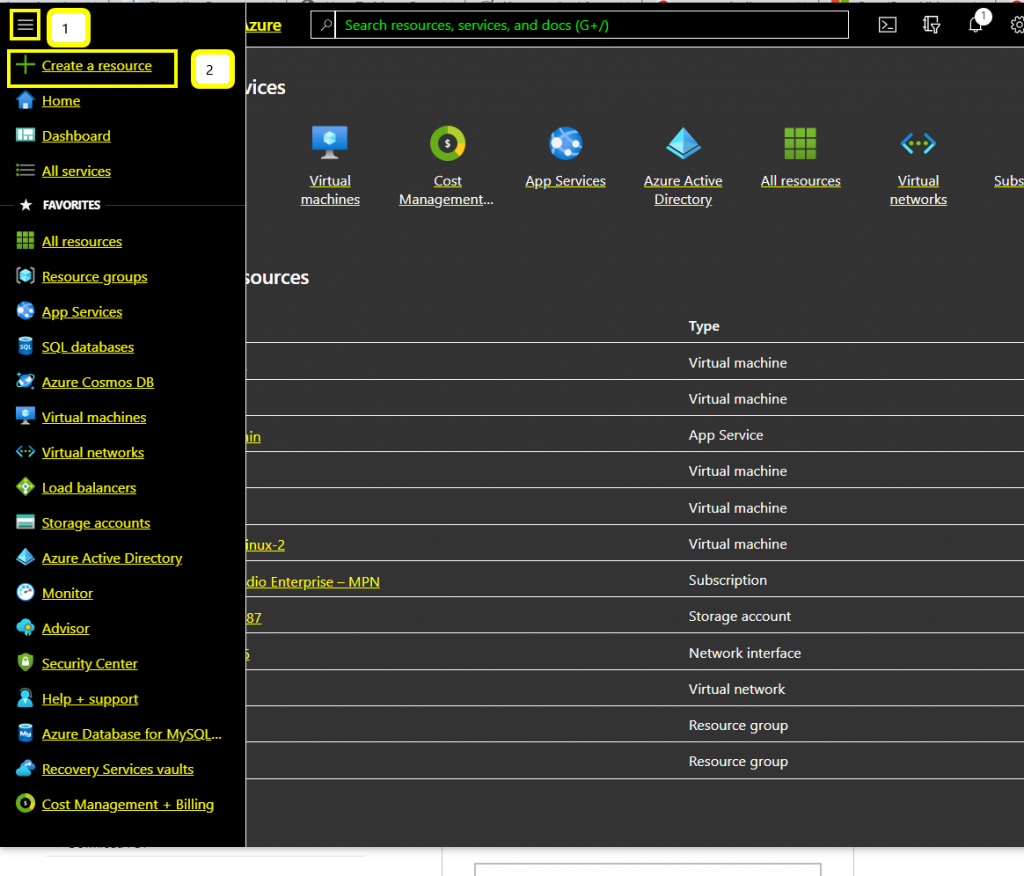
Click the menu icon in Azure Virtual-Machine and Create Resources and search for automation.
Search “automation” and select it to create.
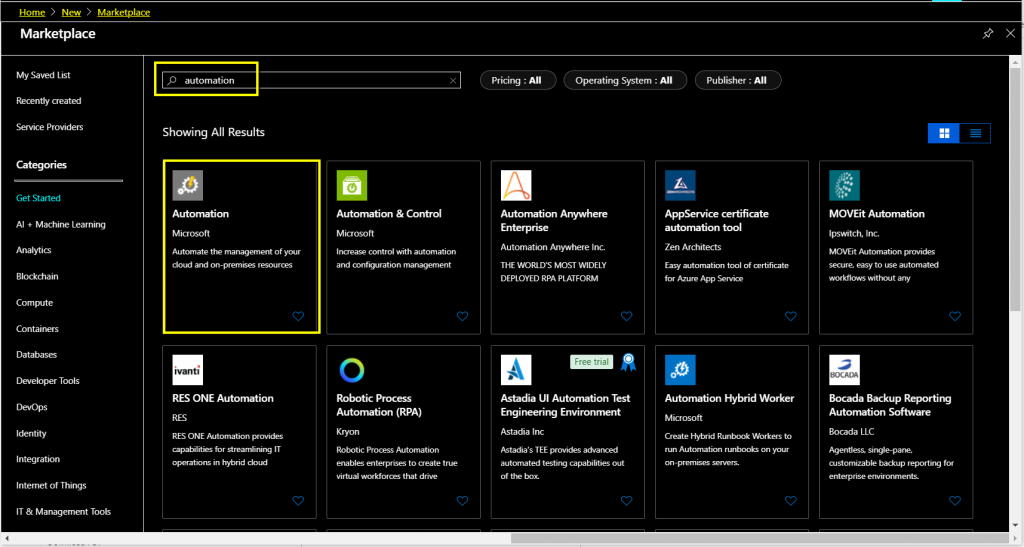
Pick Automation from the search result and Create
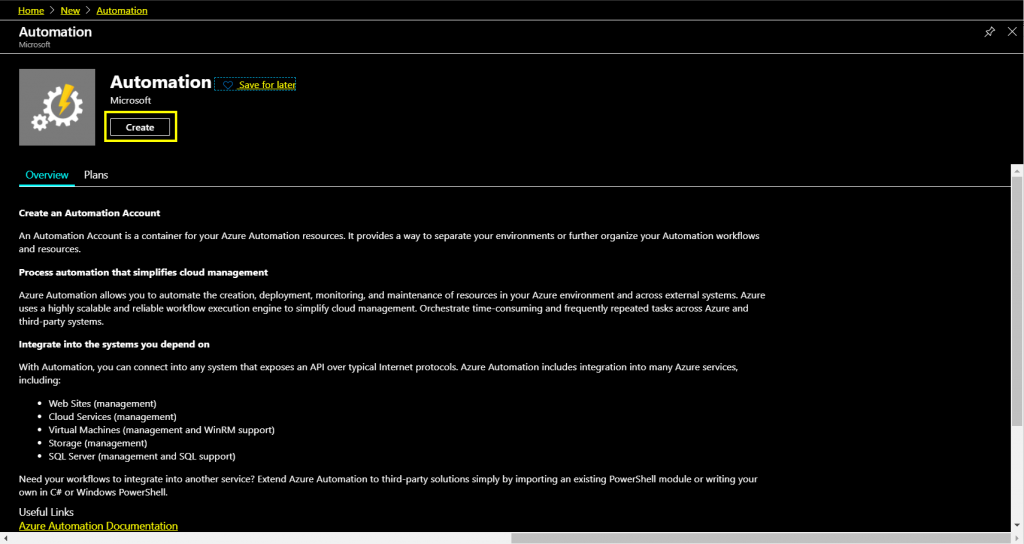
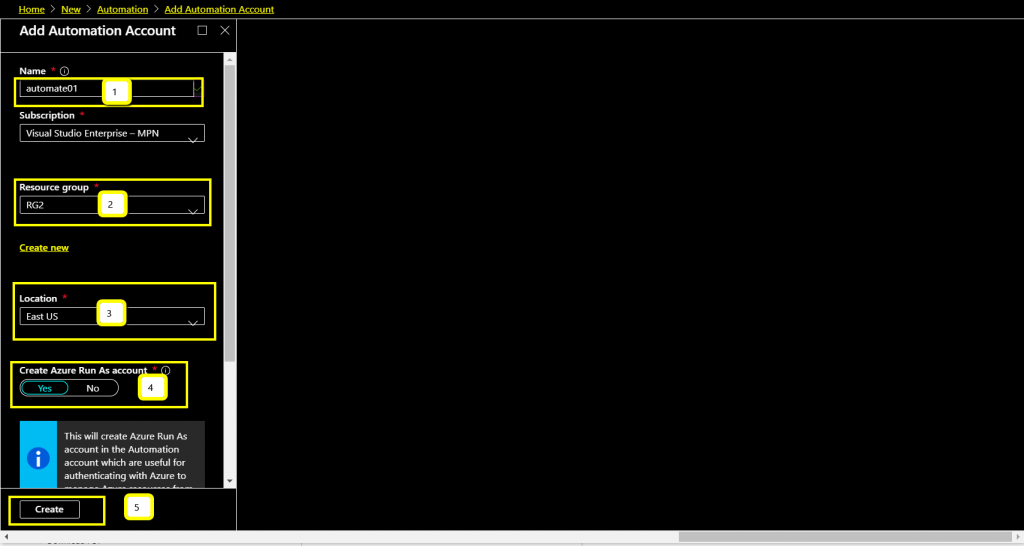
In the Create Automation Account, type name of the Automation Account (One that you choose), Resource Group and Location. Leave the toggle “Create Run as Account” to Yes.
Click Create
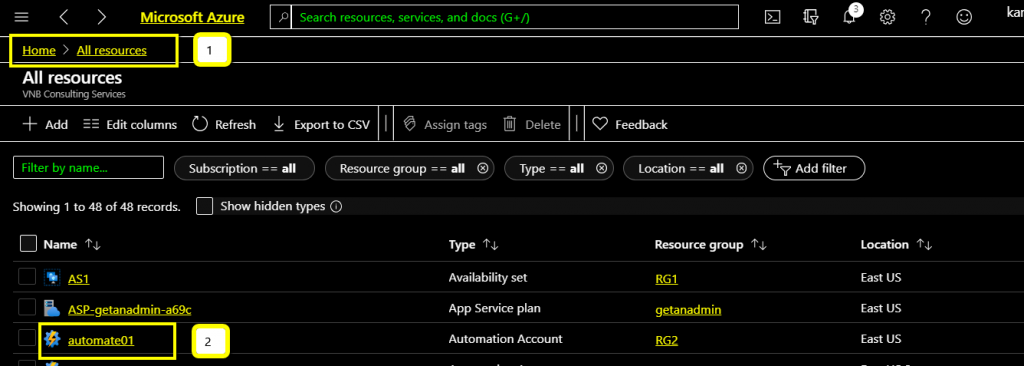
2. Import Runbooks to Azure Virtual-Machine Automation account
Go to All Resources and open Automation account created.
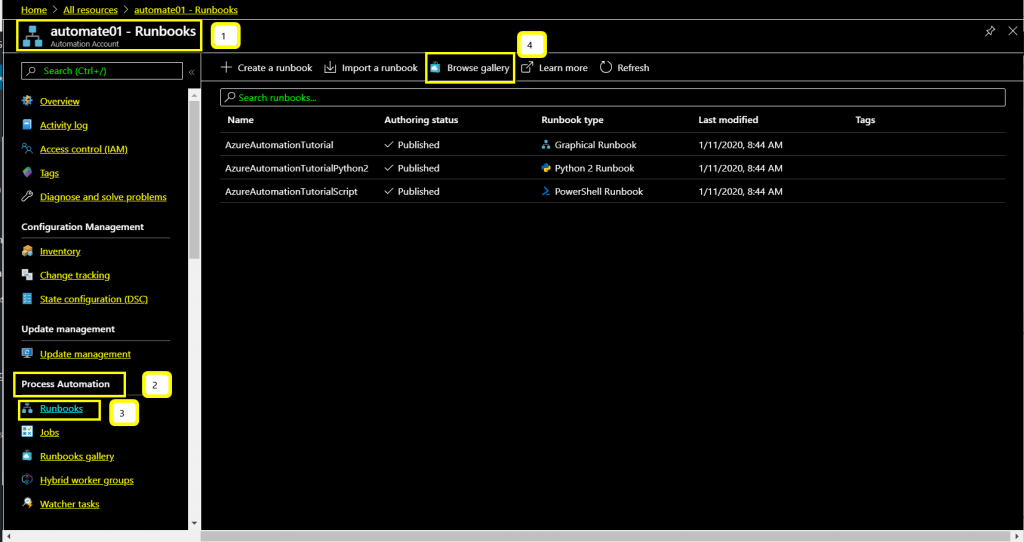
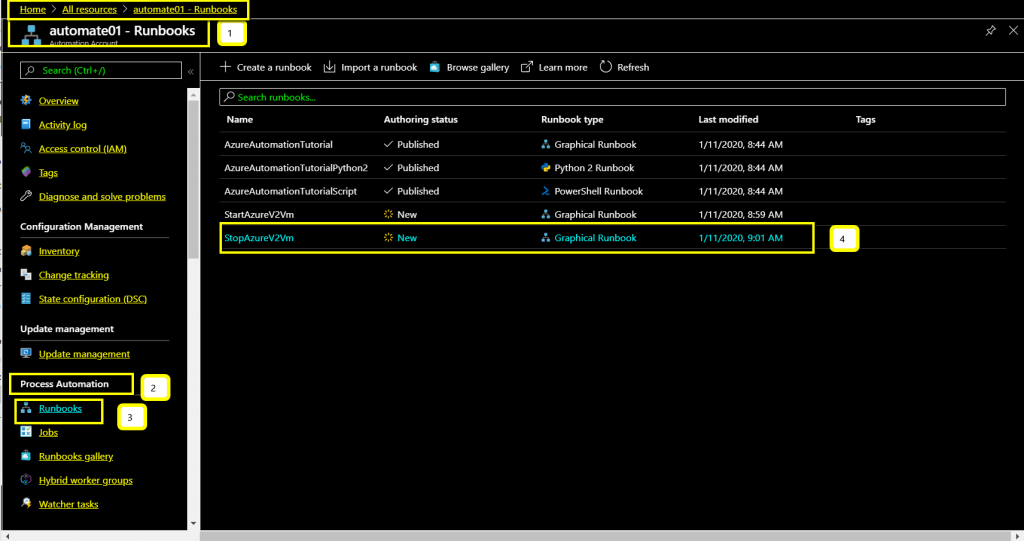
On the automation account, under process automation, select Runbooks.
In order to import runbooks for stop/start automation, select Browse Gallery
Here, we have to import Start Azure V2 VMs and Stop Azure V2 VMs runbooks.
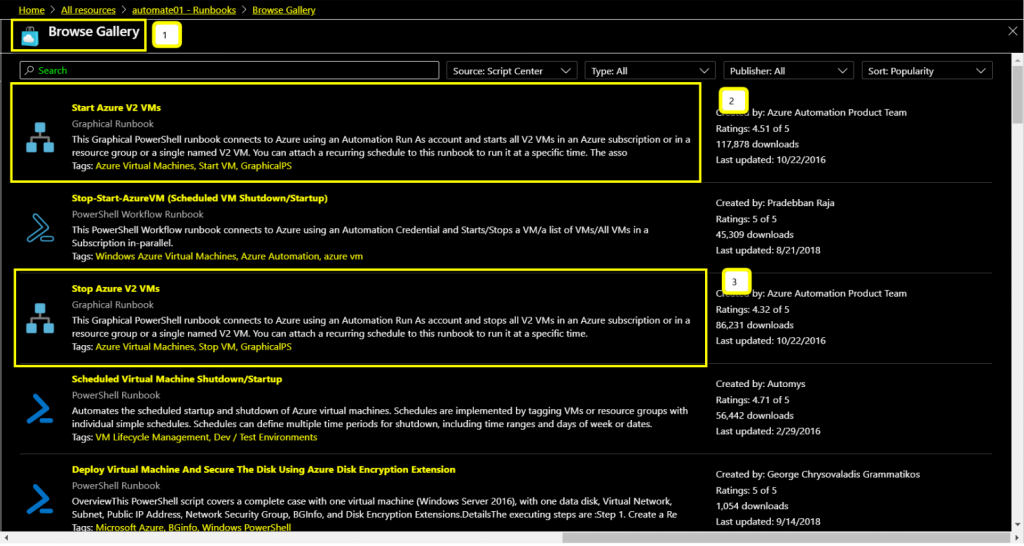
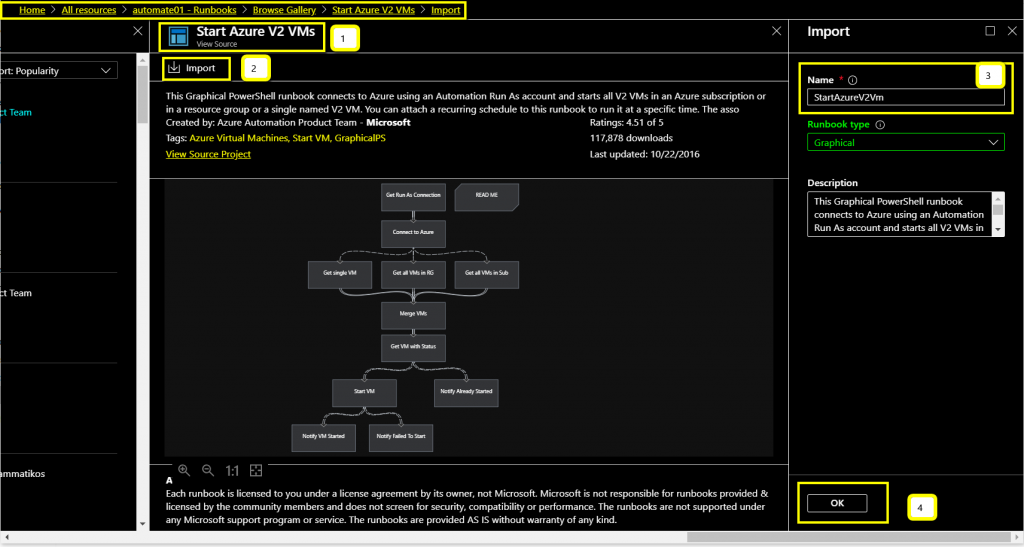
Select Start Azure V2 VMs and Import and click OK as in the below screen.
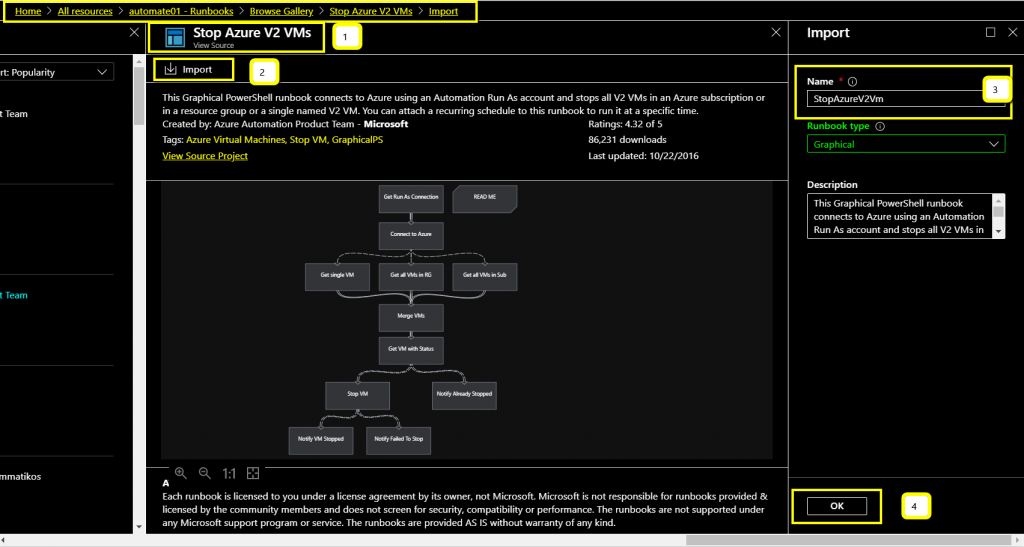
Also, do the same steps to import Stop Azure V2 VMs.
After importing the runbooks, we have to publish these runbooks, so that we can schedule VMs Start/Stop automation.
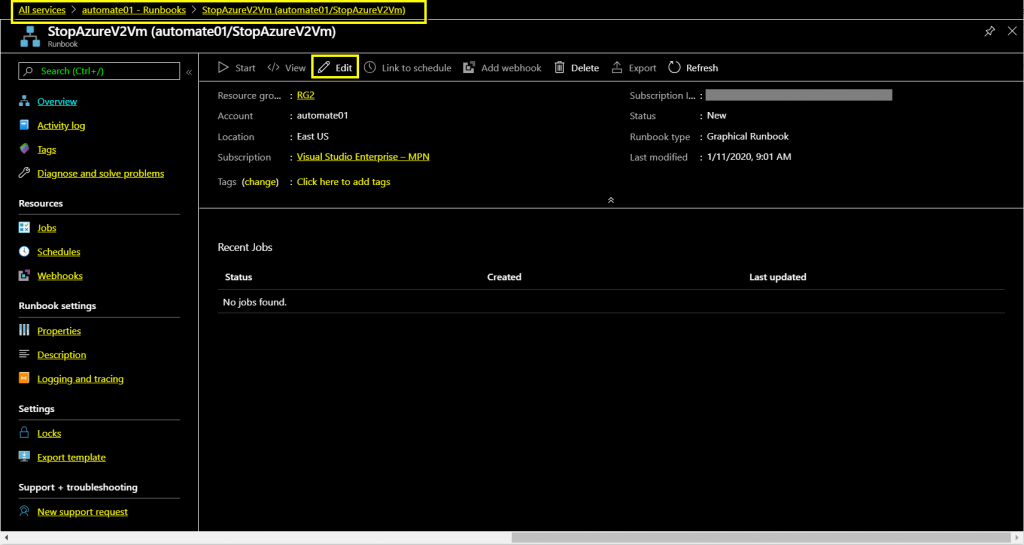
Open each runbook and click Edit. Here we are editing StopAzureV2VM runbook.
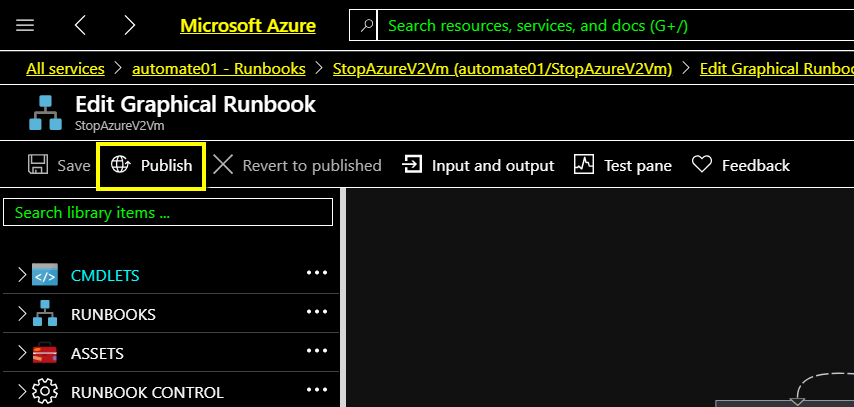
Now, we can edit the runbook, click publish, so that the stopazurev2vm runbook will be published.
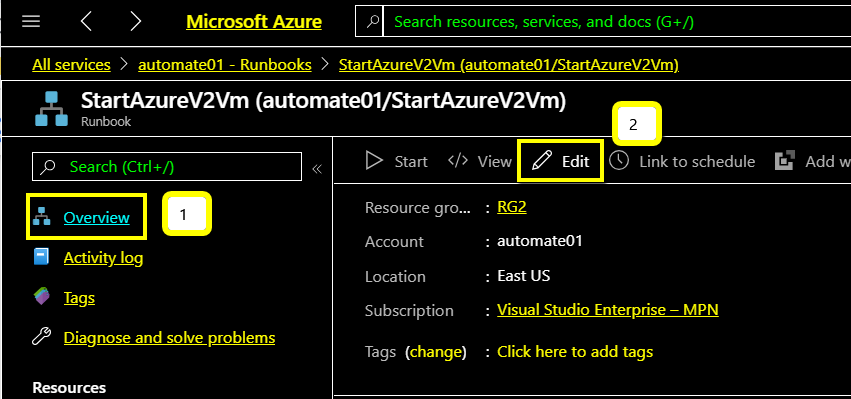
Next, Open StartAzureV2VM and select edit to publish this runbook.
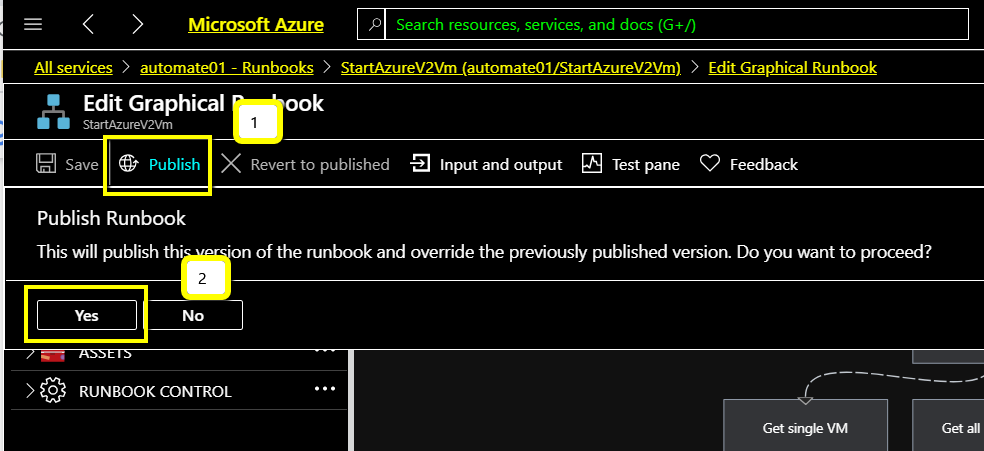
Click Publish to get the StartAzureV2VM to get published.
Confirm the StopAzureV2VM and StartAzureV2VM runbooks are published by checking status of them.

Here is StartAzureV2VM

3. Schedule Stop and Start VMs with imported runbooks
Open the StopAzureV2VM and Schedule the Azure VM to stop at a specific time. In the Navigation, under resources, select Schedule and Add Schedule in the right.
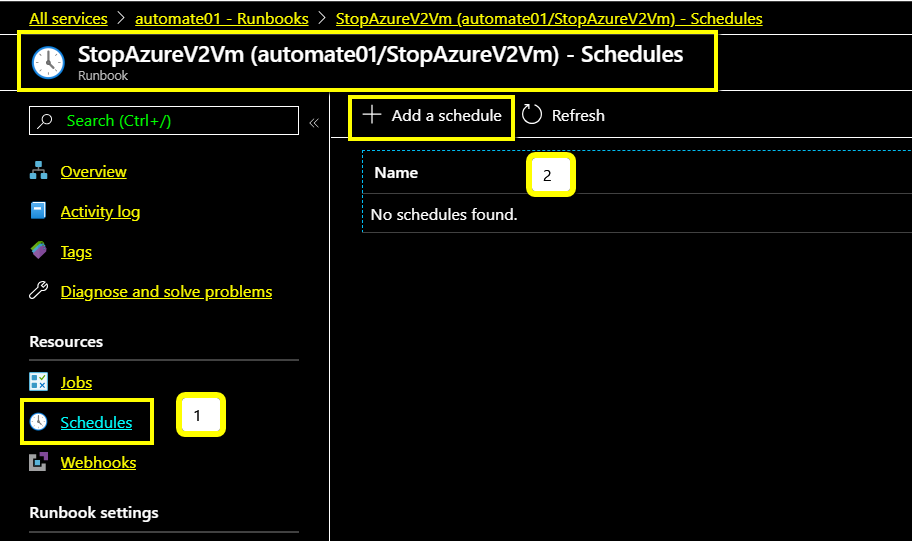
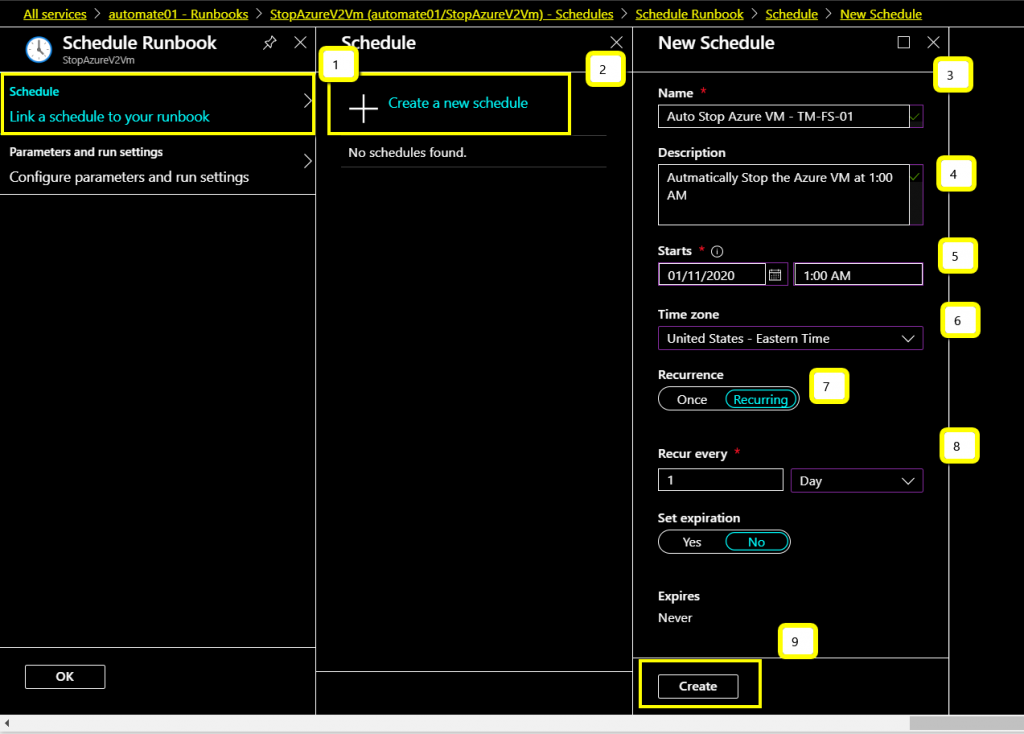
Select Link a Schedule to your runbook and Create New Schedule.
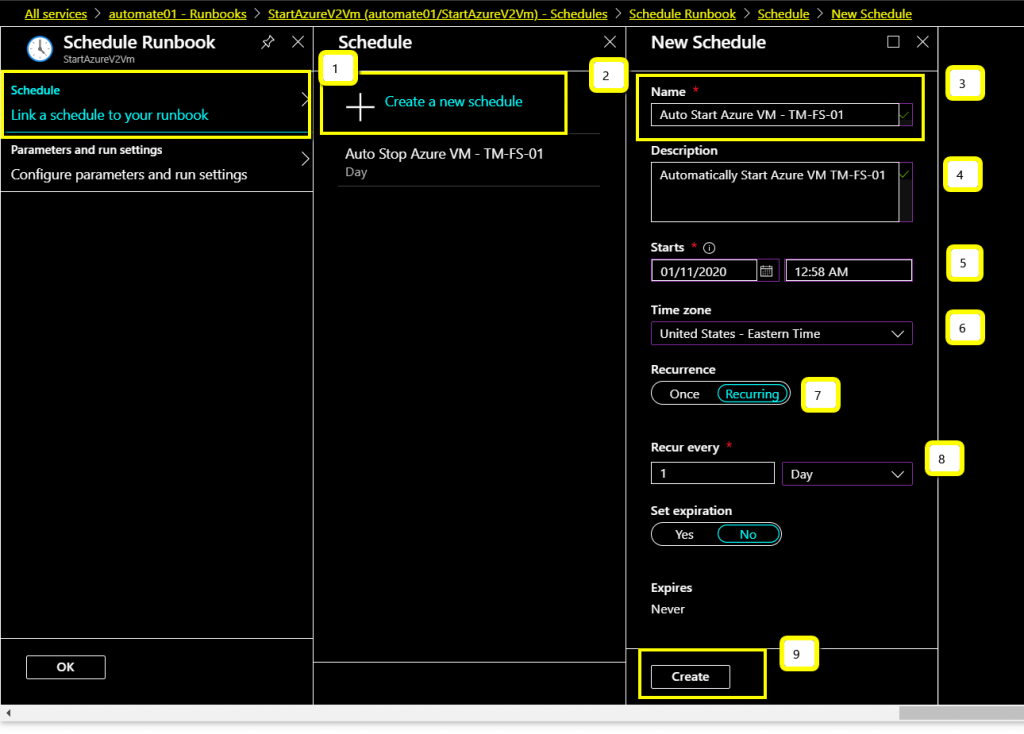
Type name of the Schedule/Give a Description
Select Date and Time for the VM to Stop and the time Zone relevant to you.
Toggle Recurrence as you want. I have selected Recurring and recur every day for this Example.
Click Create to create the schedule.
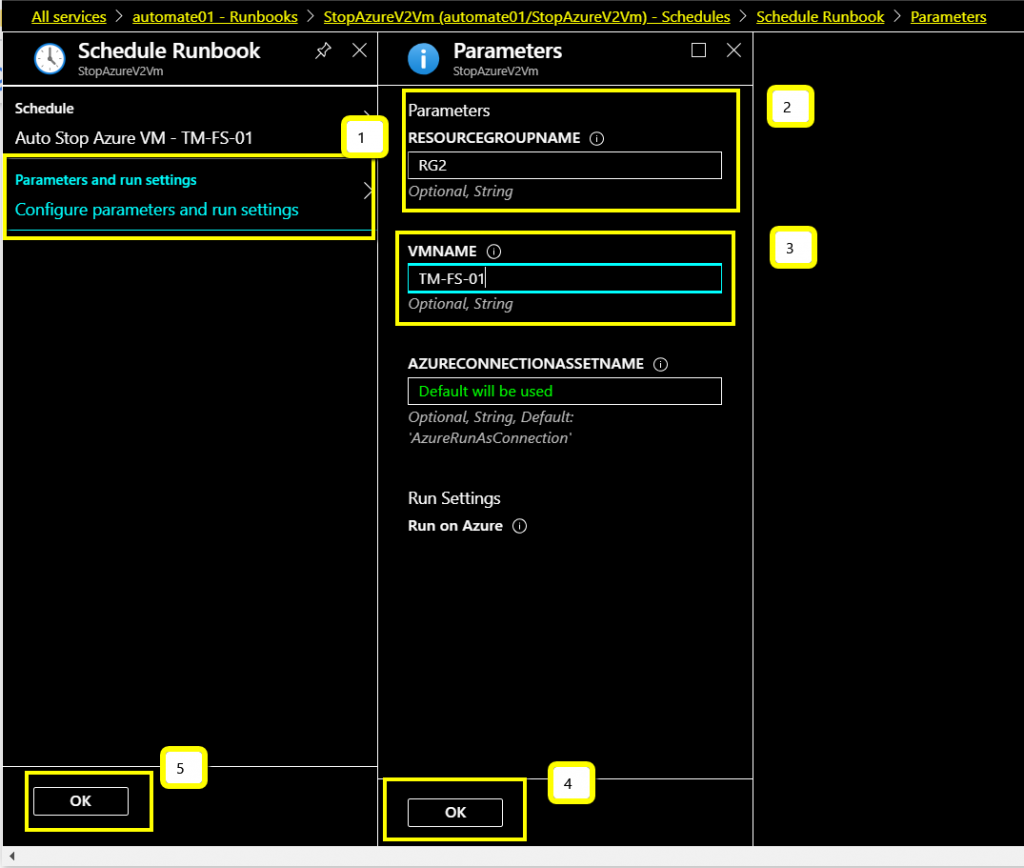
Once the Schedule has been configured for Stop VM, now configure parameters and run settings for the VM that you choose to stop at a specific time.
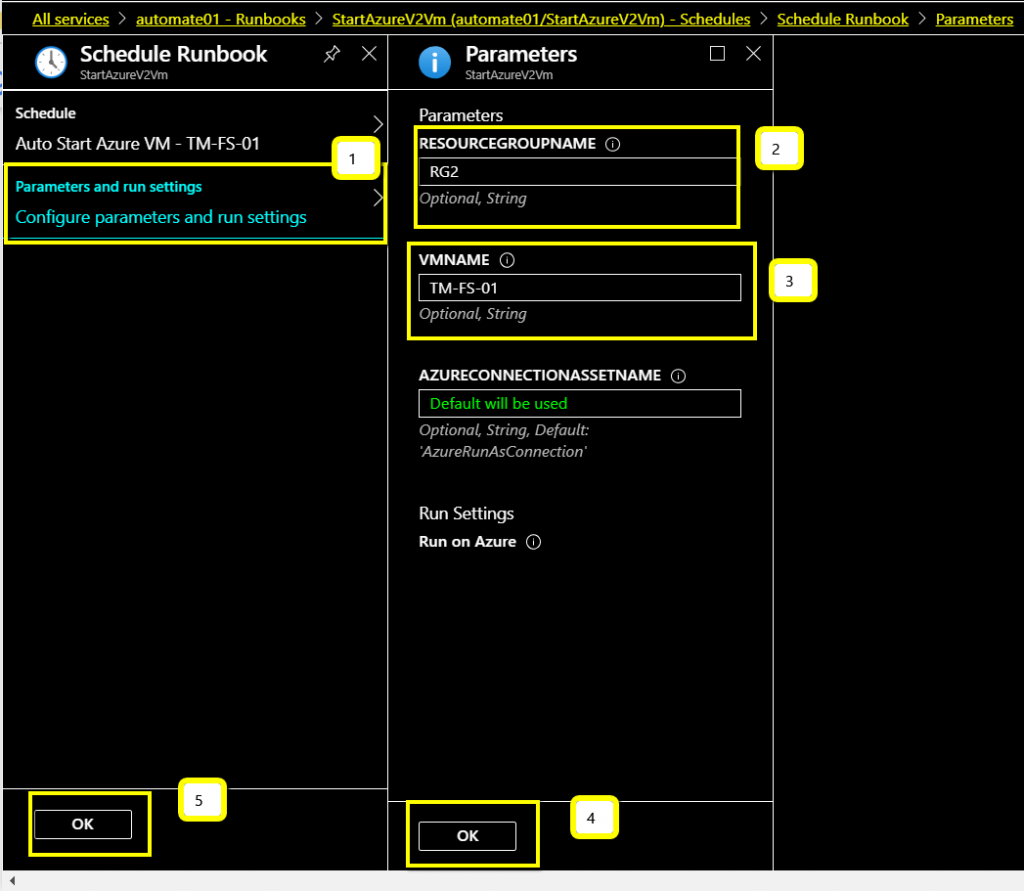
Type the Resource Group name and VM that needs to be automated to stop and click OK to complete Parameters.
Click OK to complete the Schedule Runbook.
The StopAzureV2VM has been Scheduled to Stop.

Next, we need to schedule the StartAzureV2VM runbook to start at a specific time the same way we did for Stop Schedule.
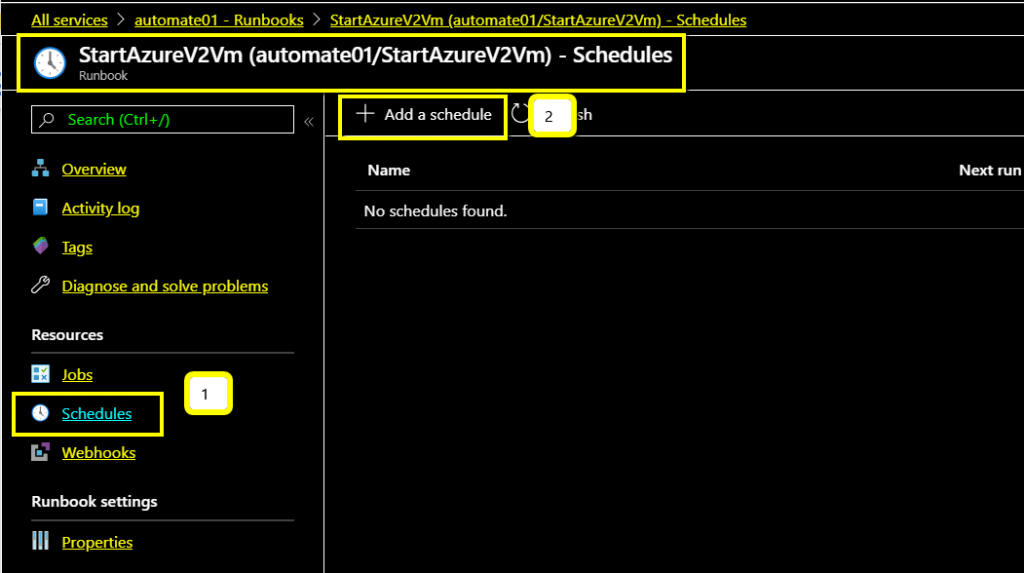
Now, Link a schedule to runbook to automate Start the VM.
And, Configure Parameters and run settings for the same VM that we had configured to stop.
The StartAzureV2VM runbook has been scheduled and configured.

4. Check the Start and Stop Runbooks scheduled Jobs in Azure Virtual-Machine
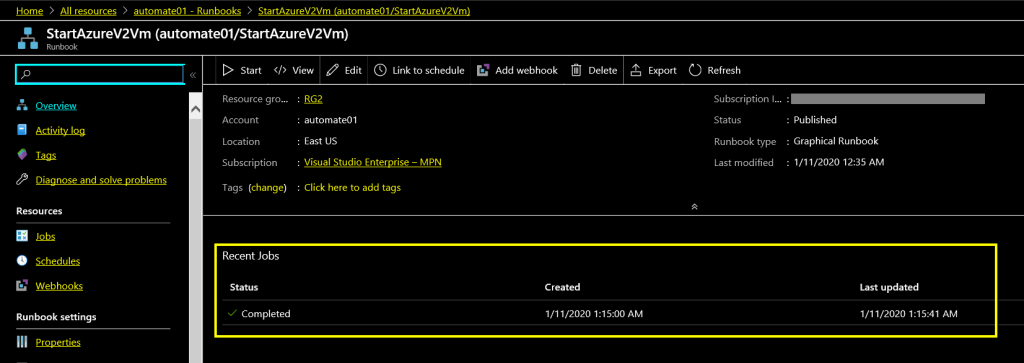
The VM Start was completed at the scheduled time.
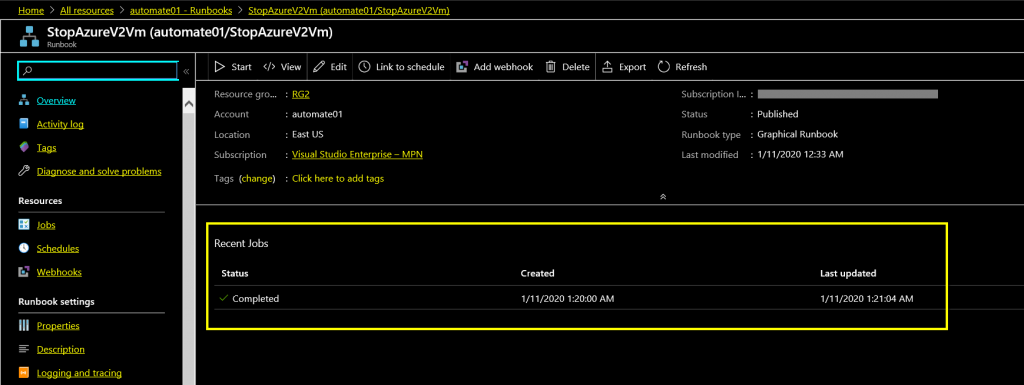
The Stop job also completed as scheduled.
The configuration of automating the VM to Start and Stop is completed here.
You Can Find Microsoft Documents For Azure here
Please send your feedback in the comments below.

