
How Quickly Map Azure Storage File-Share As Network Drive
This step by step instruction helps you in creating Azure Storage with file share on the Azure Cloud and Mapping Azure Storage File-Share As A Network Drive.
There are two steps in this process, and we are going to look at it one by one.
The Azure Document home page can be accessed here.
- Create Storage Account and File Share on the Azure Portal
- Map the Azure Files Share as Network Drive on Windows System
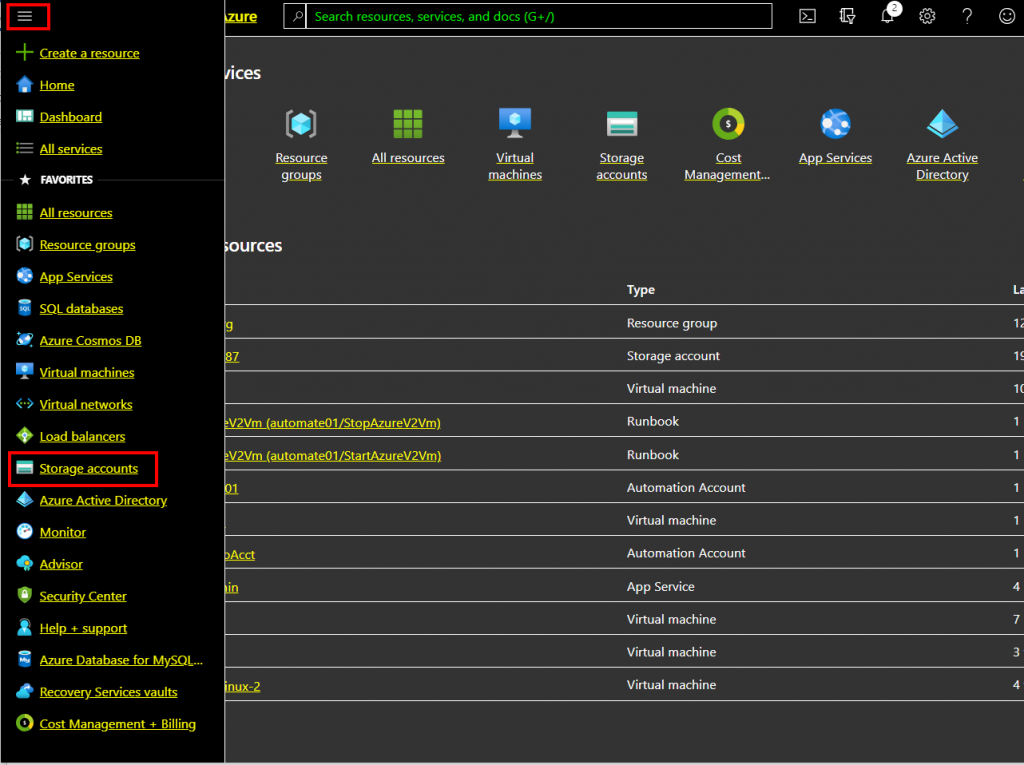
Login to Azure Portal and select Menu Icon on the top and select Storage Accounts
Create Storage Account and File Share on the Azure Portal
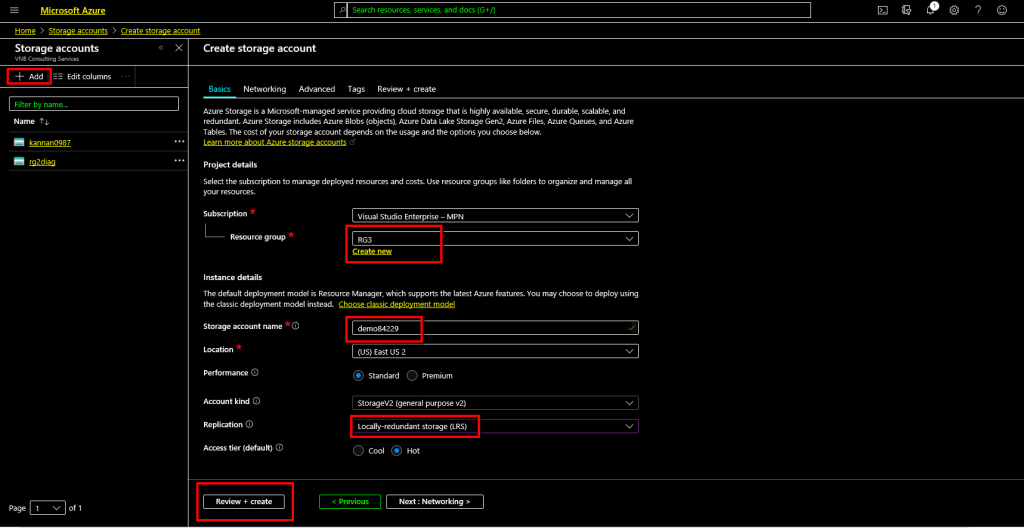
We are going to add a new storage account for this demo. However, you can use an existing storage account if you prefer.
On the Create Storage Account dialog box type select or create the Resource Group. In this case, the already created Resource group has been selected. However, you can create new resource group for instance.
Type storage account name relevant to the requirement. This name should be unique and only lowercase letters and numbers. For example, I have named “demo84229”.
Select the Location and Replication type. I selected Locally redundant storage just for this demo purpose.
Click Review + Create
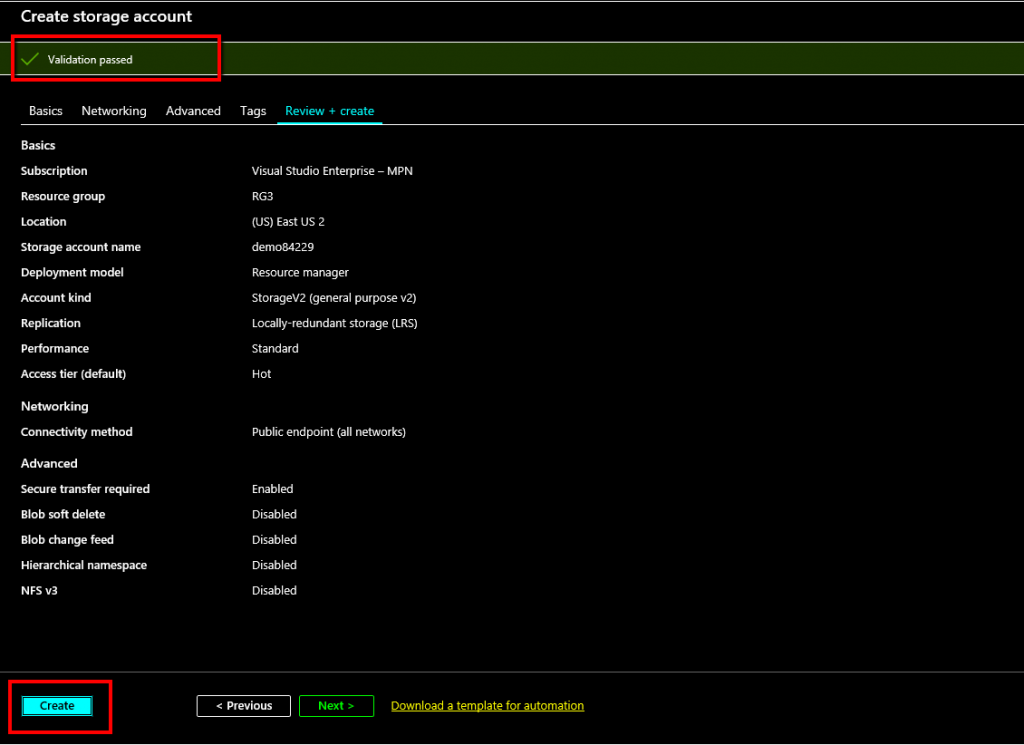
You would see Validation passed if your Basics configuration on creating storage account has no errors.
Click Create
Once the Storage Account is created You would see “Your deployment Complete”.
Click Go to Resource.

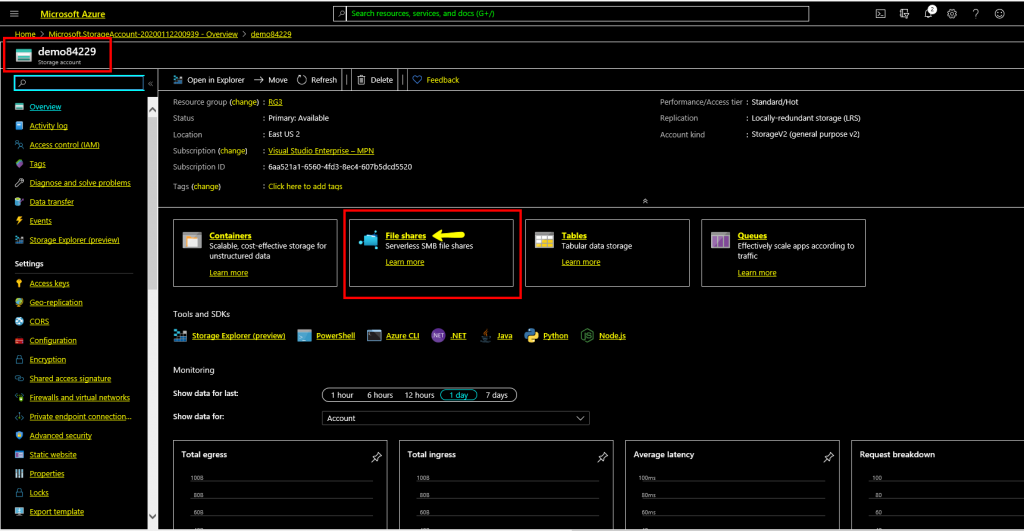
Create File Share on the Storage Account
On the Newly Created Storage Account, Click “File Share”. The files share windows would open and files shares can be created there.
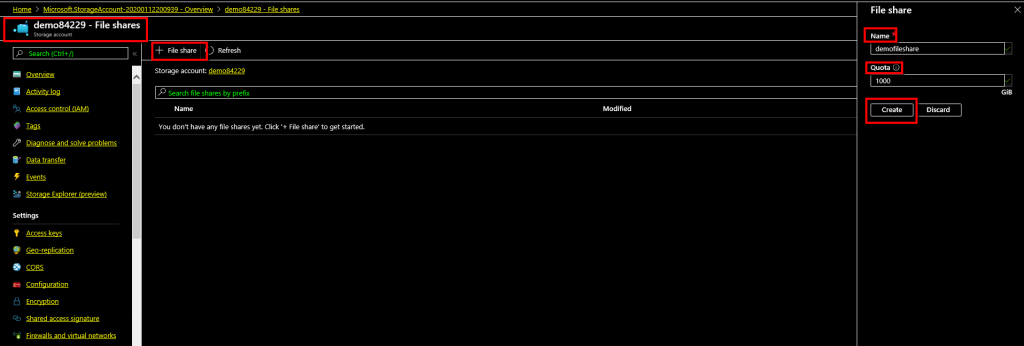
To create a file share, click + File Share button and on the right-side file share window and type file share name and quota. The quota has to be provided in GigaBytes (GB). Type 1024 in Quota if you want to create 1 TB file share but the value can be as provided with respect to your requirement. Note that the name should be lowercase letters and numbers and do not use uppercase letters and special characters.
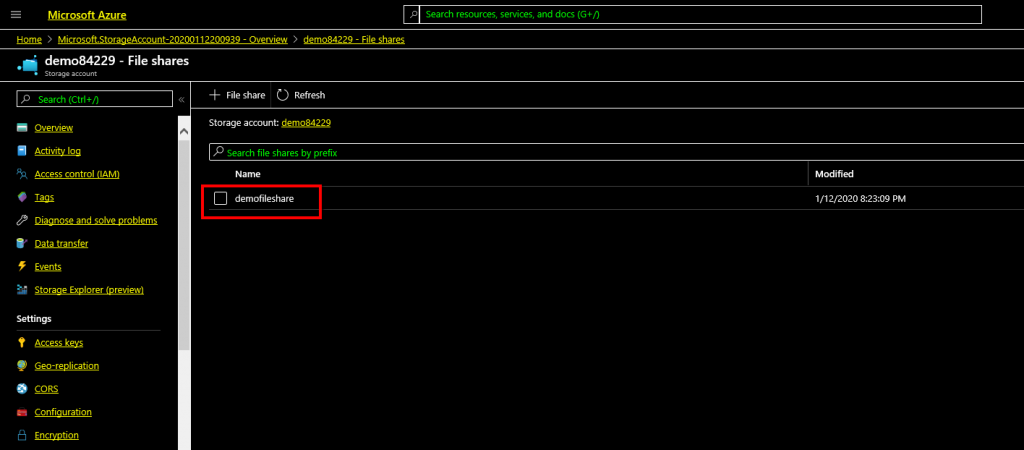
The newly created file share will be displayed on the storage account and, click the file share, so you would be listed with the file shares and in this case, it is “demofileshare”.
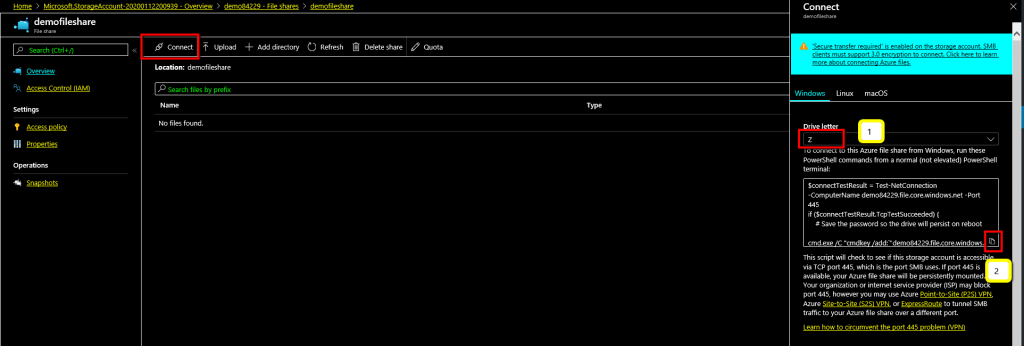
Once the File Share opened click connect to get the connection details.
You may select the Drive Letter you want to map on the Windows Explorer and this drive letter can be the one that is not used in the Windows system. I have selected Z drive for example in this demo and click on the copy to clipboard small icon on the right side window the script block.
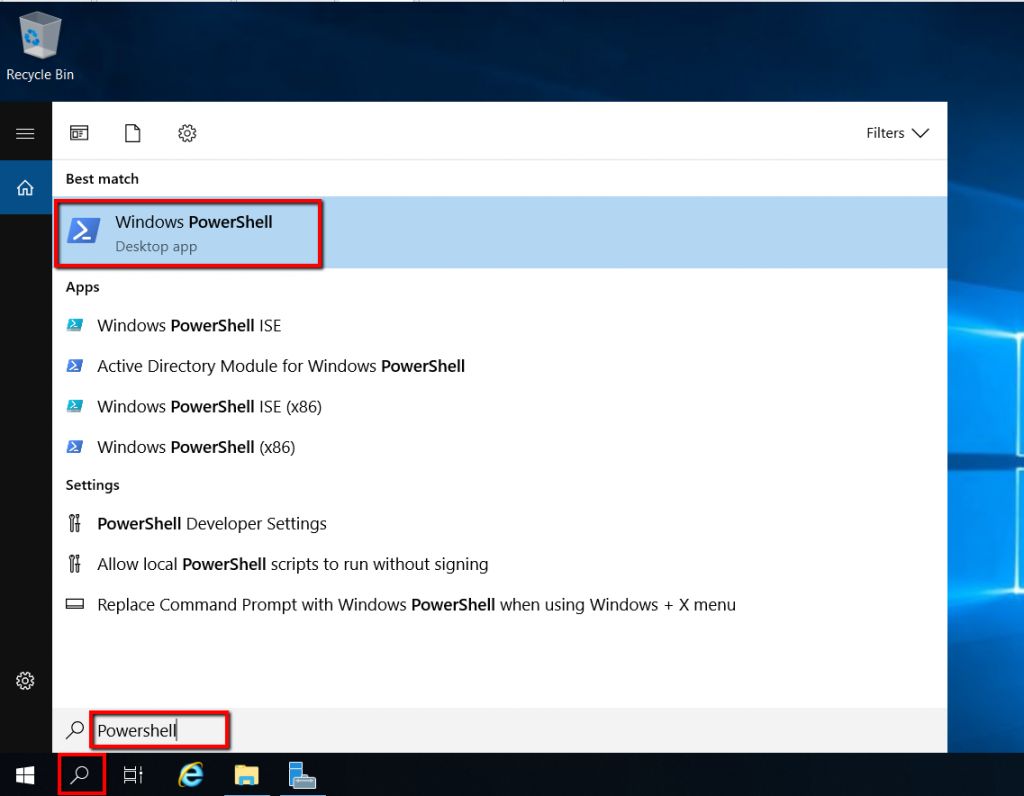
On the Windows system where you want to map the Azure Storage file share as a network drive and open Windows PowerShell in normal mode.
Map the Azure Files Share as Network Drive on the Windows System
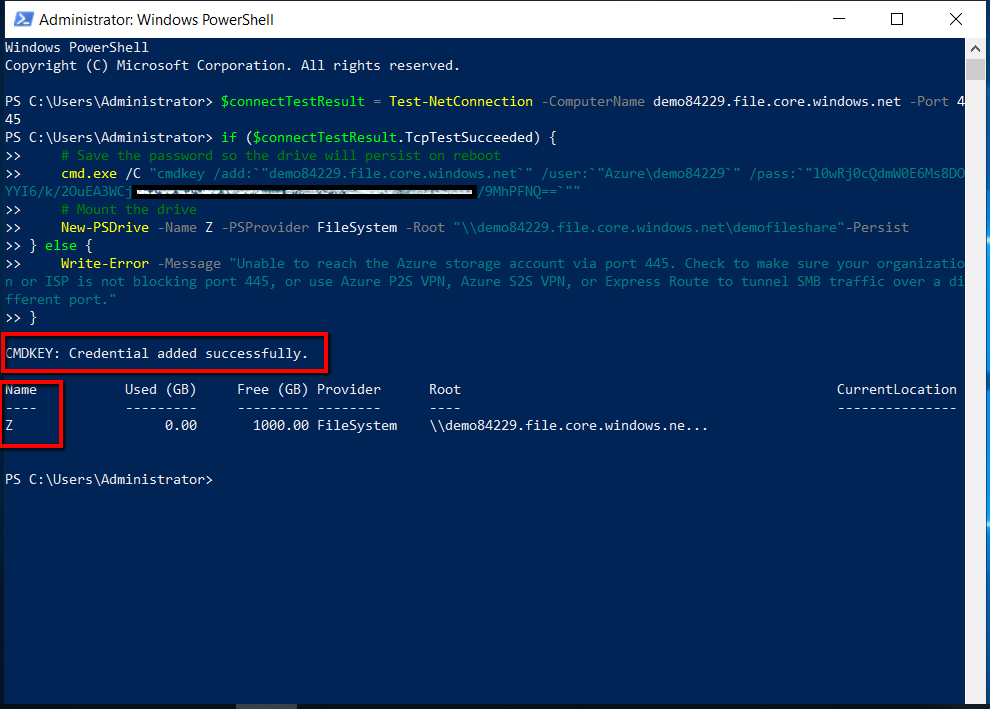
Paste the script copied on the clipboard from the Azure portal on the PowerShell prompt and, you would see command completed successfully and mapped network drive.
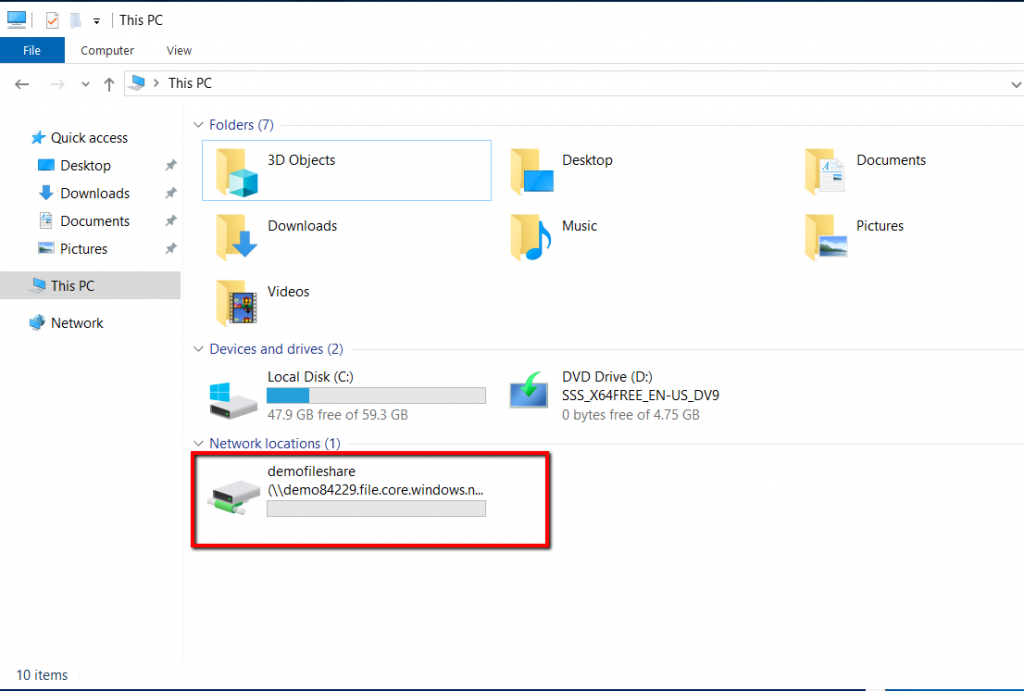
On the Windows Explorer, the mapped drive will be available and, to store files.
In this Demo, we have Created Storage Account and Mapped Network Drive on Windows System. I hope the instructions under the topic Mapping Azure Storage File-Share As A Network Drive is clear.
Please write your comments in the column below.