How to Securely Access Virtual Machines using Azure Bastion
Preface: Access Virtual Machines using Azure Bastion
The traditional RDP access using port 3389 is the hacker’s target for the virtual machines running on the cloud and the desktops access connecting on the internet. The Virtual machine running on the Azure cloud has no exception to these attacks. To mitigate this security risk Microsoft has introduced a feature in Azure to Access Virtual Machines using Azure Bastion.
Bastion is a web-based Remote Desktop Protocol (RDP) and Secure Shell Protocol access service. It eliminates the need for exposing the ports such as RDP (3389) and SSH (22) over the internet for accessing Azure virtual machines. The Azure Bastion works on SSL connection using the web browser and there is no need for an agent on the Virtual Machines. Bastion is a more secure way of accessing Virtual machines from the Azure Admin Portal. The browsers should be HTML5 compliant with all the security measures taken care of and accessed using port 443. The Bastion connections are scalable and can be configured to access more than one connection at the same time.
Adding Bastion Subnet to the Virtual Network
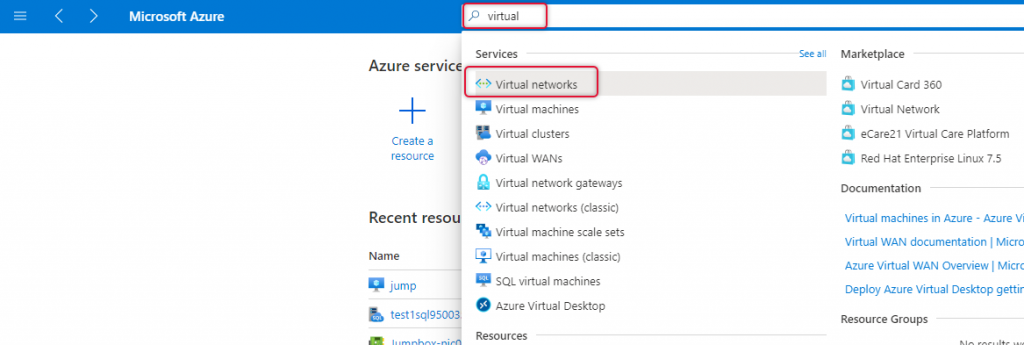
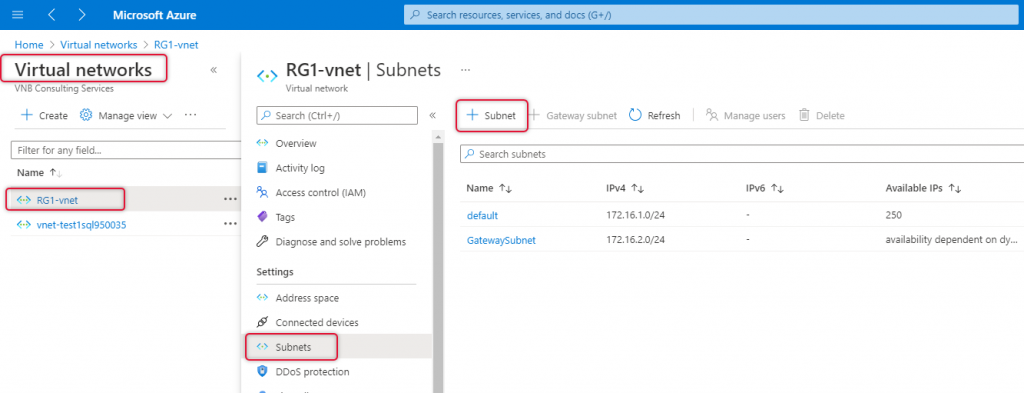
Adding Bastion service and configuring it is so simple and bring bastion service implemented just some clicks of the mouse pointer. In order to add this feature, create the Bastion subnet upfront and then add the service. Go to Virtual Networks and select Subnet from the left side navigation and click Add Subnet.
Click on Add Subnet on the subnets pane.
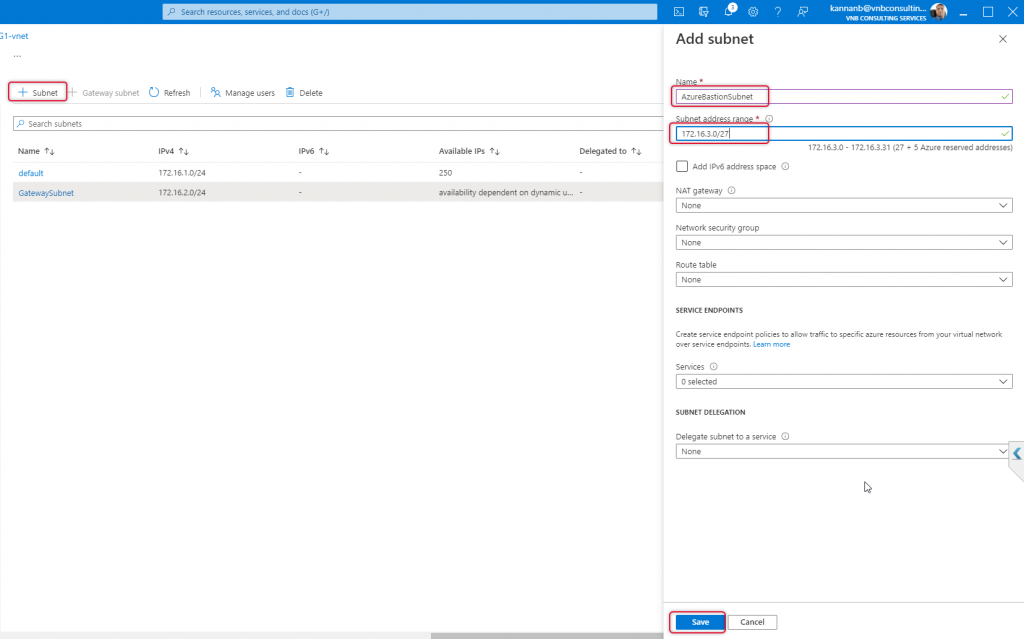
The name of the subnet should be AzureBastionSubnet and add a subnet with the prefix of 26 or 27, 27 is the lowest subnet that can be used on any subnet on Azure Virtual Network. The subnet prefix 27 will be good enough for bastion subnet purposes. In my case, I have typed 172.16.3.0/27 subnet as my Virtual Network address space is 172.16.0.0/16 and leave the other values as is and click save.
Creating Bastion Service
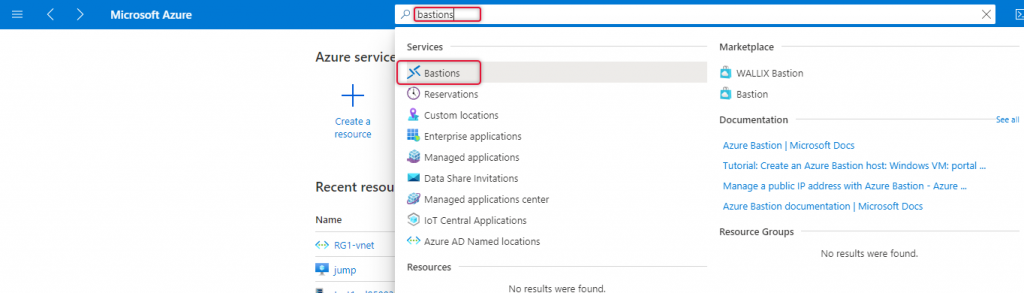
Azure Bastion Subnet with the subnet name AzureBastionSubnet has been created, now is the time to create Bastion services, type Bastion at the top search bar, and select the Bastions from the search results dropdown.
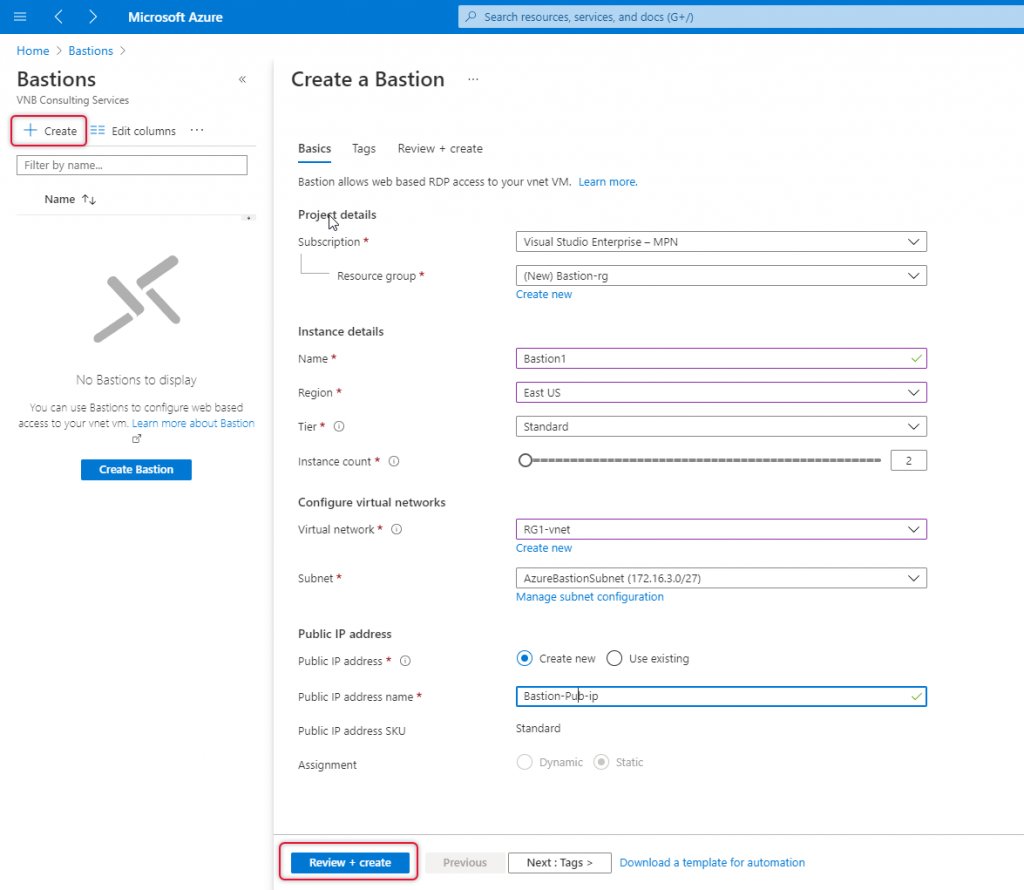
Create a Bastion page opens and on the Basics tap do the following.
Subscription: Select the subscription where the virtual machines are running if you have multiple subscriptions.
Resource Group: Resource group you can either create a new one or select the existing one as appropriate.
Name: On the Instance details give a name for this bastion resource.
Region: Select the location where the Virtual Network resource is located.
Tier: you can either choose Basic or standard as per Bastion instance host scaling.
Instance Count: You can create a number connection needed concurrently. Drag the instance count as your need.
Virtual Network: Virtual Network is for which virtual network you are crating Bastion.
Subnet: Subnet will be chosen from the list, AzureBastionSubnet that we have created will be the one chosen.
Public IP address: Select Create and type an appropriate name to identify later.
Click Review + Create.
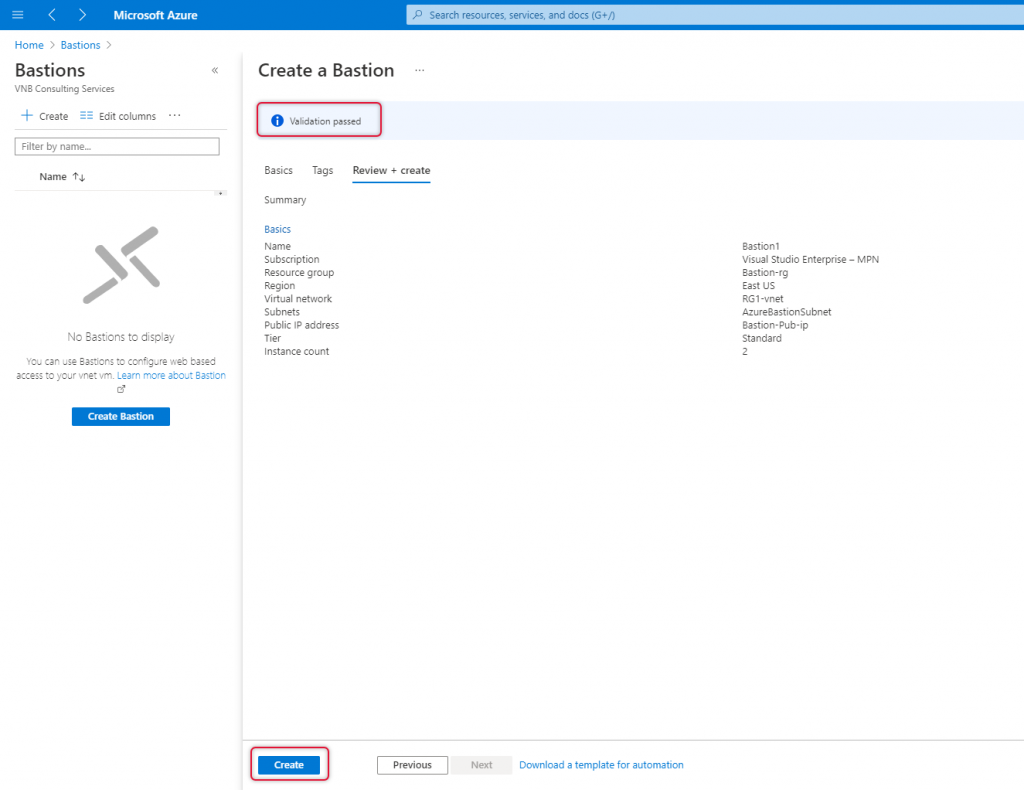
On the create page you should is validation passed if the basics parameters are correct. Click ‘create’ to start Bastion deployment.
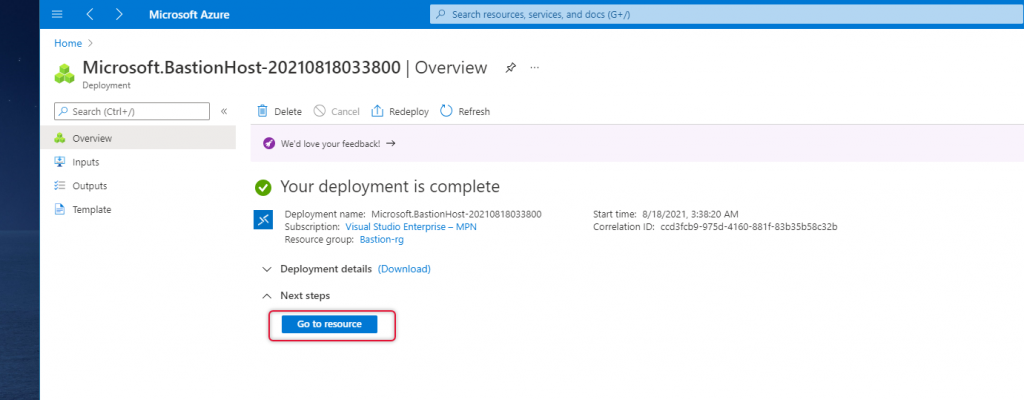
Click Go to Resource, to view what are the additional resources created along with Bastion.
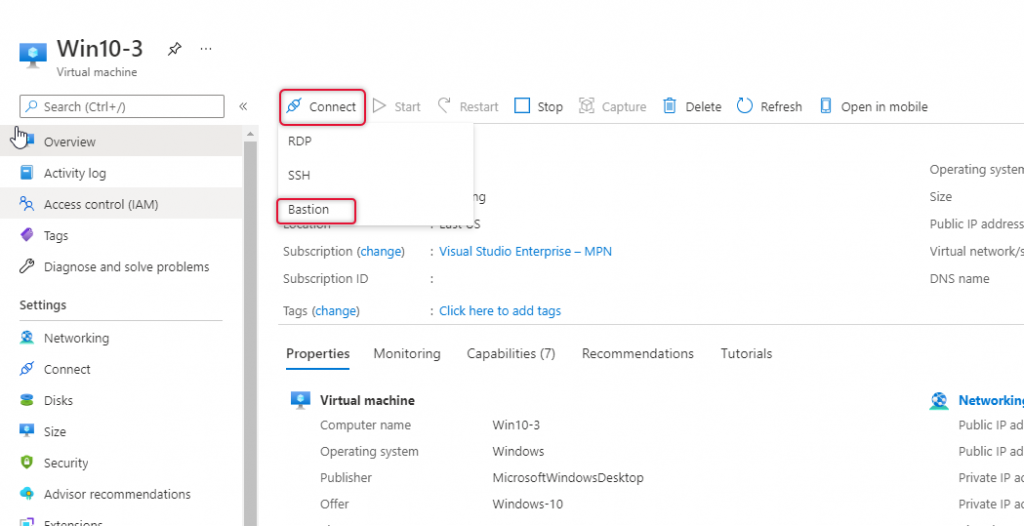
Testing Bastion
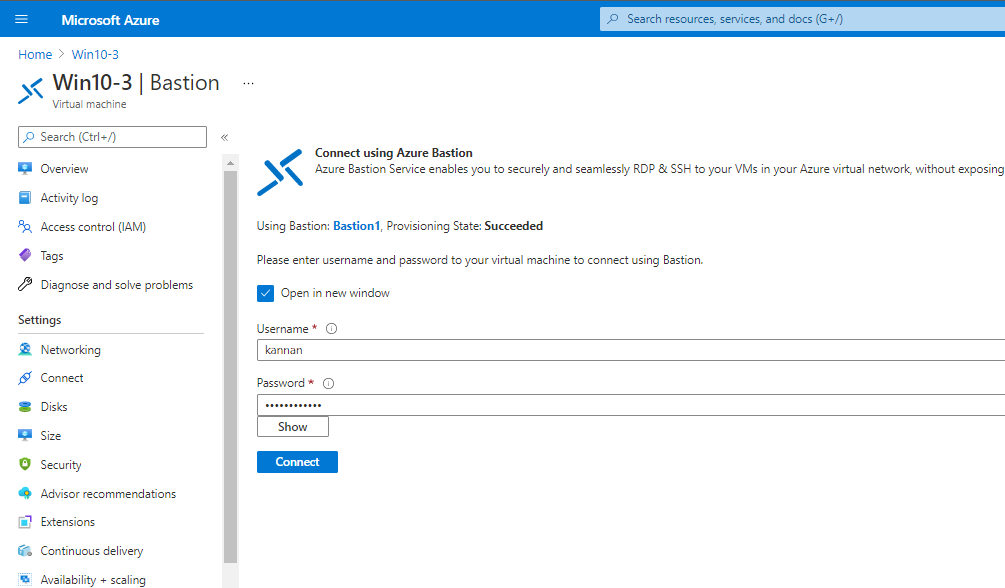
Now, time to connect to the virtual machine. Click connect and select Bastion.
Type the username password that you provide on RDP connection access to the Virtual Machine.
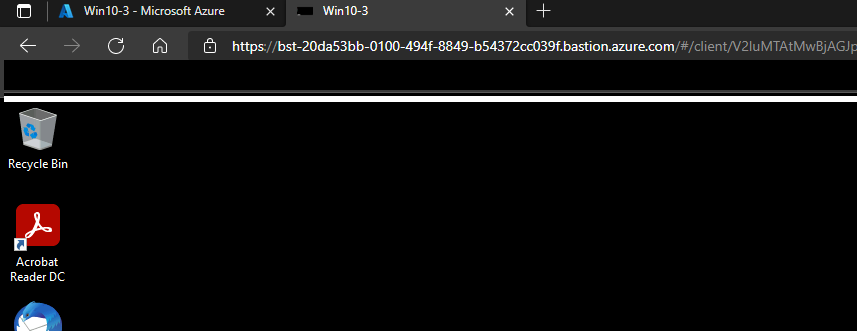
Whola, here is the virtual machine RDP console on a web browser tab.
Conclusion: Access Virtual Machines using Azure Bastion
In this article, we have seen the demonstration of how to create Bastion service and access Virtual Machines using Azure Bastion securely and seamlessly. I’m excited to receive your feedback and comments below to improve this article and upcoming ones. I’m looking forward to seeing you on another occasion with a different article. Thanks for taking the time to read the article and I hope this article will help you create Bastion Service or understand how it is deployed.