
How to Create Azure Load Balancer Step by step
Preface:
In this article, we are going to create Azure Load Balancer. An Azure load balancer is a service in Azure that provides high availability and load balancing between identical Azure workloads such as Virtual machines and web applications. Azure load balancer operates at layer 4 which is the transport layer of the OSI model, whereas application gateway is on layer 7 which is the Application layer. The application layer is capable of identifying the loads like protocols HTTP and HTTPS, whereas the transport layer is application unaware but capable of identifying the loads with the protocols TCP/UDP.
There are four components in Azure load balancers that are mandatory in configuring load-balanced Azure network resources and some optional components which will improve the security and performance running the load balancers.
The first and foremost component used to configure the IP address pool to access the load-balanced resources is the Frontend IP address, using this component you can create a pool of IP that can be accessed over the internet using a public IP address or private address assigned to the pool. The second component is the backend pool, which is the pool of Virtual machines or web applications added which will render the service that the load balancer pointing to. The third component is the Health Probe which is used to find the health of transport layer health of each resource. The health probe is used to dynamically add or remove the resource which is in the backend pool which is determined healthy or unhealthy. Using all the above components, a load balancer rule was created with the protocol which is used to query for the resource. The rule will access Frontend IP Address for IP address resolution and backend pool for finding the resource which renders the service and the most important the health of each resource in the backend pool with the type of protocol that is in requirement.
There are two kinds of Load Balancer, there are
Public load balancer used to load balance web tier
Internal load balancer used load balance database tier
Create Azure Load Balancer Service
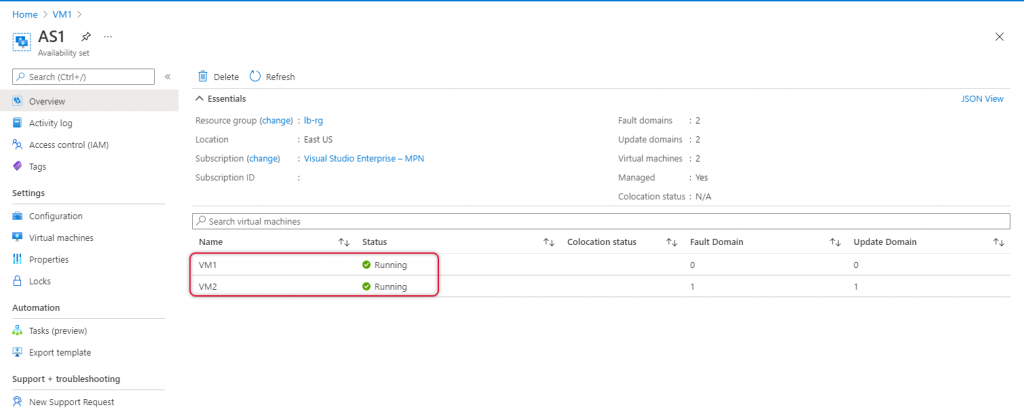
I have already created two virtual machines named VM1 and VM2 on the availability set AS1. You can find the Availability Set Overview page below.
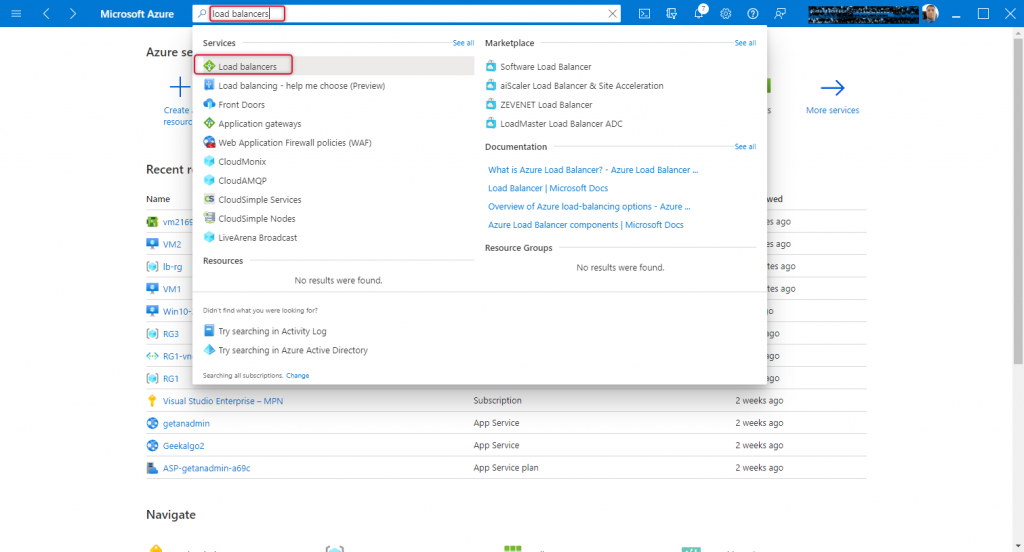
Launch Azure admin panel and type Load balancer on the top search bar and the resulting dropdown select Load balancer as it appears.
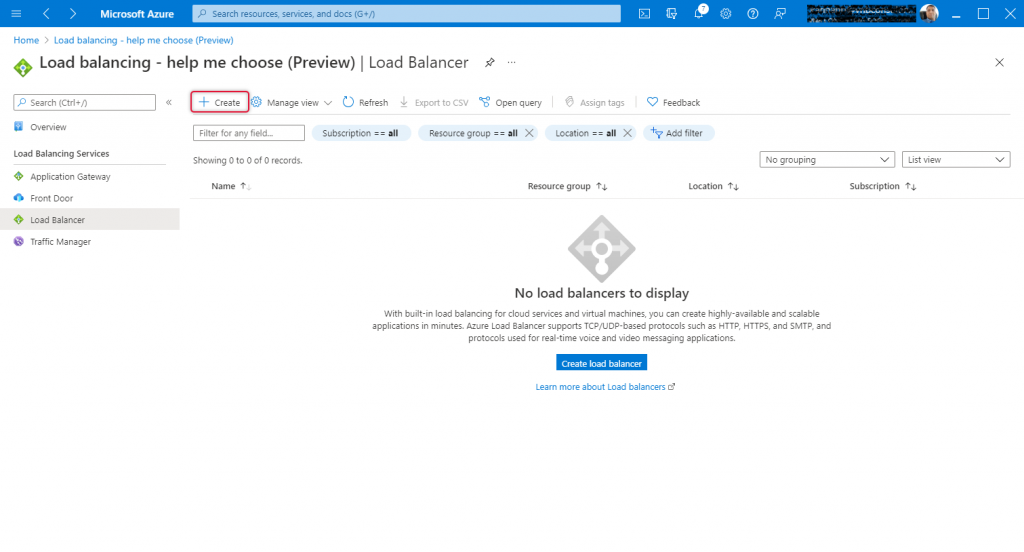
The Load balancing – help me choose screen appears and click create either on the top navigation or on the middle pane.
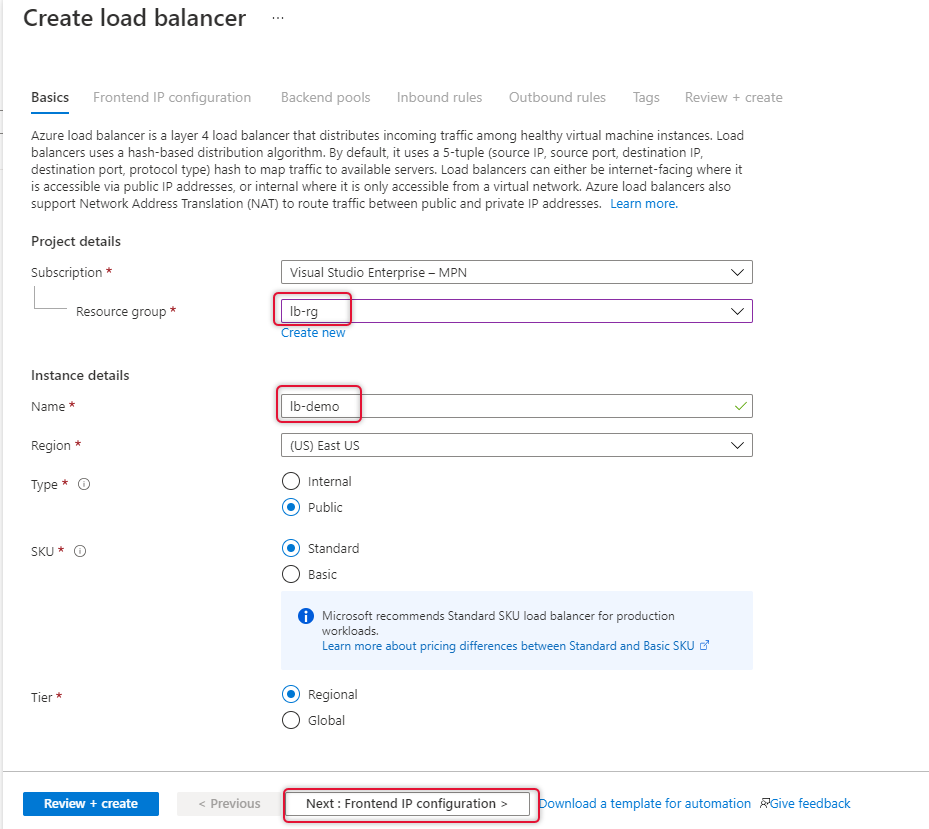
On the create load balancer page, I have already created a resource group called lb-rg on east us location, select the resource group where Availability Set and Virtual machines are located. Mine is lb-rg.
Type a name for this load balancer, here it is lb-demo.
Leave all other settings as it is and click ”Frontend IP configuration” at the bottom of the page.
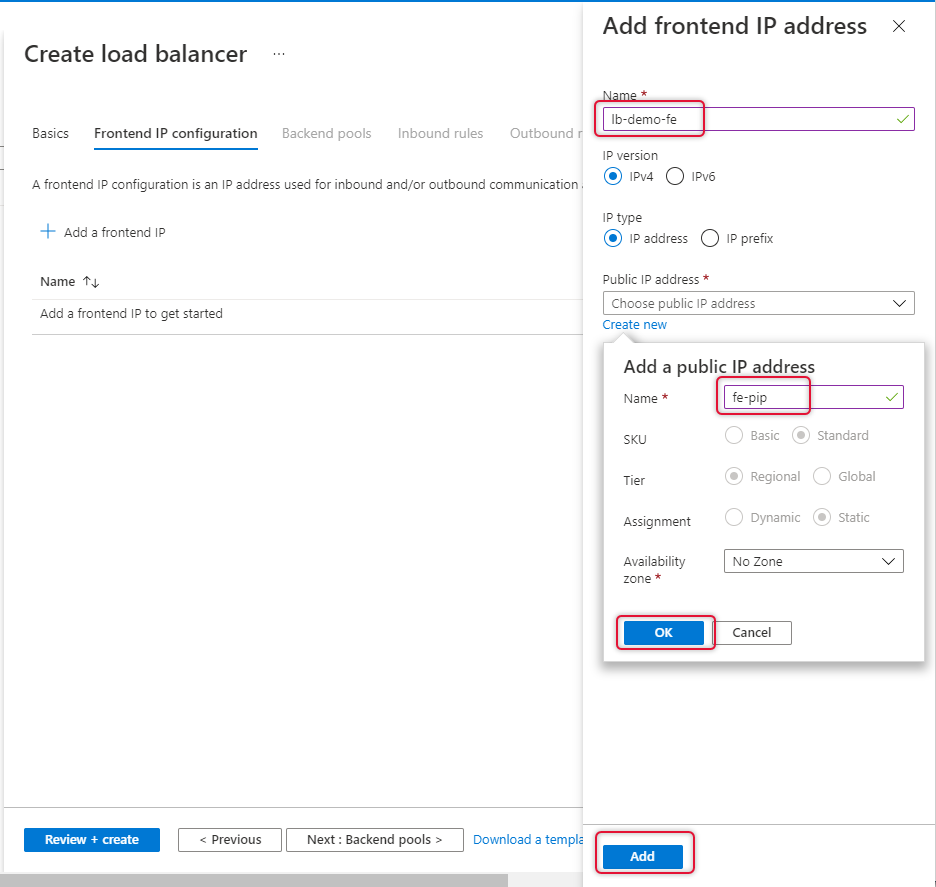
On the Frontend IP Configuration page click “Add a Frontend IP”

Type a name for the frontend IP and create new standard SKU public IP.
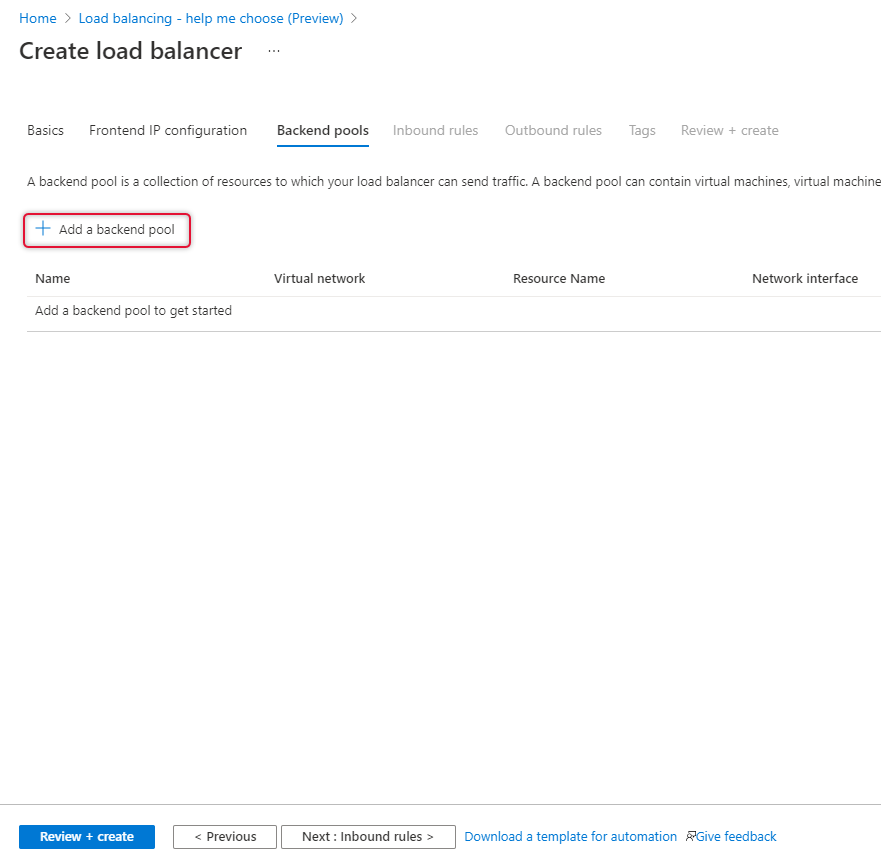
Once Frontend IP has been added, click Next at the bottom of the page to create a backend pool

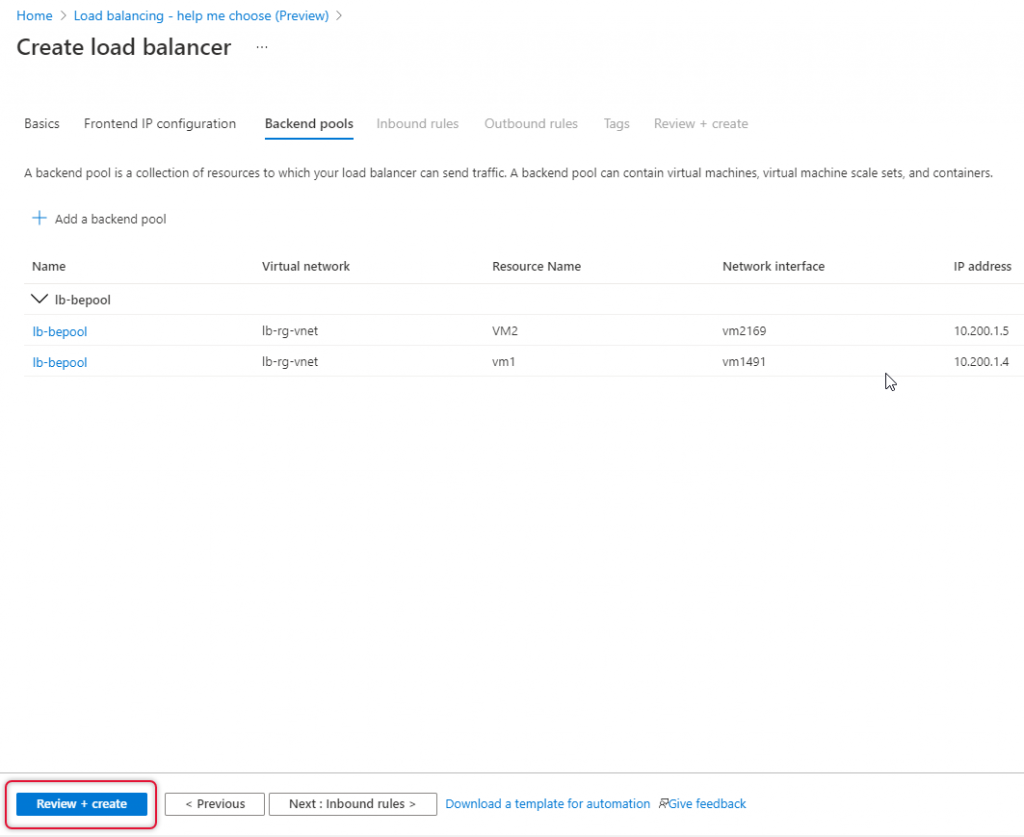
Click Add a backend pool and select the Virtual Machines running on Availability Set.
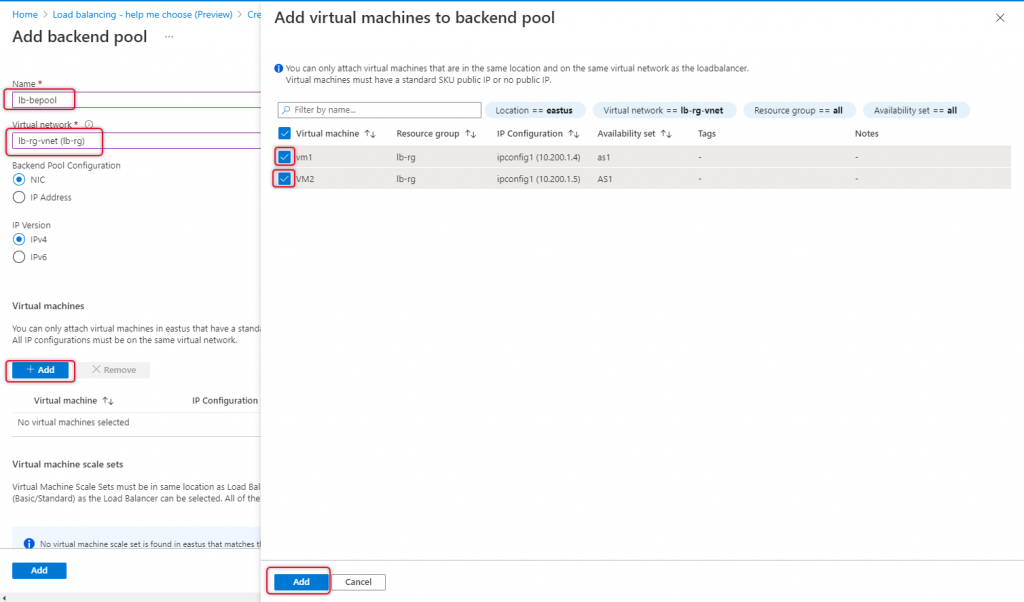
Type a name for the backend pool and select the Virtual Network where the Virtual machines are connected.
Click Add to add virtual machines.
Select the Virtual machines which are ready for load-balanced and click Add.
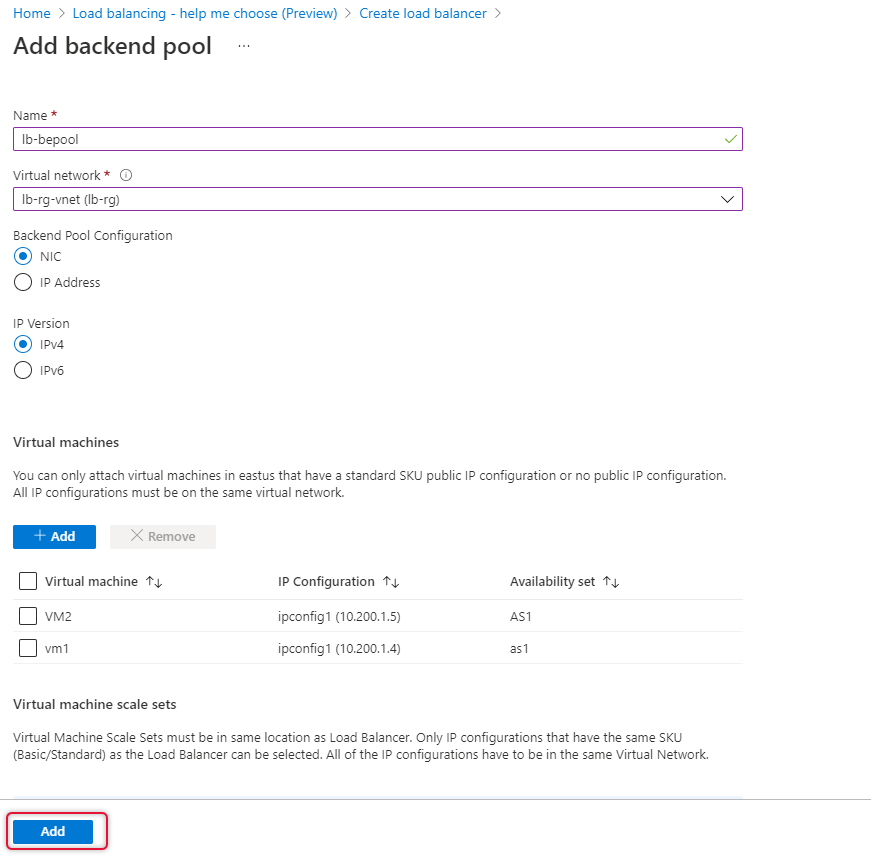
Click add to add a Backend pool.
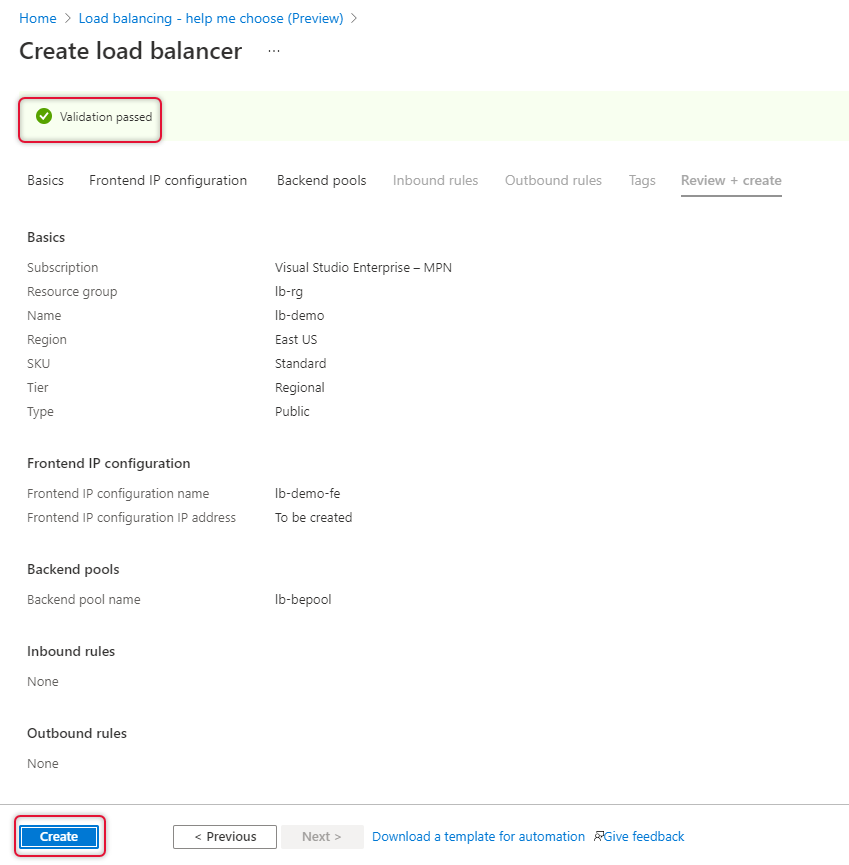
Leave other tabs default and click Review and create to create the load balancer.
The Load Balancer validation is passed and clicks create to create the load balancer.
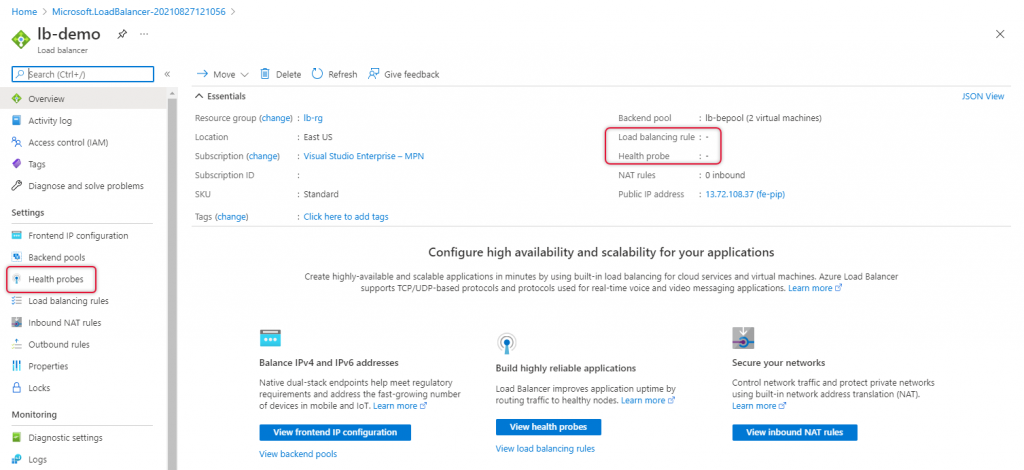
Once a load balancer is created you will see that deployment of the load balancer is complete, click Go to resource to go to the newly created load balancer.

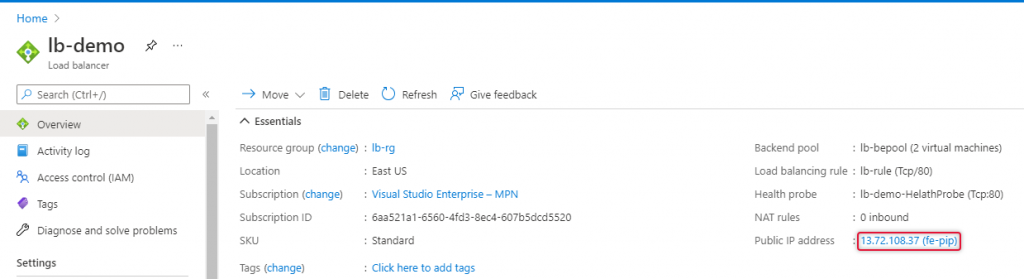
On the load balancer resource overview, you can find Health Probe and load balancer rules are blank and we are going to create them.
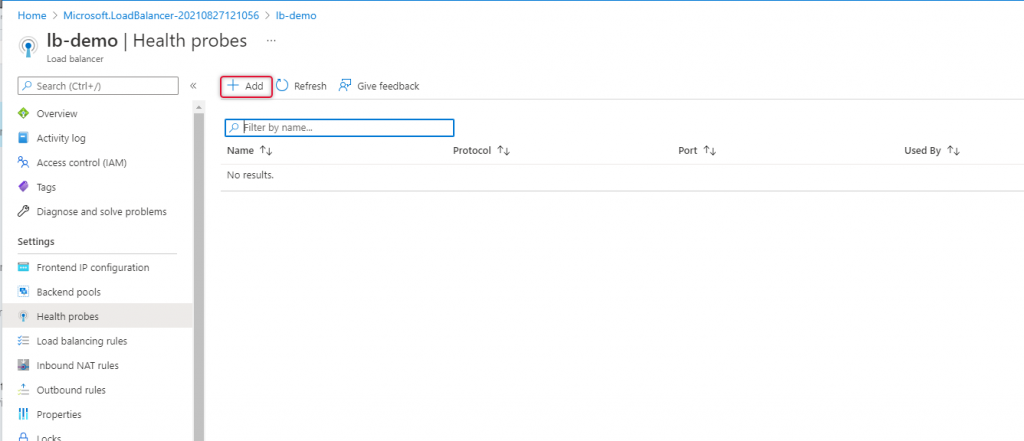
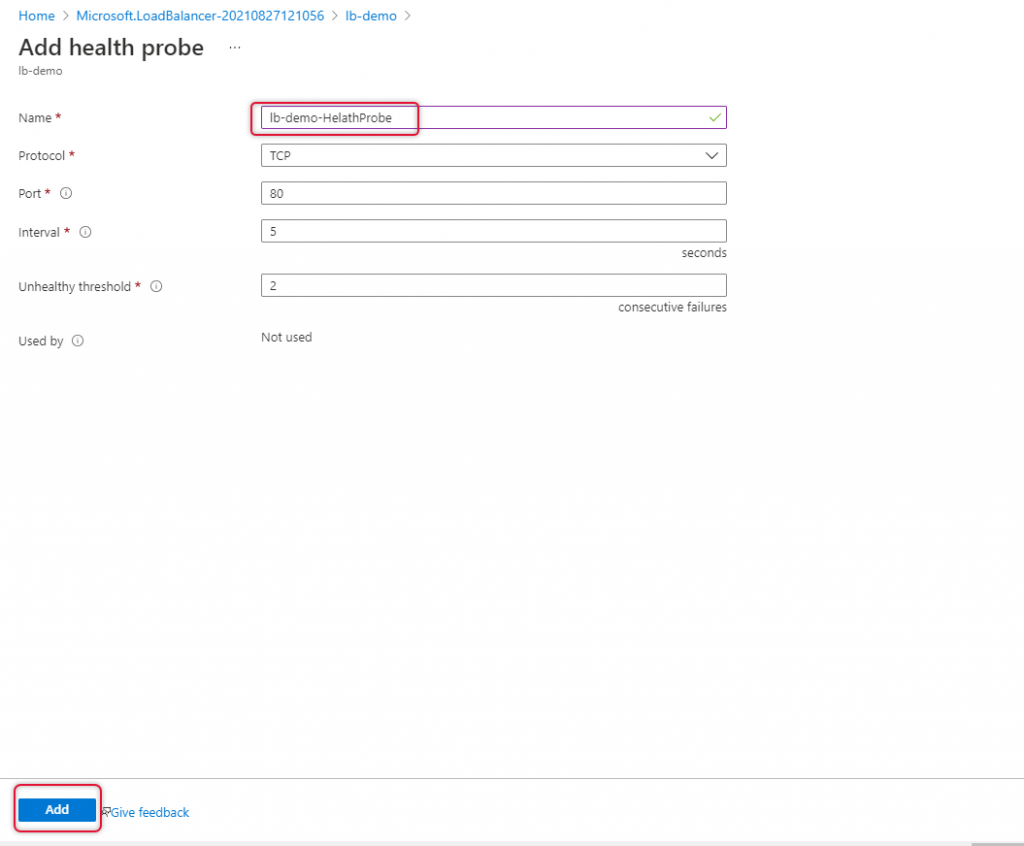
Add Health Probe
Navigate to the health probe on the left side navigation and click add to add a new health probe.
Type a name for the health problem and change the port to what protocol you want to load balance, in this demo we are going to load balance HTTP workload, so I left port 80 which is default as well.
Click add to add health probe.
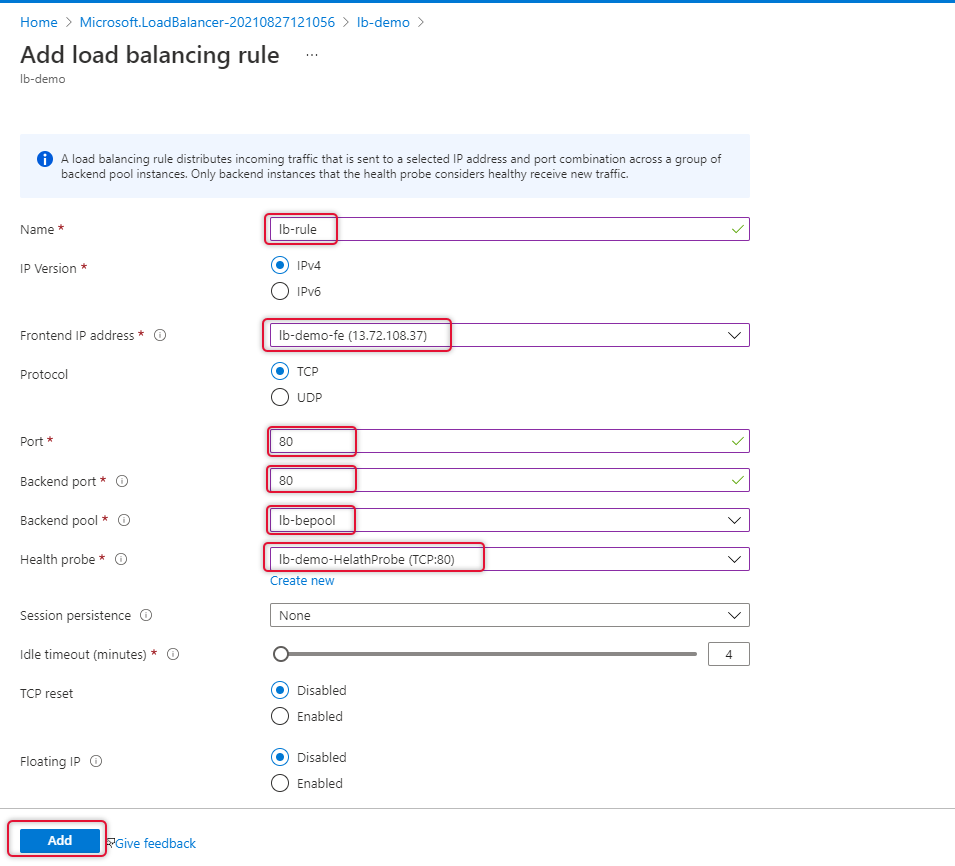
Add Load Balancing Rule
Navigate to Load balancing at the left side navigation to add a new rule.

Type a name for the load balancing rule.
Select the front-end IP address that we have already added.
Leave the protocol to TCP and port to 80, type backend port to 80, if you are trying to load balance HTTPS type port 443 on port and backend port.
Select the backend pool and health probe and leave other settings as default and click Add.
Test the Azure Load Balancer
We have completed creating the Azure Load Balancer and Heath probe and load balancer rule added. Copy the Load balancer Ip address on the overview page as below.
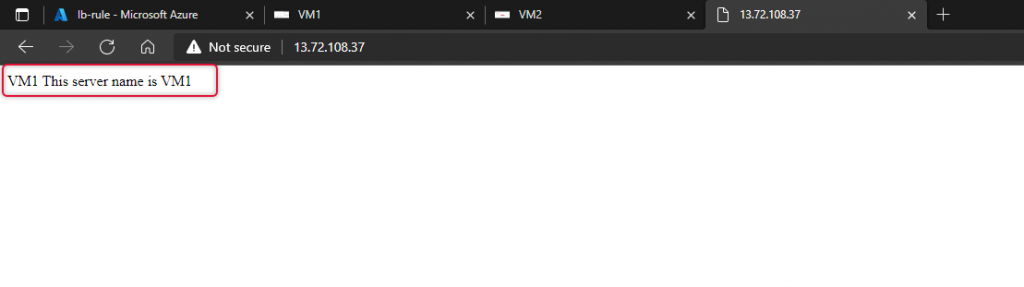
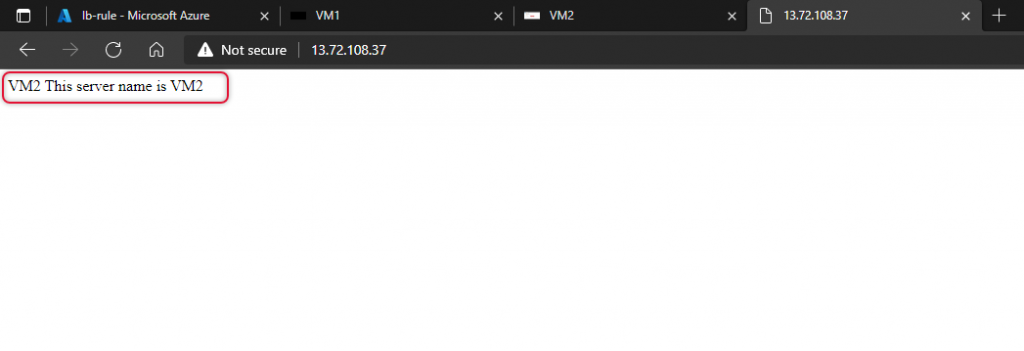
Launch a web browser and paste the public IP address copied from the load balancer overview page. I have already modified default.htm to show the name of the virtual machine. You would see the name of two virtual machines.
Now I have stopped Vm1 and refresh the web browser and now the web page is loaded from VM2.
Conclusion:
In this article, we have seen the demonstration of how to Create Azure Load Balancer and access tested the HTTP web page load balancing between the two Virtual Machines under the Availability Set. I’m excited to receive your feedback and comments below to improve this article and upcoming ones. I’m looking forward to seeing you on another occasion with a different article. Thanks for taking the time to read the article and I hope this article will help you create a Load Balancer or understand how it is deployed.