
How to deploy DirectAccess in Windows Server 2019
Preface
We have gone through the VPN deployments using SSTP, PPTP, and so on in our other articles. Today we are going to deploy the DirectAccess server in Windows Server 2019. The same step can be followed on Windows Server 2016 or Windows Server 2022.
This is a single server deployment where the default settings are used to deploy the server. It is recommended to enable a firewall at the server and client-side to make the remote access more secure. We don’t need a certificate authority in an Active Directory domain, but if it is there we can make use of it. In this deployment, a public hostname pointing to the DirectAccess server with a third-party certificate will be used. The client computers accessing DirectAccess must be Windows 8 Client operating system or later. The network location server in this scenario is the same server with that we are deploying the DirectAccess role. Also, the Network Access Protection server is not used and multi-factor authentication is not supported. As all services related to DirectAccess point to the same server, the installation of the DirectAccess role service will be simple and easy.
The server deployment is started with creating a security group to assign client computers that are a member of this computers group. After that, we are installing a remote access role and configuring DirectAccess alone Remote Access client, Remote Server, and Infrastructure is the components we are going to configure in it. Also, the DirectAccess client configuration is mostly dependent on Group Policy objects and the windows client computers need to be connected to the domain network before connecting from the remote network as the client computers need to be updated with group policy object settings. The client PC with group policy updated required for DirectAccess connected to domain network from any public network over the internet where the connection to the DirectAccess server is allowed to access.
What are we waiting for, lets’s start dipping in the water to get a rinse of how to deploy DirectAccess and configure of single server scenario. The demonstration will cover DirectAccess role installation and configuration and connecting from an external network using a windows 10 client computer. Let’s get started.
Create Direct Access Client Security Group
Before we start adding the Remote Access role on the DirectAccess server we are going to create a group to allow access to specific computers as a member and get the DirectAccess connectivity privileges.
To add a security group, we are login into Domain Controller and launching “Active Directory Users and Computers” and this group is under the appropriate OU under the Domain hierarchy. In this case to identify the nature of the group we call the OU name “DA-Clients”.
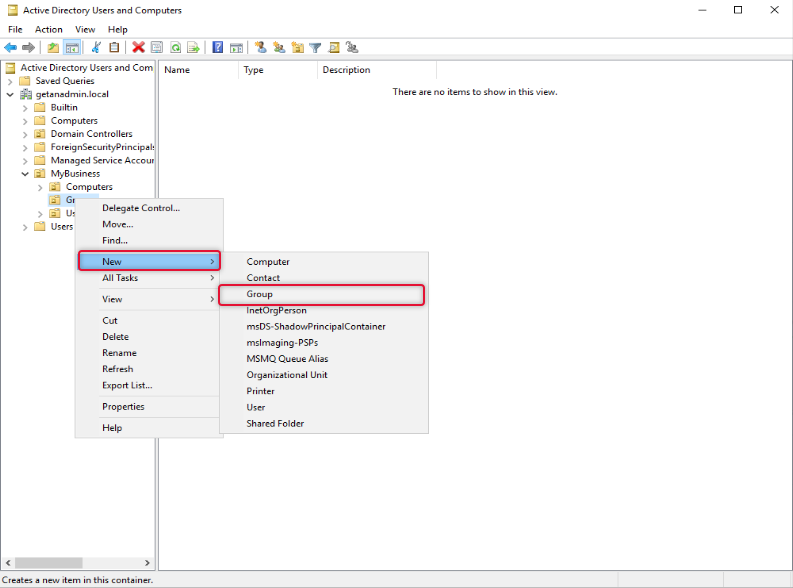
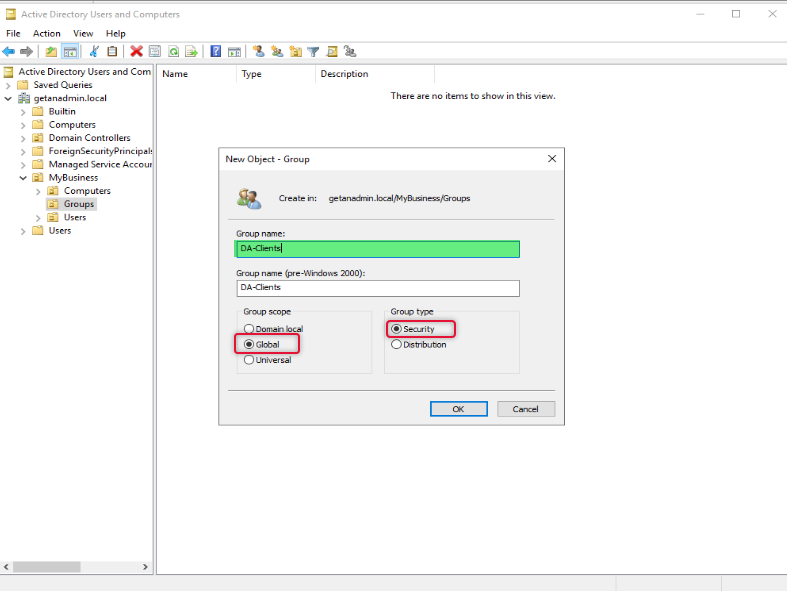
Type a name for the group and select scope as Global and type as Security and click OK.
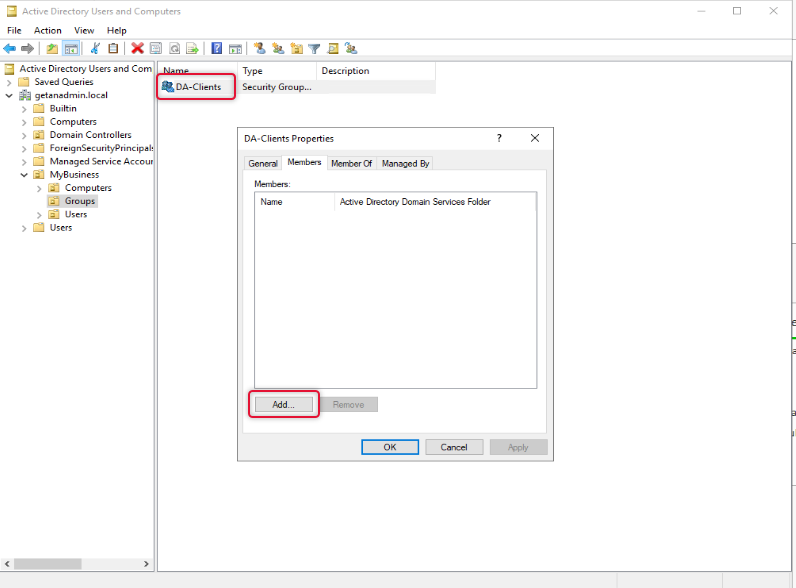
Once a group has been created double click the group object to go to its property and select the member’s tab and add the computers that you want to allow access to connect to DirectAccess.
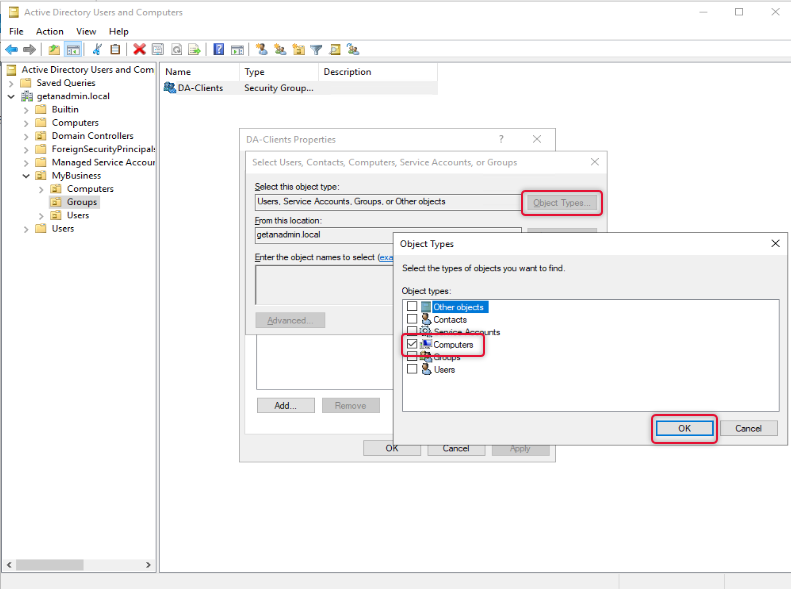
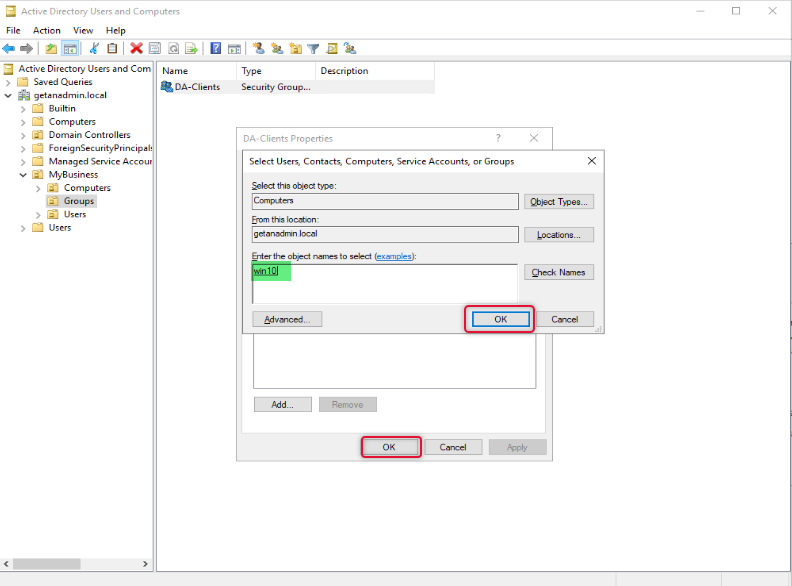
On the Select object type select Computers as we are going to add computer objects as members.
On the Enter object names to select box type names of the computers, you want to give access to and click OK twice to close the properties window.
We have completed creating a group and are ready to go to the next step which is to add the Remote Access role.
Add Remote Access Role Service
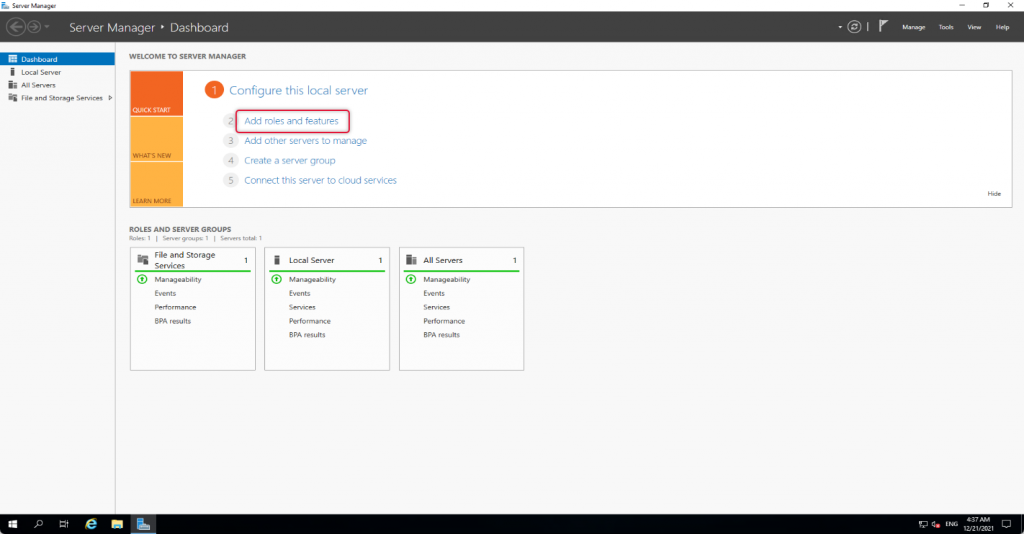
To add Remote Access role launch, Select Server Manager “Add roles and features”
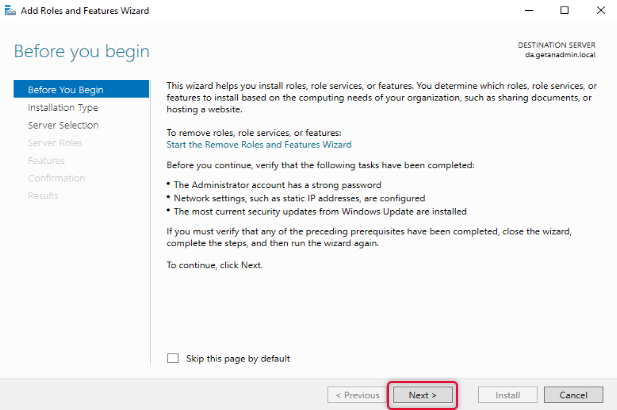
The wizard instructions give you a gist of how the Add roles and features wizard helps you install the roles or features to your local or remote computer. You may go through the instruction if you are new to adding roles and features to Windows Server. If you don’t want to see “before you begin page” anymore, click skip this page and click next to move on to the next page of the wizard.
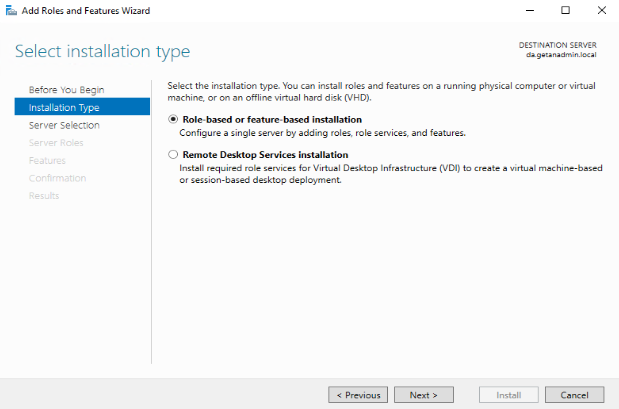
The Remote Access role comes under role-based or feature-based installation. So, click Role-Based or Feature-Based installation and click Next.
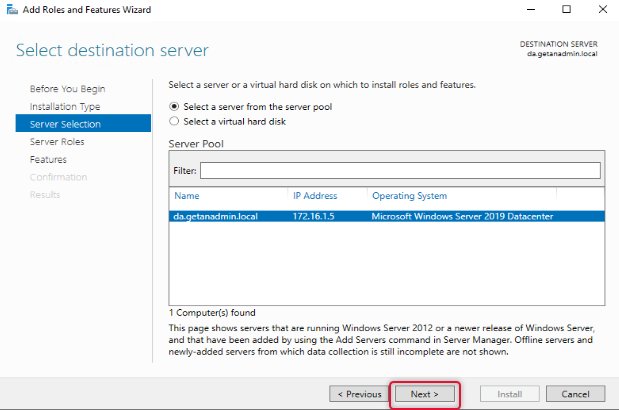
On the server selection, the local server is listed, and our intention is also to install the Remote Access role on the local server. Click Next to continue.
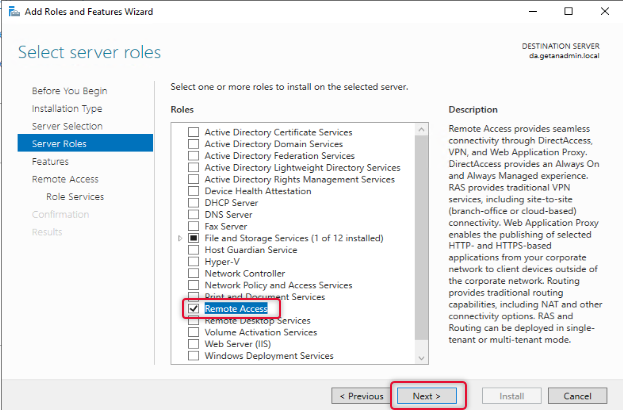
From the server roles list, select Remote Access and click Next.
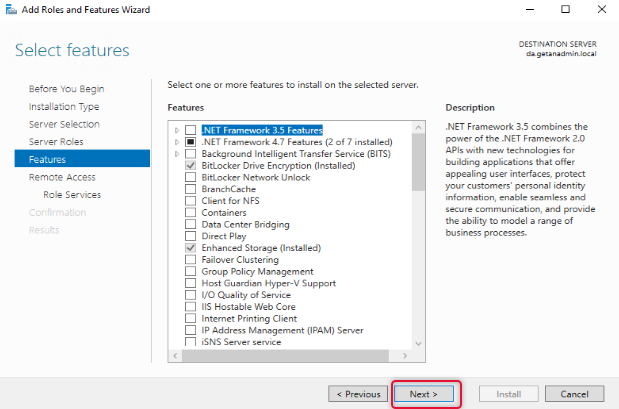
The next screen is to select features related to the role, leave the default selection, and click Next.
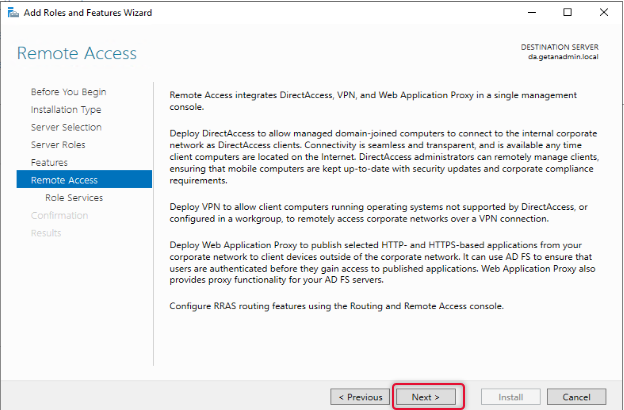
On the Remote Access page, the instruction for the Remote Access role would be given, go through the Remote Access instruction, and click Next to continue.
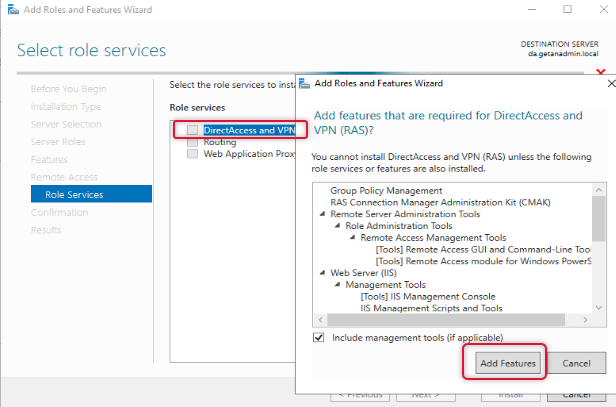
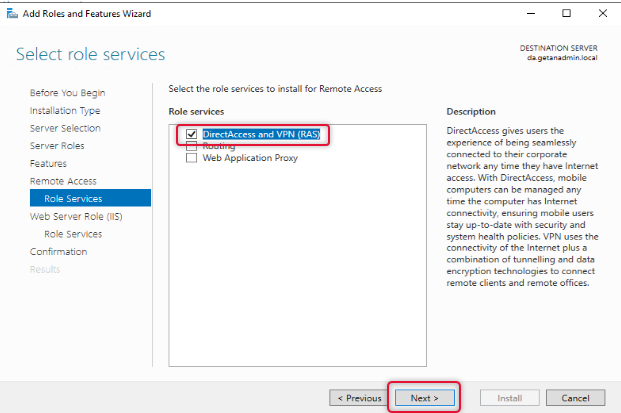
From the Remote Access role services list, select DirectAccess and VPN, and when you click on the role service, you will be prompted to choose the features to install, leave the default selection and click Add Features to return to the role services selection window.
When the role service features are selected click Next to continue.
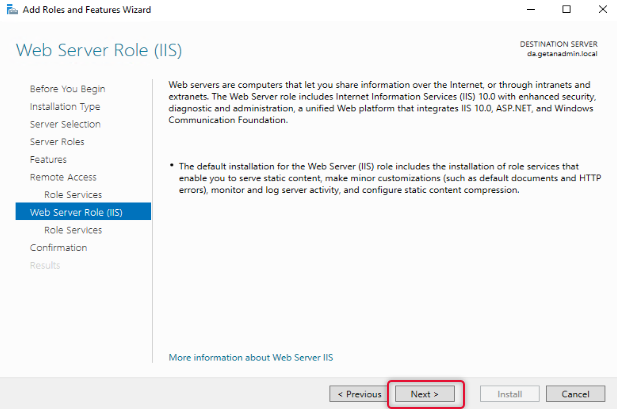
On the web service, role services go through the instruction and click Next.
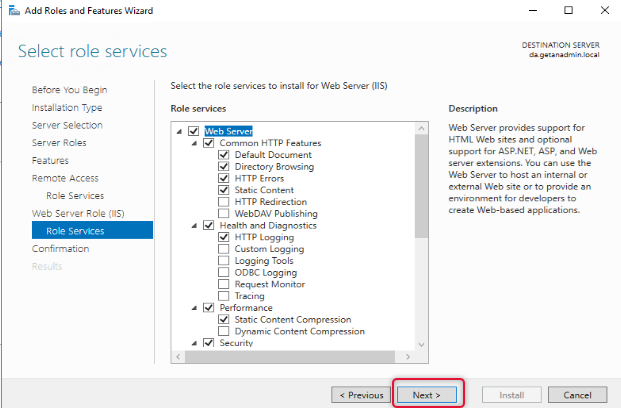
Under Web Server Role, leave the default role services and click Next.
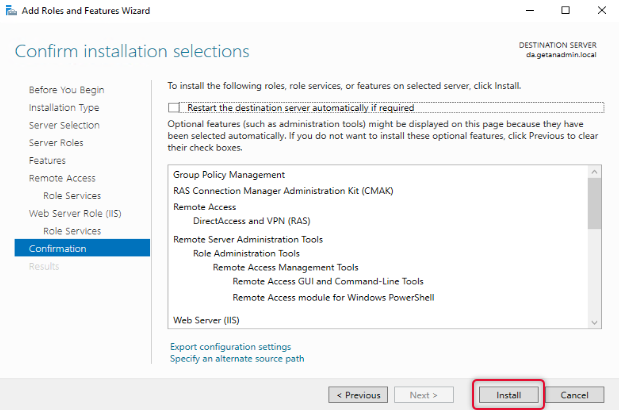
Click Install on the confirmation page to start the installation.
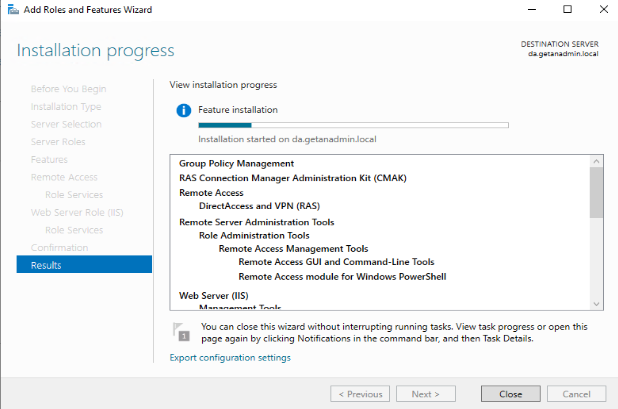
The view installation progress, let you know the installation progress of the installation, wait for the Remote Access role installation to complete.
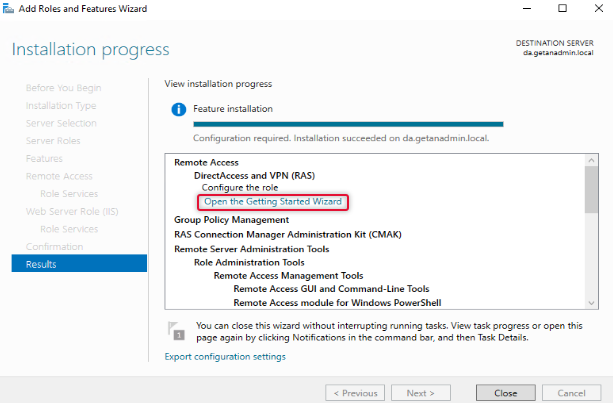
The Remote Access role has been added. Now, click on Open the getting started wizard to start the wizard.
Configure and Deploy DirectAccess Service
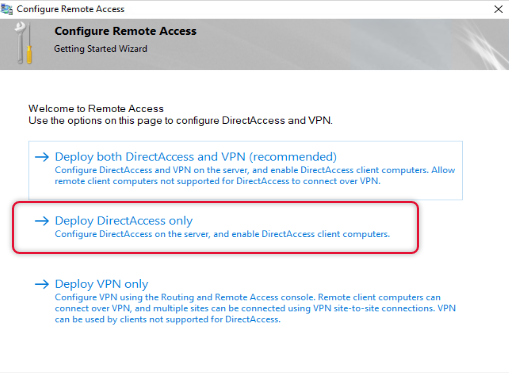
We are going to configure DirectAccess, so click on Deploy DirectAccess only.
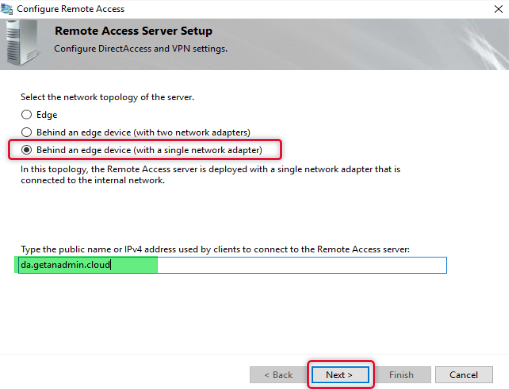
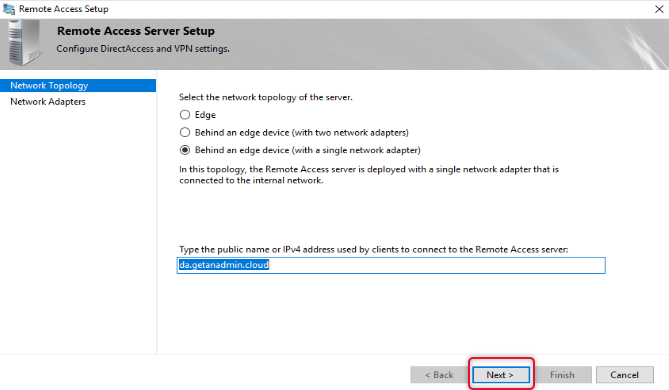
Every DirectAccess setup may not have the same network topology of the server, select the appropriate topology as per your network, if your remote access server is behind a firewall, choose behind an edge device. Type the public hostname of the DirectAccess server. You can create a host record on your domain registrar DNS and install a third-party certificate from a CA. I have created a hostname in the name of da.getanadmin.cloud and installed the CA certificate already.
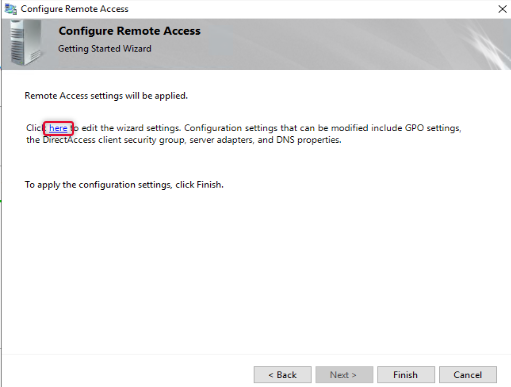
On clicking Next, you will be prompted to apply settings, before we apply settings, we need to configure a few more settings, to open the settings wizard, click the link on the as in the wizard.
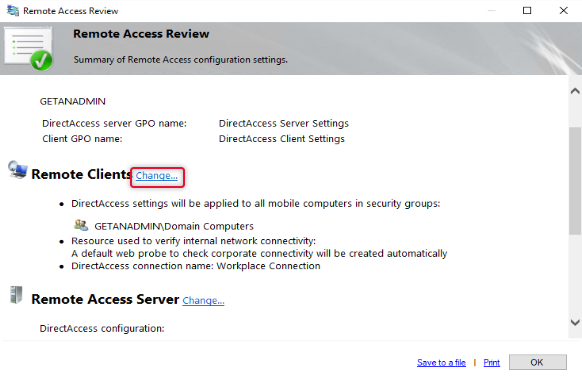
First, we are going to configure Remote clients with a few settings.
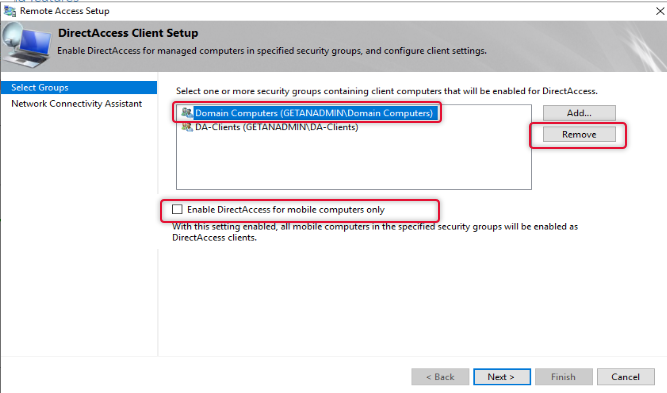
The default group added to the remote clients is domain computers, to allow only certain computers to access the domain network we need to remove domain computers and add the group with computers that we need. Click Add to add a group to the list. You may remember we have created a security group previously for this purpose add that group and remove the Domain Computers group.
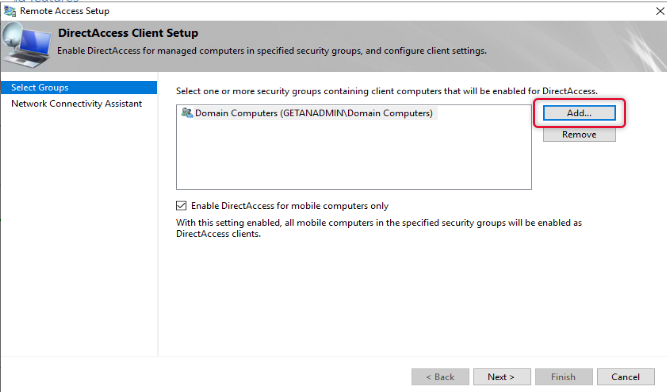
Once the security group with allowed computer members in it is added, remove the domain computers. Also, uncheck “Enable DirectAccess for mobile Computers Only”.
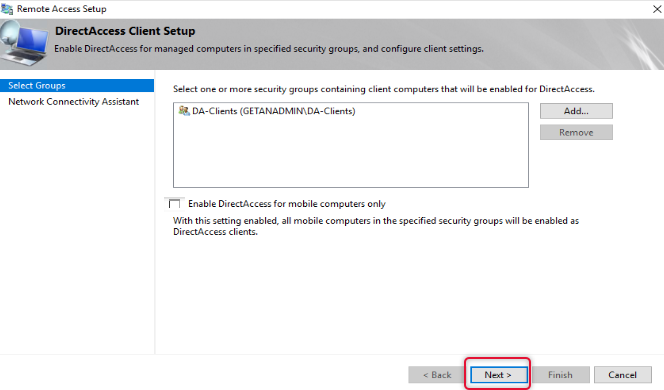
Now the group has been tidied up and click Next to continue.
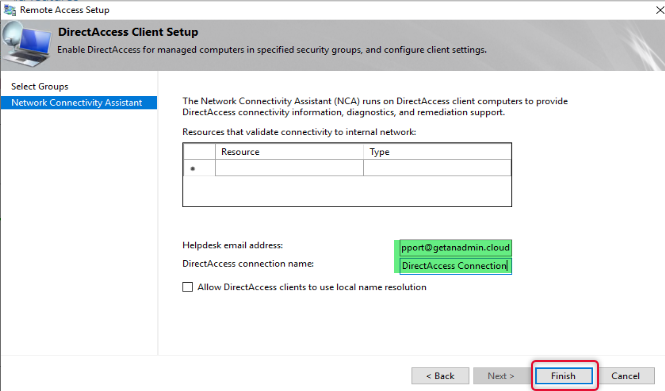
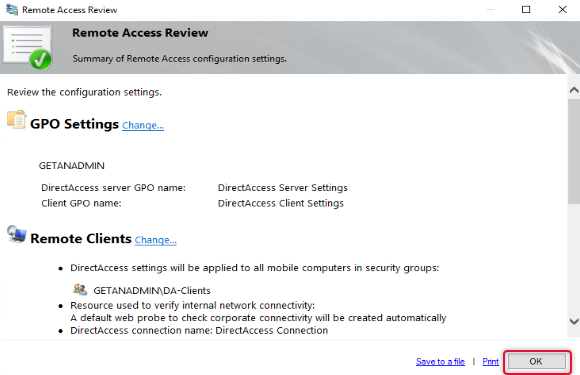
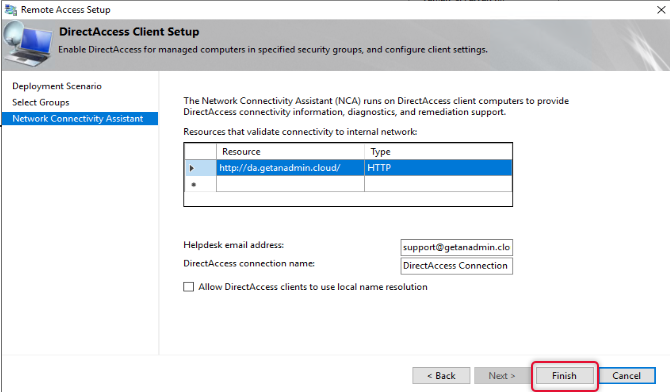
Type email address to get email related to the issue and logs from Remote client computers to contact the administrator and type a connection name and click finish.
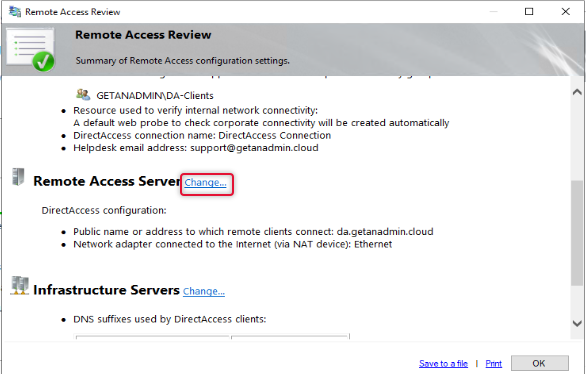
On the Remote Access review page click Change besides Remote Access Server.
On the Remote Access Server settings, we have already configured the details click next on the network topology to get to the next page.
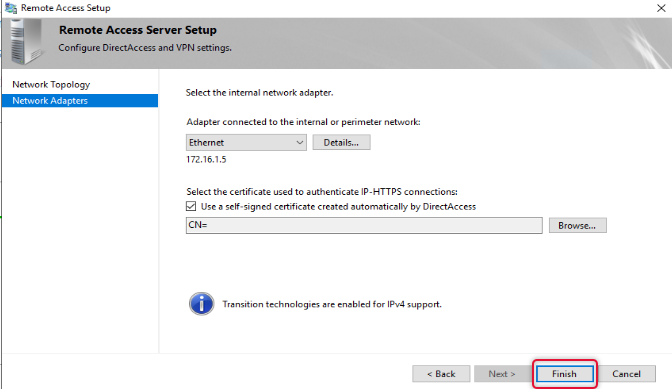
On the Network Adapters page leave the default settings and click Finish.
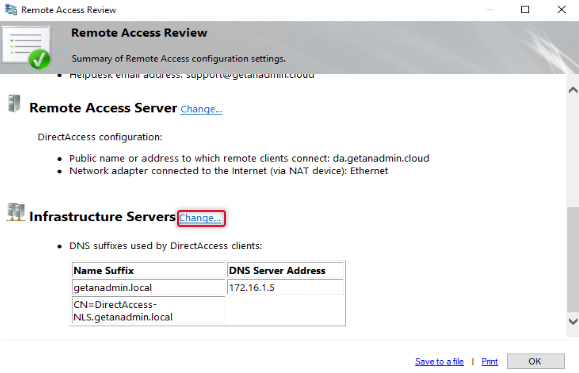
The Final setting, we are doing on the remote access review is to change the remote access infrastructure server. Click Change next to Infrastructure Servers
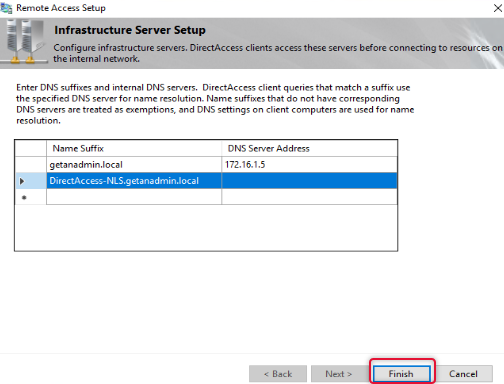
Here makes sure DNS IP address is specified for domain suffix and make sure there is a DNS host record available on the local DNS for the name DirectAccess-NLS. Click Finish to exit out of the infrastructure server configuration.
Click OK on the Remote Access review page to apply changes.
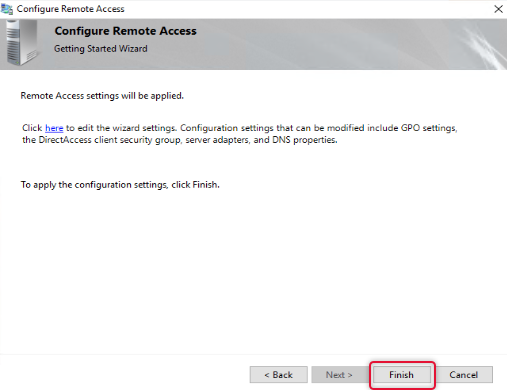
Click Finish to apply changes to return to the Remote Access Management console.
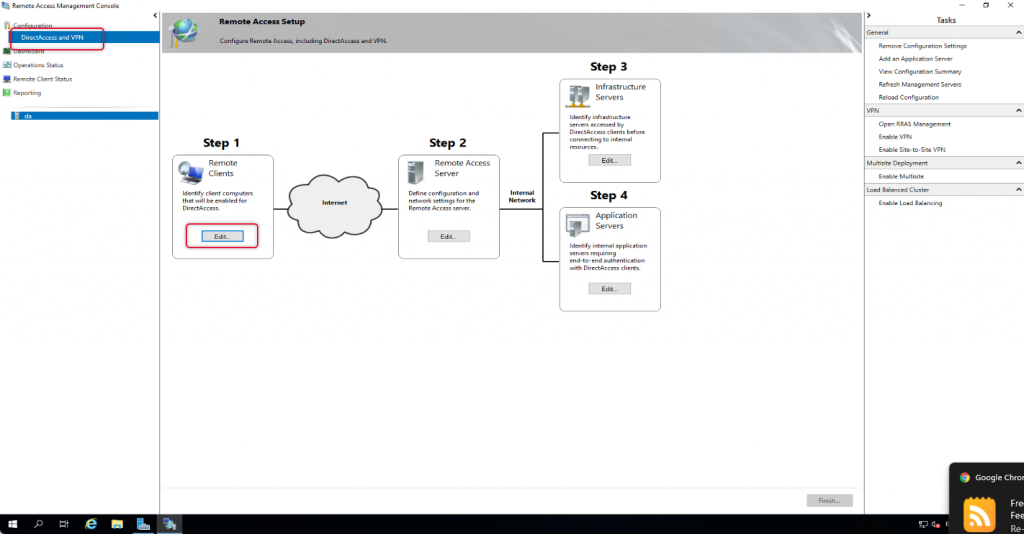
On the Remote Access management console, under configuration and Remote Client, click Edit to Edit the settings.
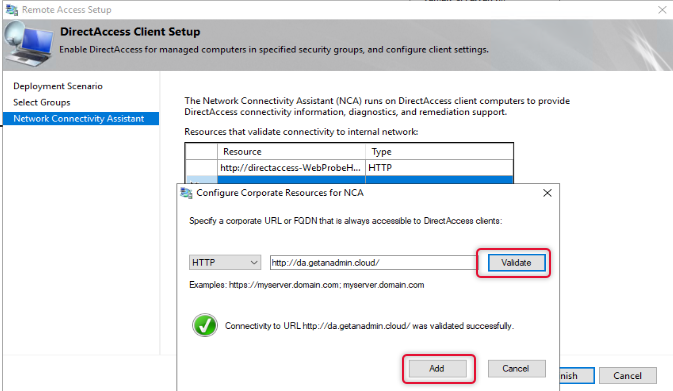
By Default, Network Connectivity Assistant settings will get Direct-AccessWebProbehost hostname on the resources list, we need to remove it and add the hostname we have added on the public DNS. Choose the protocol as HTTP on the dropdown list. And add the URL with the public hostname pointing to the DirectAccess server. Click Validate to validate the URL and click add.
Click Finish to exit out of Remote client settings.
Click Finish at the bottom of the Remote access setup to apply changes.
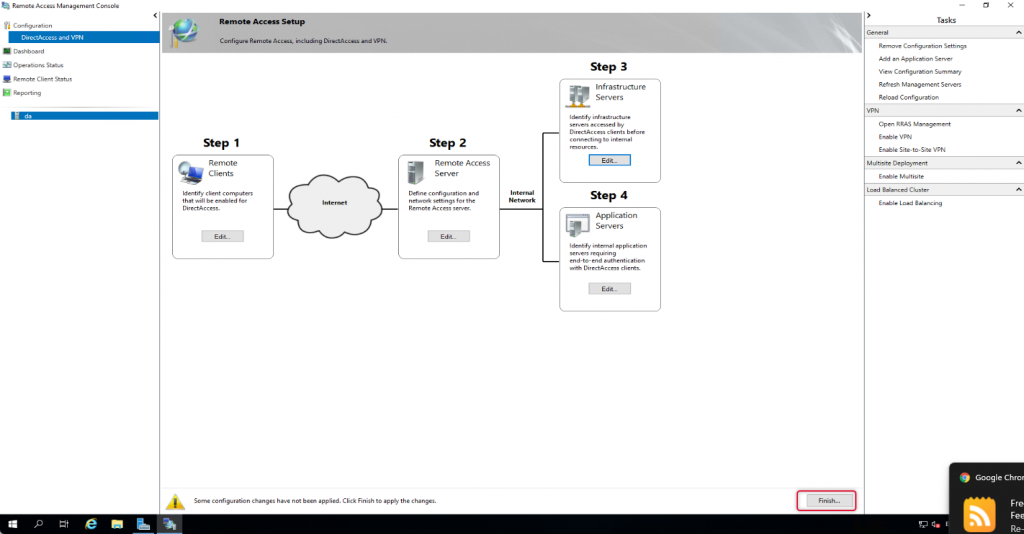
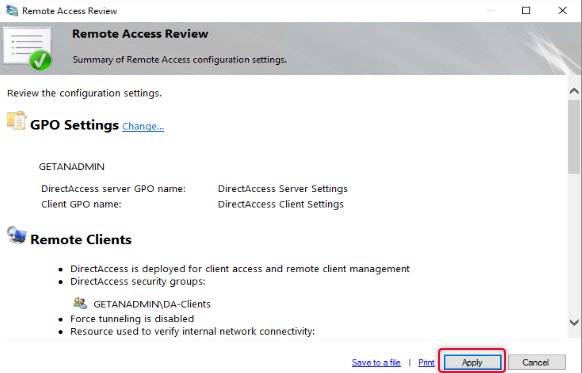
Click Apply to apply the configuration changes.
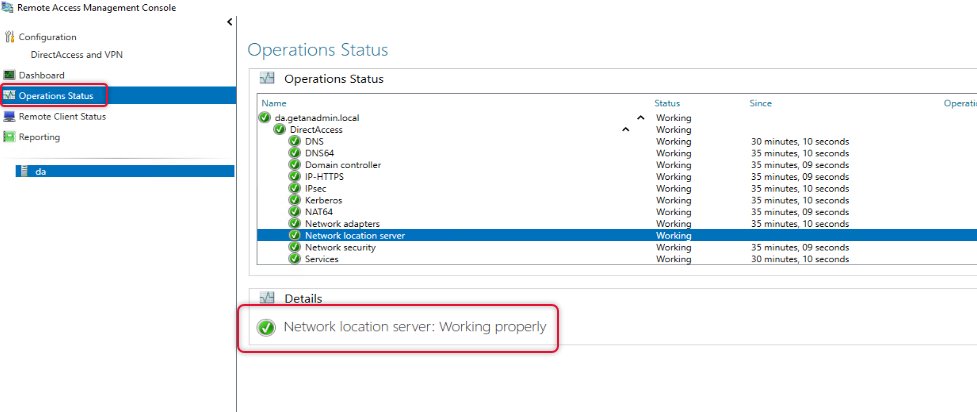
Once configuration changes are applied go to operation status and check all operations are working.
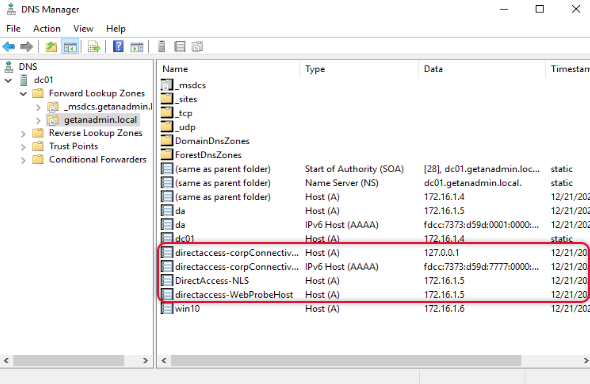
Go to Domain controller and open DNS Manager management console and check the highlighted hostnames are created.
Connect Windows 10 client from an external network
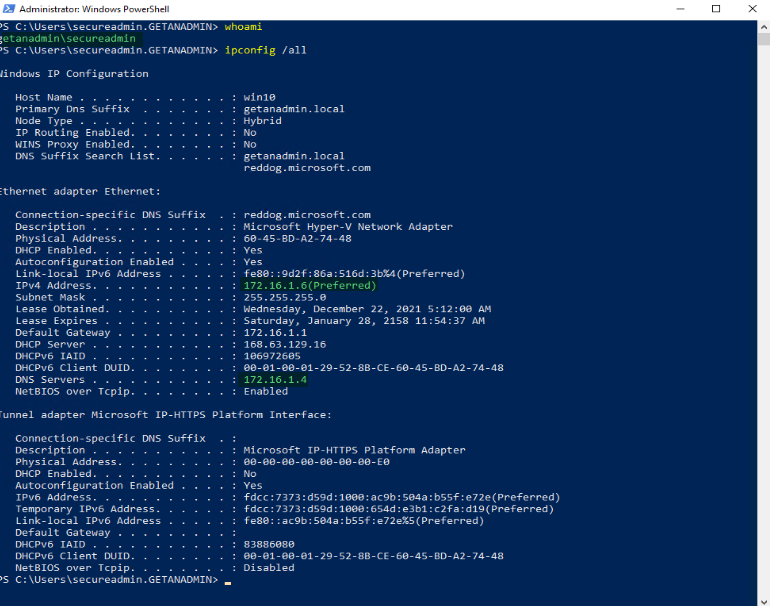
We have completed the server-side setup and now the time to access a windows client PC from an outside network using DirectAccess connected. Before we do log in to the client computer and check the server is in the domain network and the IP address of it by running ipconfig /all. We can run gpupdate /force to get the PC to get the DirectAccess group policy settings, but I recommend restarting the Windows client PC.
We can utilize some PowerShell commands to check if the settings are updated on the client’s computer. You can use these commands to troubleshoot DirectAccess in case remote clients are not connecting or unable to access resources from outside the network.
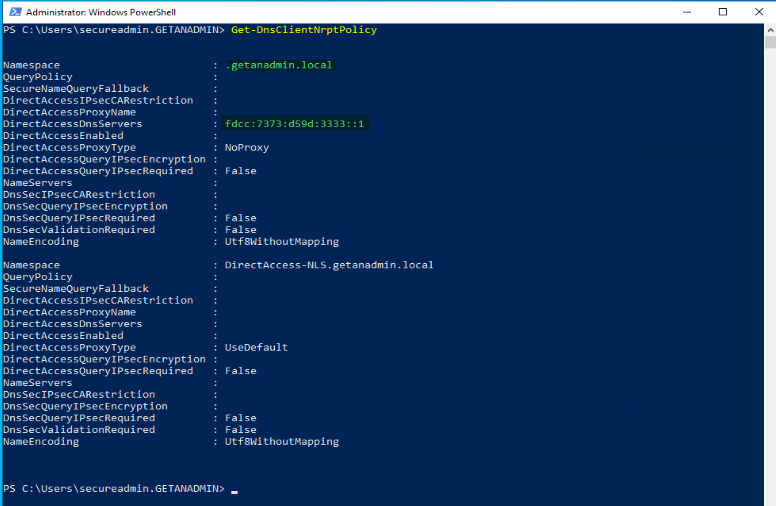
Get-DNSClientNRPTPolicy is the command to check the DirectAccess DNS IP address is assigned for the domain namespace.
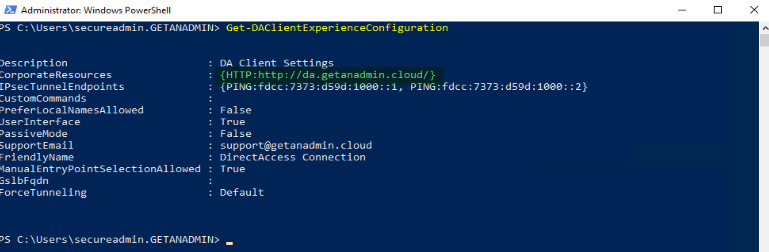
Get-DAClientExperienceConfiguration PowerShell command to check the URL that we mentioned in the remote client resource setup is displaying correctly.
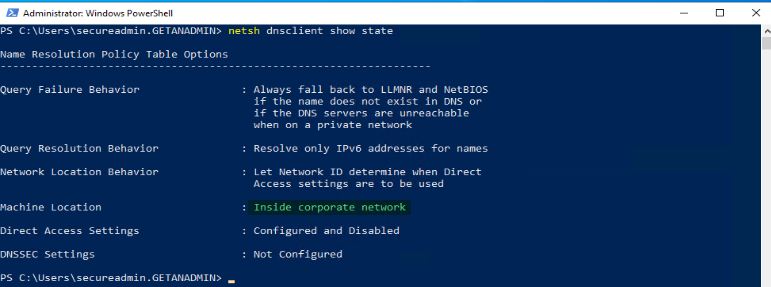
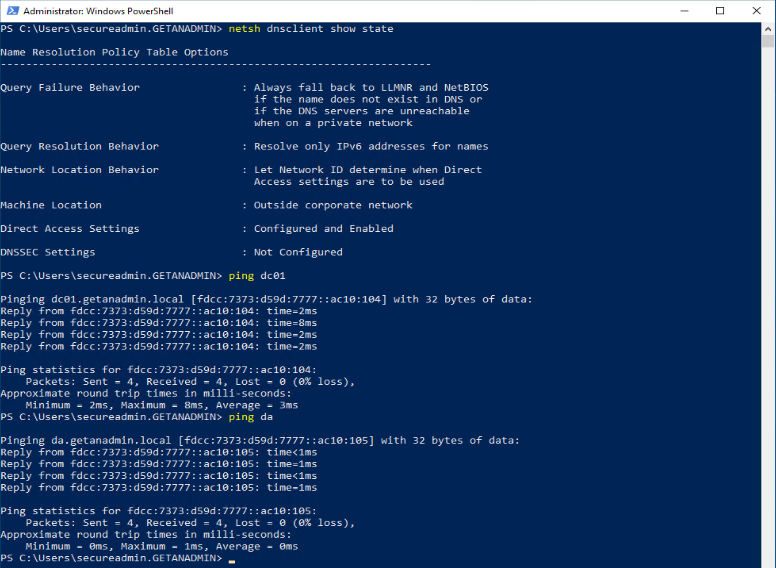
netsh dnsclient show state
Command will show whether the windows client PC is inside or outside the network. In this case, we have not disconnected from the domain network, so it’s showing that the client PC is inside the network as Machine Location.
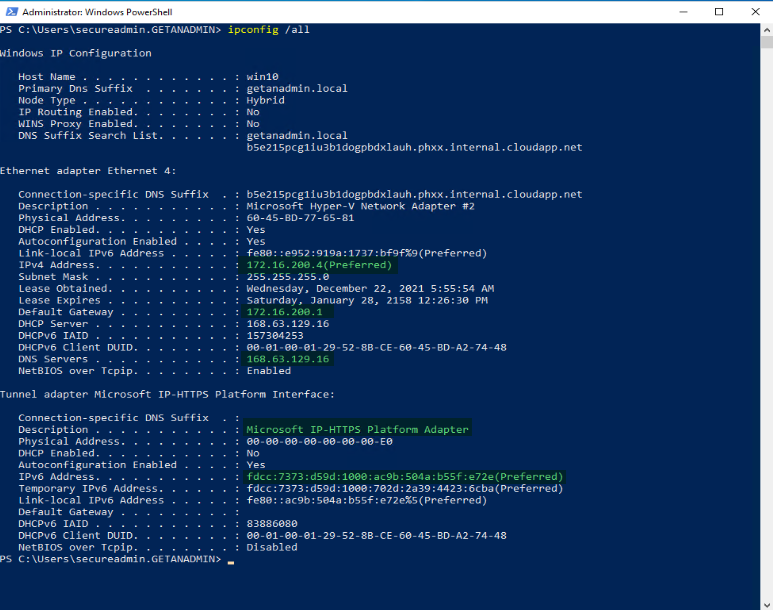
Now, we have disconnected the Windows Client PC from the domain network and connected it to a private network away from the domain network. You can see the different network and DNS IP addresses. Also, you can see the tunnel network adapter IP address for the Microsoft IP-HTTPS platform. The adapter will get only IPv6.
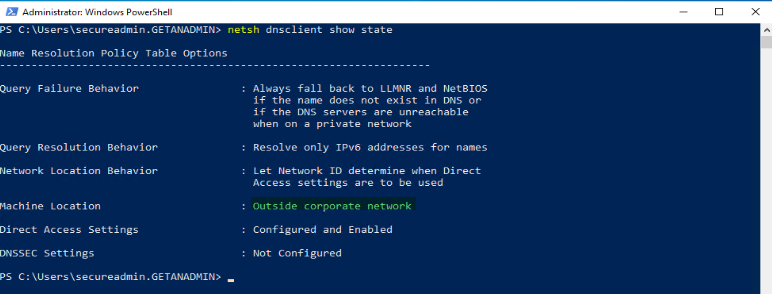
As you can see that the Machine Location is not Outside Corporate Network.
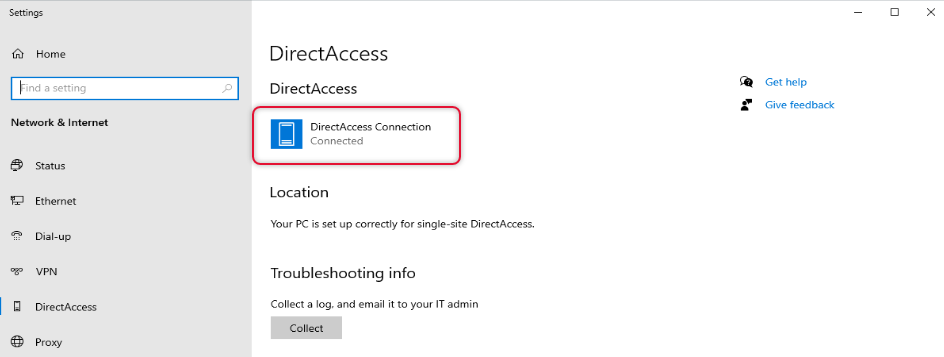
Click on the network link on the taskbar and find the Direct Access connection connected.
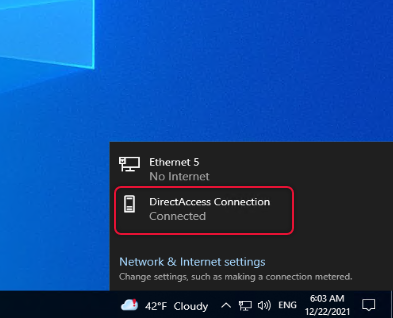
If you look under network & Internet settings you can see DirectAccess connection status.
Test domain network resources access
We can try to ping some servers inside the corporate network, and you can see it pining. I try to ping the domain controller and DirectAccess server and I can see a successful ping reply.
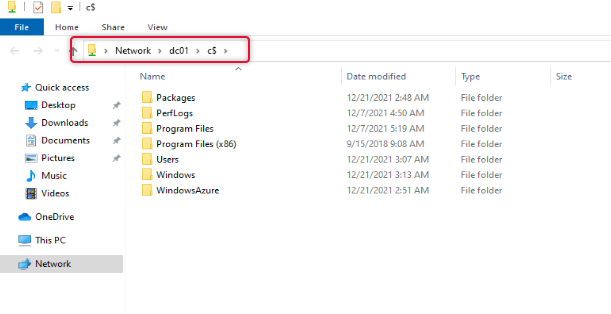
I also tried to access the file share on the DC01 and was able to get to the share as well.
Conclusion
In this article, we have discussed the complete installation and configuration to deploy DirectAccess. Also, we have tested with a remote client to access the resources inside the corporate network. The demonstration is completed here and if you have any queries or feedback that you want to share, please send a comment below. I look forward to seeing you another time with a different article.
1 Comment on "How to deploy DirectAccess in Windows Server 2019"
I followed all these steps on Windows Server 2019. Fresh install of Server 2019, fresh install of DirectAccess Server. Everything went great until the end, and it gave me the following two errors that I cannot figure out:
System services required for the server to function properly have either been stopped or are not responding.
IPsec-DoSP is disabled. Enable IPsec Denial of Service Protection (DoSP).