How to Web Deploy from Visual Studio Part 1
Preface
In this two-part tutorial of How To Publish Web Application Using Web Deploy, we demonstrated you to publish ASP.NET web application where Web Deploy installed on Azure virtual machine with IIS website using Visual Studio 2019. This article series will demonstrate the following topics. Click here to go to the Microsoft website for How to Web Deploy from Visual Studio
How to Web Deploy from Visual Studio Part 2
- Deploy New Virtual Machine using the Azure portal.
- Add IIS Role to Windows Server 2019 include Management Service and ASP.NET 4.7 feature
- Download and Install Web Deploy 4.0
- Create Inbound Firewall Rule to open Port 80 and 8172
- Configure DNS name for Azure Virtual Machine
- Publish ASP.NET web application from Visual Studio 2019 using web deploy
As this tutorial is a lengthy and easy reading of the tutorial series has been divided into multiple parts. The link for the various part has been given as links on the top and bottom of each article and you can navigate to the part by clicking on the link provided for you.
Deploy New Virtual Machine using the Azure portal to Web Deploy from Visual Studio
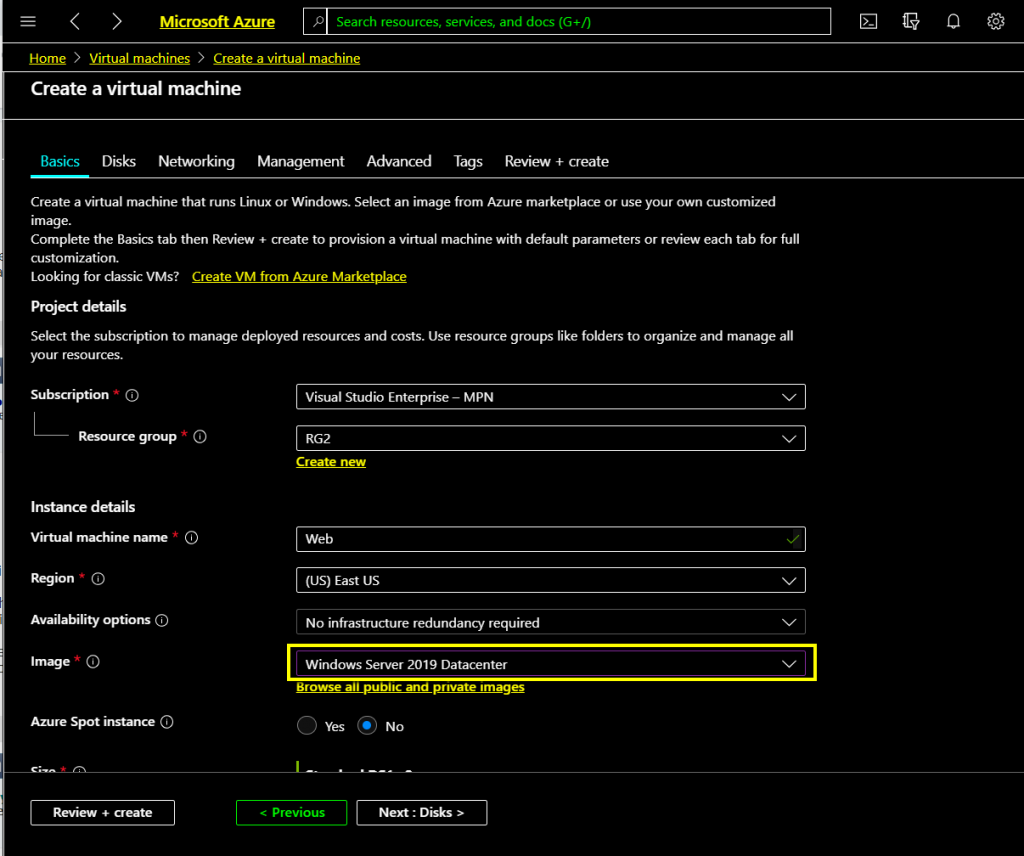
In order to demonstrate this Web Deploy concept, we need to have a Virtual machine with Windows server 2019 running on Azure. To begin with we need to open the Azure portal login with your valid Azure subscription credentials and select Virtual Machines on the left side navigation and click Add to create a virtual machine. This will open the Virtual machine to create wizard and we go over various pages such as basic, disks, Networking and so on in order to provide the details of the Virtual Machine. In the Basic tab, some of the important settings we have configured are creating and choosing a VM image such as Windows Server 2019 and so on.
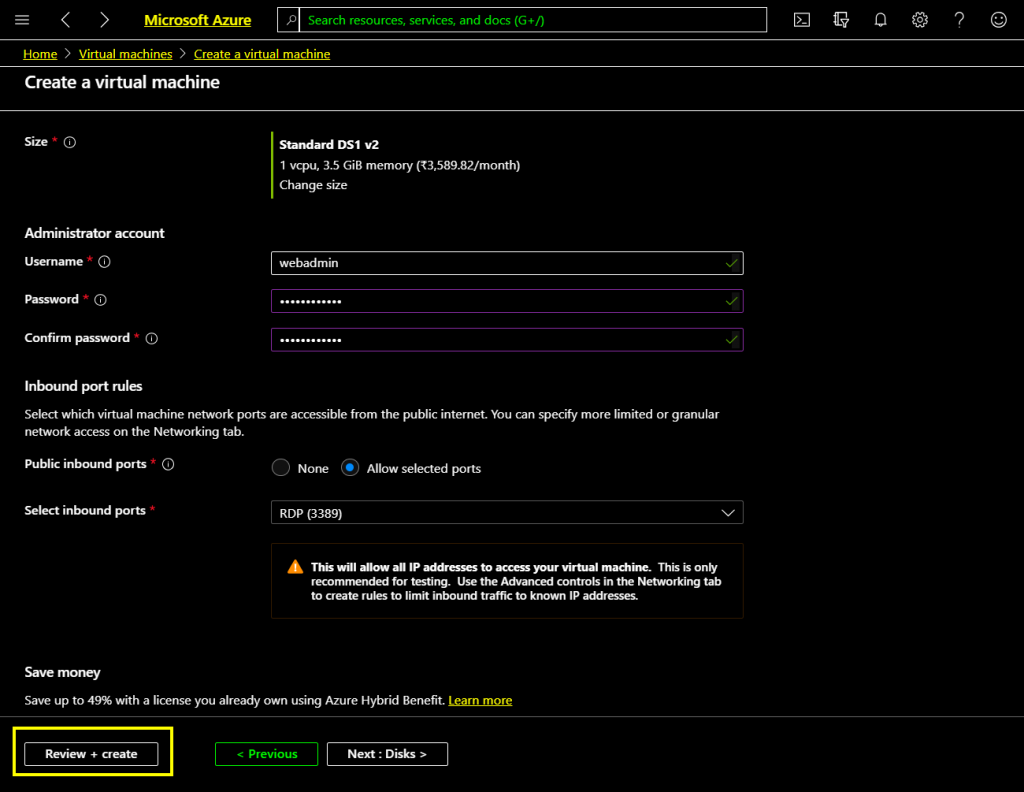
The Bottom of the Basic tab has parameters such as the Size settings of the Virtual Machine and Administrator account for the VM. On the Administrator account type a user name and strong password as you want and confirm the password. We open the port 3389 which is the default port for RDP access in this case we mentioned RDP (3389) to open on the firewall inbound port rule. The settings like Disk, Networking and so on have been left to default settings as we are going to create a simple VM for this demonstration.
Click Review + Create on the basic tab to review the settings we selected and start the Virtual Machine Deployment process.
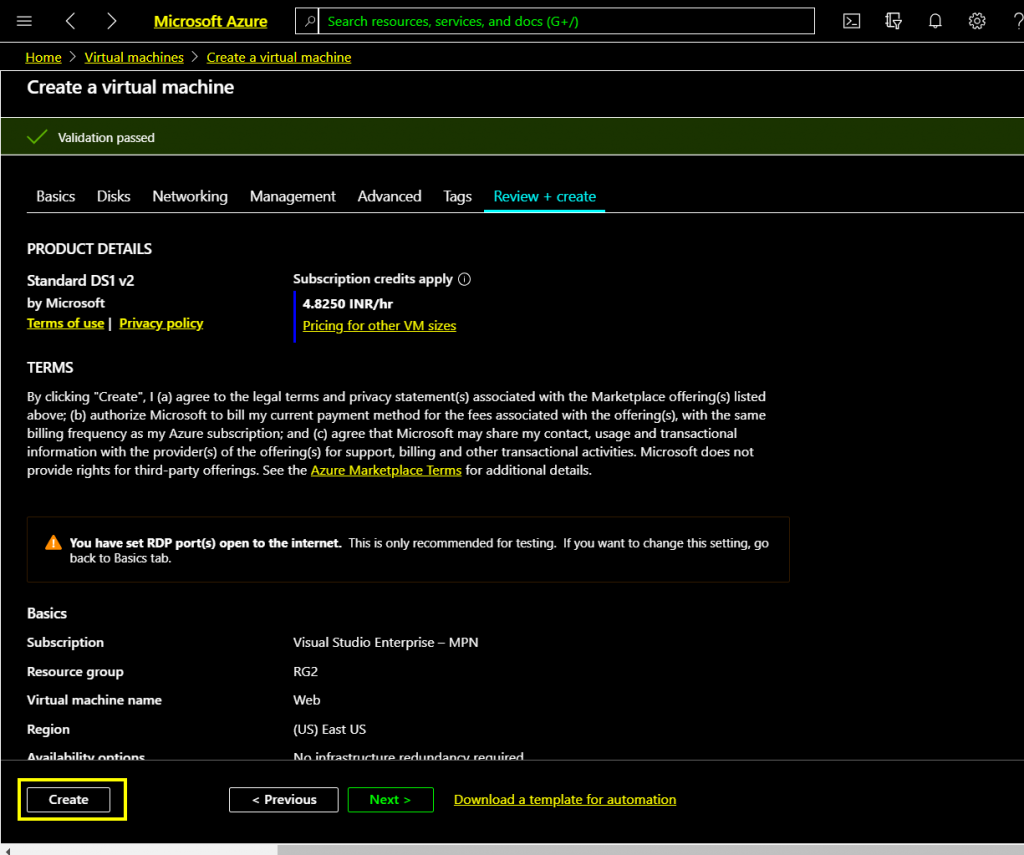
On the Review+Create tab go through the settings that you have selected once the settings are correct click Create.
The Deployment process will take about five minutes to complete, once the deployment is over you would get a message ‘Your Deployment is Complete’ as shown in the screen below. Click ‘Go to resource’ to get the details of the Virtual Machine that has been created.
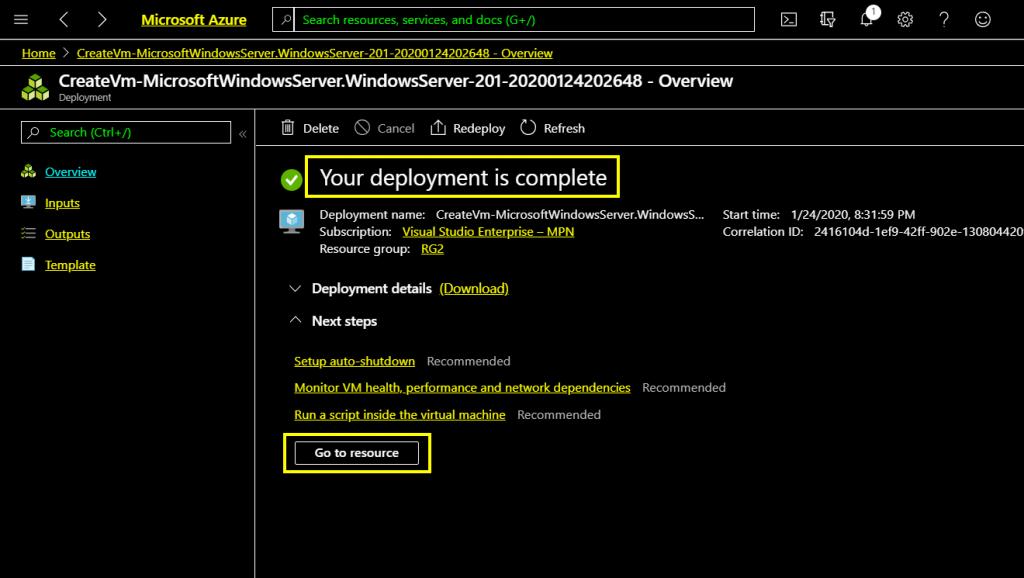
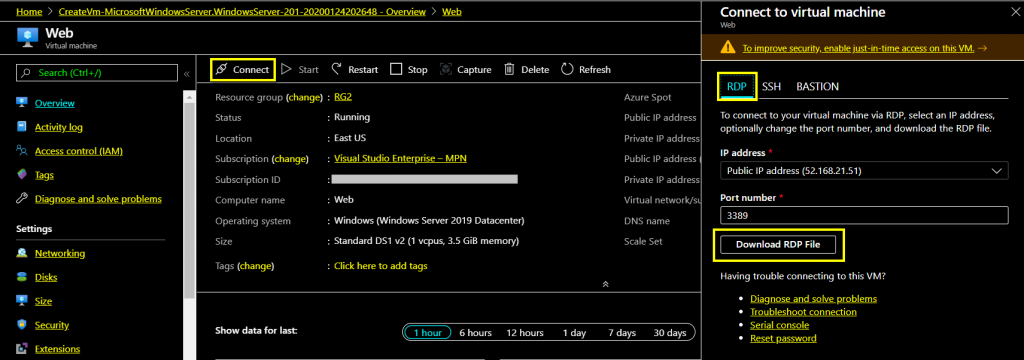
On the overview page of the VM, click connect and download the RDP access file for the Virtual Machine. The download RDP file will have the public IP address of the Virtual Machine. So you can use the credentials to log in to the Windows Server.
Add IIS Role to Windows Server 2019 include Management Service and ASP.NET 4.7 feature to Web Deploy from Visual Studio
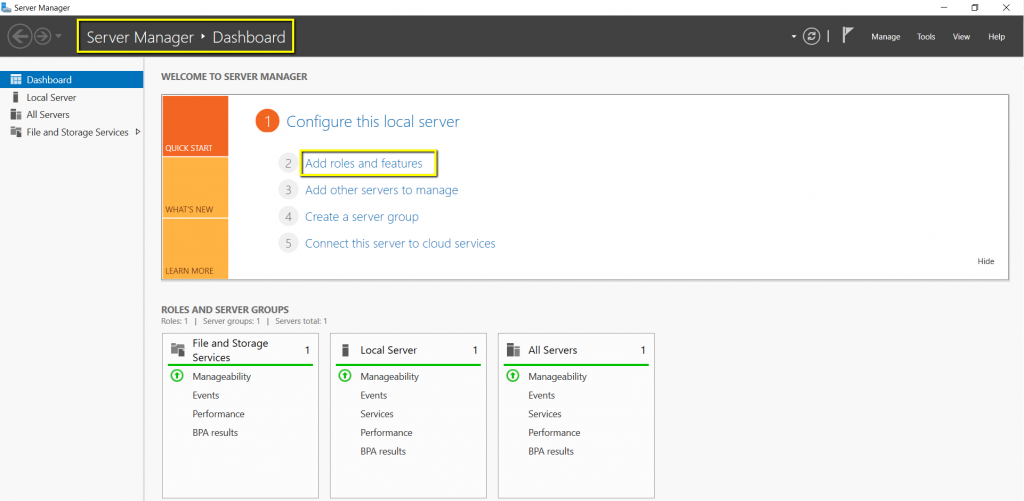
Once logged into the Windows Server 2019 open the Server Manager and on the dashboard click Add Roles and Features to add web server role.
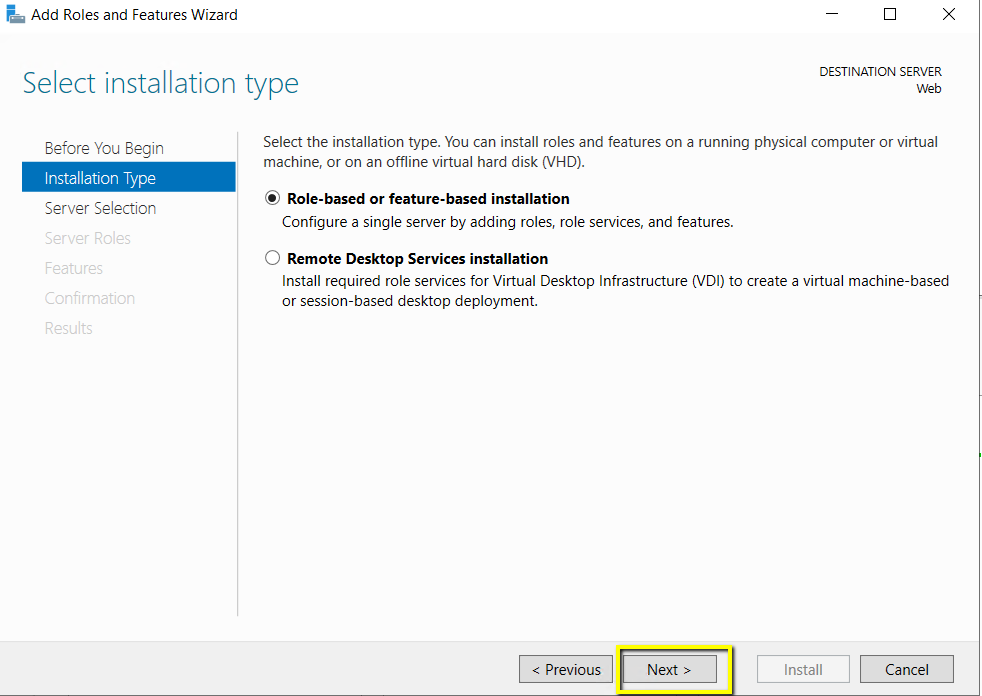
We are going to do Role-based and feature-based installation, so select that radio button and click Next.
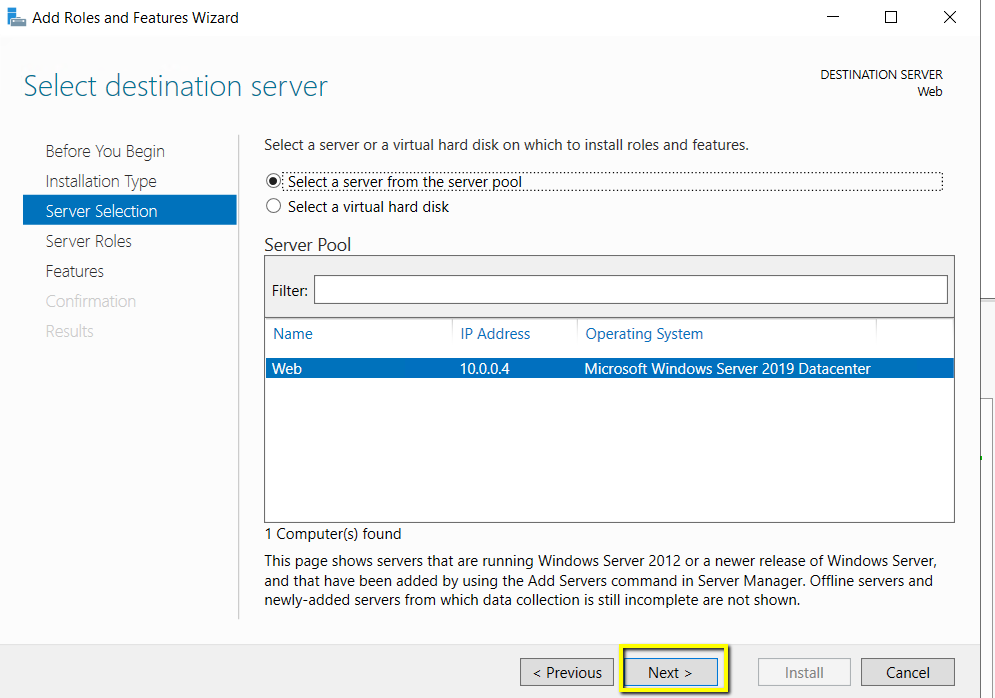
The local server will be available in the server pool, so choose the Select server from the server pool where the local server selected and click Next.
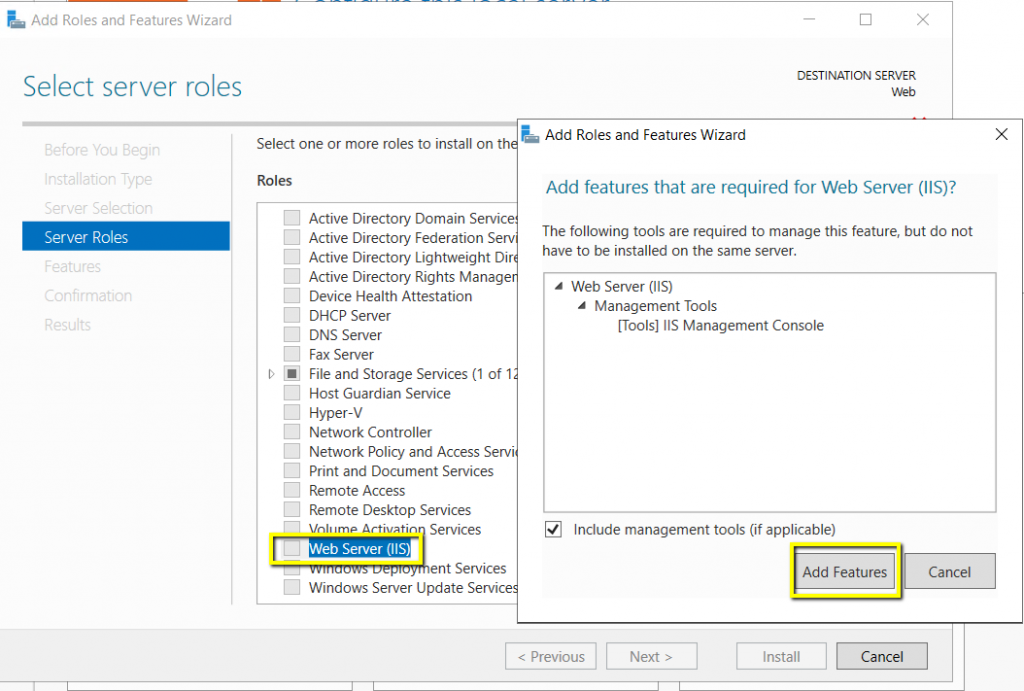
On the Roles List Select the Web Server Role and there will be a pop up with the corresponding features to add. Click add features and Click Next.
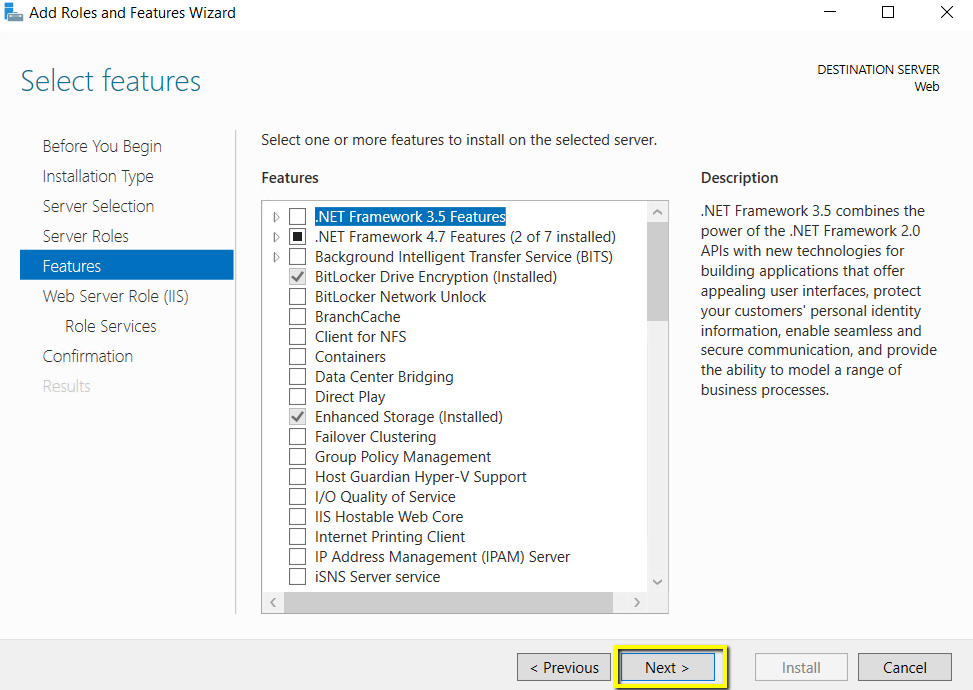
Leave the features selection alone and click Next.
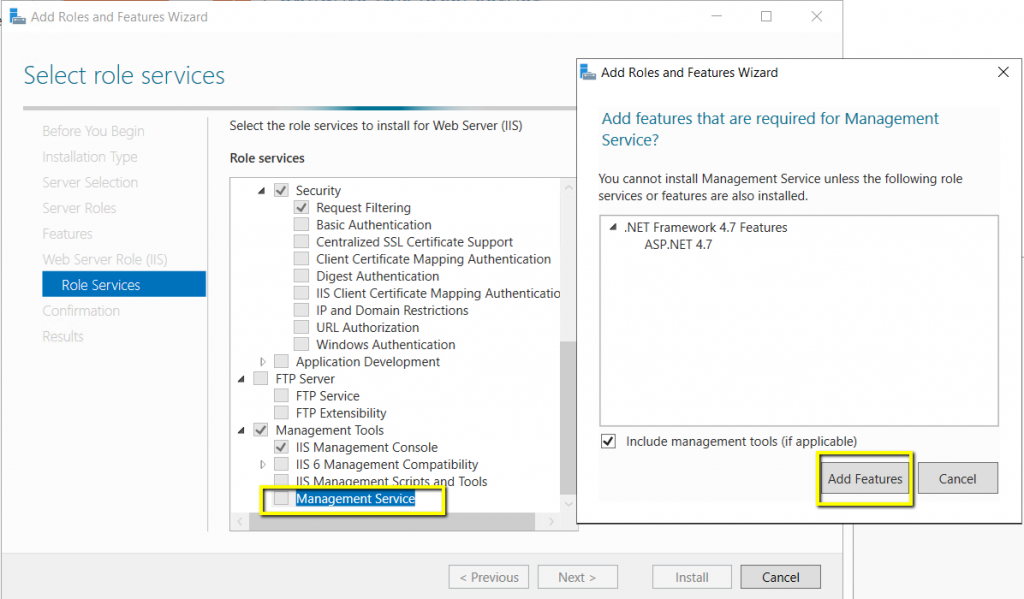
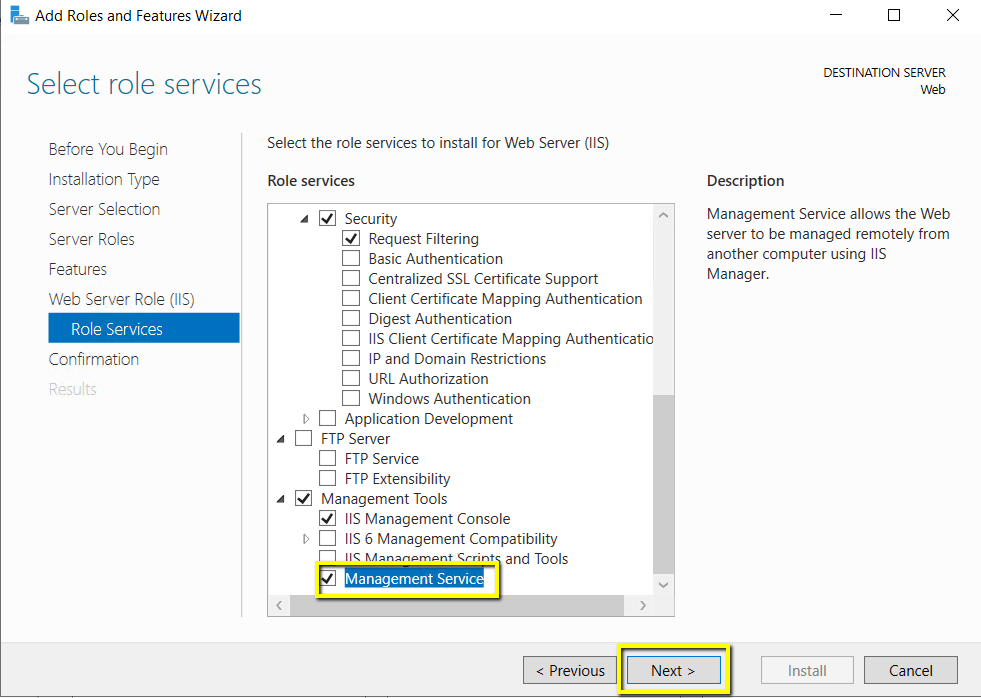
The next step will be selecting Role Services, click the Management Services CheckBox and add the ASP.NET 4.7 features. Click Add Features and click Next.
Click Next to Continue.
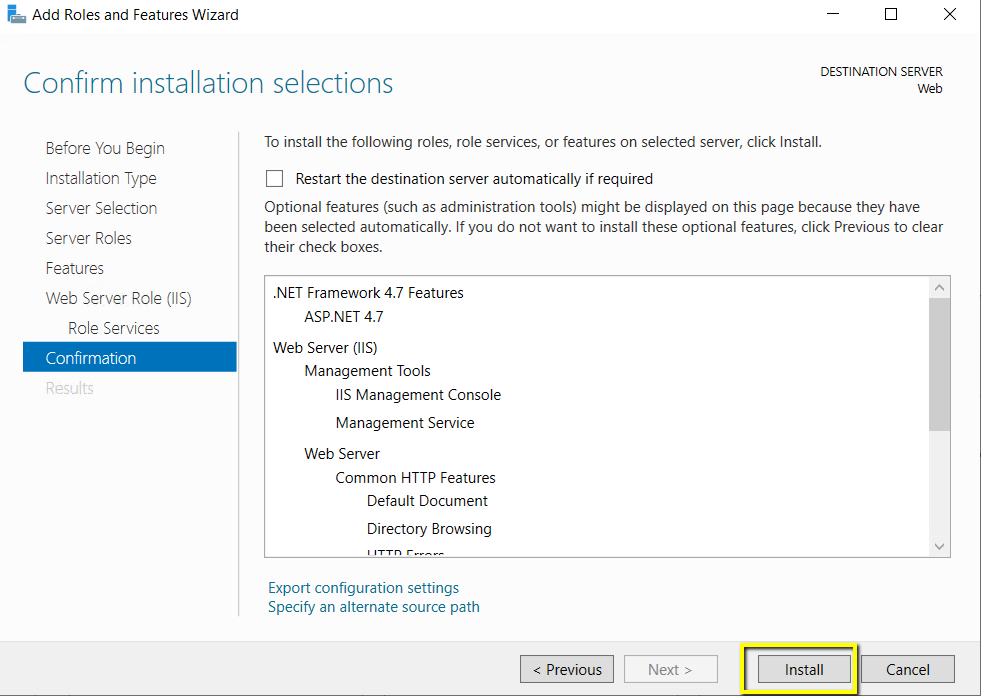
The installation selection will be provided for you to confirm, check the selection and click Install to install the Web Server with added Role Services.
The Installation Progress screen will give you the progress of the installation and once the installation is complete click Close.
Summary
In this part of the series, we have deployed Azure Virtual Machine with Windows Server 2019 image and installed the role Web Server and its role service called Management Service. The second and final part of this series will be deal with installing Web Deploy 4.0 and so on. You can click the link to go to the second part